
What is a Good Temperature to Set Your Thermostat at in the Summer?
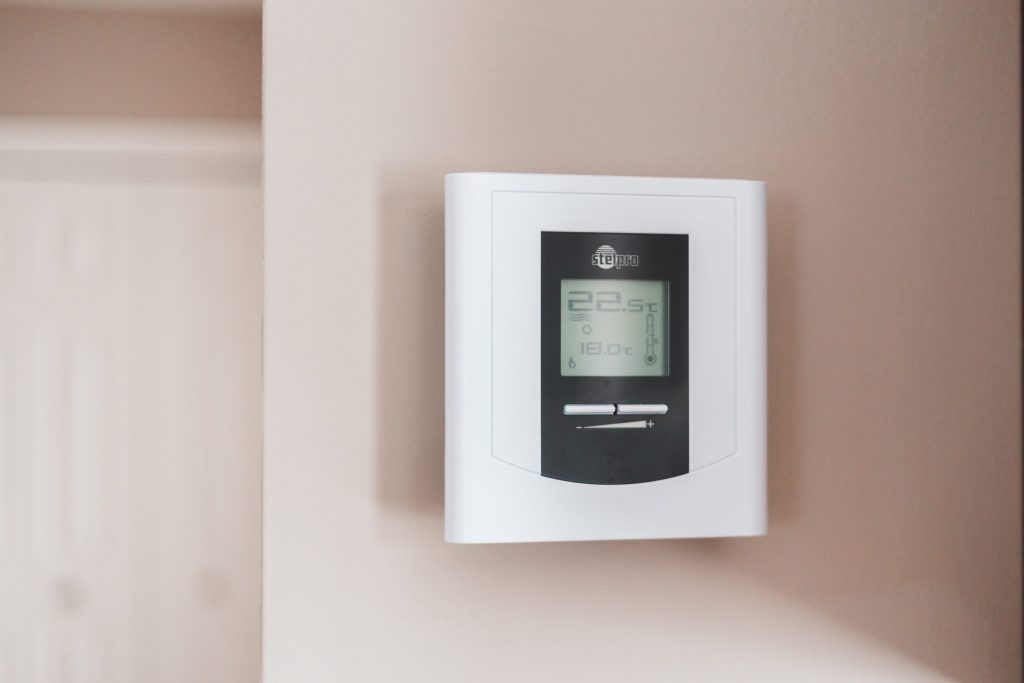
One thing we can all agree on is that an Arizona summer gets pretty hot. Opinions are far more varied when it comes to the best temperature to set your thermostat at in the summer. Though everyone has certain preferences, we’ll attempt to address some of the considerations when discussing recommended thermostat settings for summer. Outside Temperature According to the U.S. Department of Energy, the recommended thermostat setting for summer days while you are at home is 78 degrees Fahrenheit. The reason for this is that the closer you stay to the outside temperature, the less it costs to cool your home. So, if you can be comfortable with your home a little warmer inside, you’ll reap the benefits in energy savings. For the most part, it’s a good idea to factor this into your air balancing to keep those temperatures at ideal ranges. Personal Preferences If you live alone, your ideal thermostat setting is much easier to determine. You can set it at whatever feels comfortable to you based on your daily schedule. However, if you have multiple people living in your home, you may run into different temperature preferences and varied schedules that affect how you program your thermostat. Concessions may need to be made so that one member isn’t sweating in the heat while another is wrapped in blankets against the cold. Sleep Patterns Several things happen at night. One is that the sun goes down and it cools off, though maybe not as much as you’d like in the hottest summer months. Another is that you may be cooking, which heats up the house, especially if in a small space. Finally, bedtime rolls around. All of these things may require adjustments in the temperature. While a quick meal might not require any adjustment, an extended period of cooking might well warrant some adjustments to keep the area cooled down to your preferred temperature. Most people prefer to sleep at a cooler temperature than they maintain during the day. Sleep experts usually suggest between 60 and 70 degrees Fahrenheit as the recommended thermostat settings for summer nights. Of course, there may be conditions in your home or your own needs that affect this choice. If some members of your household prefer it warmer, you may have to make the same concessions you do with daytime temperatures or make use of extra blankets. The ideal solution to this problem is a ductless mini split with different zones to accommodate individual needs, but if that isn’t an option, you’ll likely have to meet in the middle and try to keep everyone as comfortable as possible without too much sacrifice on any one family member’s comfort. Check our article on “Mini split ac vs central air” for more information about the differences between mini-split ACs. The final consideration when deciding on nighttime thermostat settings is cost. Keeping your house this cool at night will result in extra energy costs. You might fare better by keeping the temperature warmer and utilizing a fan to maintain your cool. Away Temperatures When you are not at home, there may not be as much of a need to keep the house overly cool. Adjusting your thermostat to a warmer temperature during the day can result in considerable savings when it comes to the cost of cooling your home. If you are at work and you have children at school, it is an ideal time to save money on cooling bills. If you have pets, you can still raise the temperature. Unless your pet has special needs that require them to be kept at a cooler temperature while you are away, it is safe and comfortable for them to stay at home in an 83-degree house without issue. You should never set your thermostat any higher than this if people or pets are present in your home. Going away for the weekend? Going on vacation for a week? This is a wonderful time to save on cooling costs. If your house is empty, you can adjust the temperature as high as you would like though it is not recommended to set it higher than 90 degrees, which might put you at risk of mold and mildew due to excess humidity. Wear and Tear on the System First, let’s talk about how your HVAC system works. When cooling your home, the thermostat has a sensor that tells it the temperature inside the house. If that temperature is warmer than what the thermostat says, the unit kicks on to cool it down to the desired temperature. There is no change in the cool air that is blowing through your home. There is only a difference in how long the unit stays on. In other words, if you have set your temperature at 83 degrees while at work and then turn it down to 73 when you get home, the unit will run longer to get it back down to the lower temperature than it would if it was just adjusting a few degrees. What this means is that setting your thermostat to an extremely low temperature in order to cool down your home faster doesn’t work. However, it is a terrific way to cost yourself extra money and make yourself uncomfortable when you forget to adjust the thermostat and end up in a freezing cold home. You’re also creating extra wear and tear on your system with longer run times. Check out our article to learn how low can you set your AC. However, adjusting the thermostat up and down to change the temperature to reasonable levels does not harm your system or your thermostat. You can change it as often as you deem it necessary, though you might fare better with a programmable thermostat, so you don’t forget to make adjustments. The Bottom Line The question remains: what is a good temperature to set your thermostat in the summer? Now that we’ve discussed what affects the way you cool your house, you may still not
How to Test Air Quality in Your Home
Your home should be a safe place for you and your family, and this includes having clean air to breathe in your living environment. But no matter how hard you work to keep your home clean, your air can still be affected by unhealthy contaminants like fumes, mold, mildew, and microscopic particles if not properly ventilated. Then there are also more serious threats, like radon gases and carbon monoxide, which can be present without you even knowing it until it’s too late. So, how do you tell if your home has poor air quality? The most important step is getting a home air quality test. Let’s talk more about that. Signs of Poor Air Quality The following list includes some of the most common signs that your home has poor air quality. If you are experiencing any of these, consult one of the professionals at American Home Water and Air for effective cleaning and advice. Ineffective ventilation If you see condensation on your walls or windows, mold on your walls or other interior surfaces, or noting a stale smell, these are obvious signs that your home is not properly ventilated. Breathing problems or other health issues If you are experiencing prolonged symptoms that only subside when you’re away from your house, you might find the air quality in your home is making you ill. Musty smells It is easy to become accustomed to the way our home smells, good or bad. If you leave for work and then return home to be hit by an unpleasant odor each day, contaminants such as dirt, mold, or mildew might be the culprit. Aging houses Most older homes weren’t built to the same standards in place today. They may include building materials that give off damaging volatile organic compounds (VOCs) or other unhealthy particles. Even a perfectly working ventilation system may not be effective when coping with modern living. This doesn’t preclude new homes from having issues, but current regulations do help improve the odds against having poor air quality. What about the stuff you can’t see? The first thing you’ll need to know is how to test the air quality in your home. Knowing is half the battle, so you’ll first need to find out what test to use for the various problems you might be experiencing. Air quality tests for toxins and pollutants You can be proactive about maintaining our air quality by installing an air quality monitor in your house. VOC monitors contain special sensors that detect toxins. Other models estimate particles in the air utilizing a laser to determine air pollution levels. The method utilized is determined by what needs to be detected, and some models will also measure the room’s humidity and temperature. Air quality tests for mold You can get mold tests in a variety of forms. For example, swabs are used to collect particles from surfaces. You can use them on a counter, tabletop, or any other solid surface where tiny pollutants might settle. These kinds of tests will give you immediate results, but won’t tell you what kind of mold you have. Tape strips and petri dish tests allow you to gather the samples from your home but require you to send them to a professional lab for testing. Results could take as little as a few days or as much as a few weeks. Air pumps are set up near your ventilation system or the area you want to test. Contaminants are collected in a closed container where contamination is less likely than with the other types of tests. Air quality tests for radon Radon gas is colorless and odorless. It is created by the breakdown of uranium found in certain rocks and soil. It seeps through the foundations of nearby homes and collects in homes until it reaches dangerous levels. Testing for it is an extended process that samples levels over short or extended periods. Results are determined by a lab. Alternatively, you can get a testing system that operates constantly and provides an alert if radon is present. You may need to install testing equipment in certain areas of your home for this type of system. Air quality tests for carbon monoxide Carbon monoxide can be deadly. With limited exposure, this invisible, odorless gas can create confusion, dizziness, and headaches. Prolonged or high-level doses can result in unconsciousness or even death. Many homes already have carbon monoxide detectors built into their smoke detectors. If your home doesn’t have one in place or doesn’t support this feature, consider upgrading to include this potentially lifesaving device. What to do after testing Toxins and pollutants If your testing shows you have elevated levels of harmful particles in your home’s air, you should take immediate measures to improve your ventilation. Have your HVAC system inspected to ensure it is operating properly and follow the recommendations of your technician to correct any problems. If unable to make needed corrections to the system immediately, you can achieve a bit of immediate improvement by opening your windows or door and placing fans around the rooms to increase airflow. Mold If you find that you have mold or mildew, most surfaces will require that you scrub them clean using a cleaner formulated to kill the bacteria. Simple surfaces might need only a wipe down with dish detergent and water or white vinegar, but more porous surfaces might have to be replaced completely as you aren’t likely to remove all the mold through cleaning. Radon If radon is detected in your home, it can have detrimental effects on your family’s health. Because this gas leeches in through the surrounding soil, it is a problem that will not go away easily. You’ll need to consult with a foundation contractor to install a mitigation system that will pull the radon away from your home instead of allowing it to collect and be dispersed throughout your home. Carbon Monoxide If you have detected high levels of carbon monoxide in your home, you should open
Thermostatic Expansion Valve: What is it and How Does it Work?
Manufacturers include a metering device called the thermostatic expansion valve as a standard component in air conditioning systems. HVAC technicians at AHWA are well versed in the way this valve is designed and how it functions, but you may not be as familiar. We’re here to explain a bit more about it to you. What is a thermostatic expansion valve? The thermostatic expansion valve is a prime element in your HVAC system, but before we get further into what it is, let’s talk about how the system works as a whole. Refrigeration works as a four-prong cycle that involves a compressor, a metering device, a condenser, and an evaporator. Air conditioning is the end result when the refrigerant is pumped through this circuit. The cycle begins with refrigerant entering the compressor. At this point, it will become a low-pressure, medium-temperature gas. This gas is compressed in the compressor to form a high-temperature, high-pressure gas that will then be sent to the condenser. The condenser cools the gas, thus allowing it to condense to a high-pressure liquid created by transferring heat to a lower temperature medium such as ambient air. This is where the thermostatic expansion valve kicks in. To convert the higher pressure liquid into cool air, the expansion valve reduces the pressure and allows it to be pushed back into a vapor form of a lower temperature. The sensing bulb in the expansion valve is filled with a liquid similar to the refrigerant. This bulb is what allows the valve to detect the temperature of the refrigerant leaving the evaporator. This information allows the sensing bulb’s gas pressure to force the valve open, adjusting the refrigerant flow into the evaporator. It is then superheated as the refrigerant leaves the evaporator. This superheat pushes the temperature of the vapor well above boiling to achieve the evaporating pressure. If superheating does not occur, it means the refrigerant wasn’t fully vaporized in the evaporator, which can leave the liquid to recirculate back into the compressor. An insufficient amount of refrigerant hitting the evaporator coil can cause excessive superheating, which means most of it doesn’t contain any liquid refrigerant. This equates to there not being sufficient cooling when the process is completed. The regulation provided by the thermodynamic expansion valve keeps the superheat down to a few degrees Celsius so that the heat transfer developed by the evaporator is optimal and any excess refrigerant is prevented from flowing back into the compressor. What does a thermostatic expansion valve do? So, now that you understand a bit more about how the overall system works let’s talk a bit more about the specific functions of the thermostatic expansion valve. The role it plays within the system is a testament to the engineering that makes it an integral component of newer systems being manufactured today. It provides a much-needed function that maximizes operational efficiency and keeps the system running smoothly. The thermostatic expansion valve was designed to control the amount of liquid refrigerant flowing into the evaporator. The regulated flow keeps the evaporator operating at the high rate of efficiency it was designed to achieve without allowing excess refrigerant to backflow into the compressor, which means the cool air it creates is at a maximum, using less energy and keeping your home suitably cooled. This process is achieved by separating the high and low-pressure sides of the air conditioning system. This allows the liquid refrigerant to enter the valve at a high-pressure rate, but then the pressure is reduced by the valve so that too much isn’t allowed to enter the evaporator. The sole job of the thermostatic expansion valve is to control the flow rate of the liquid refrigerant in your HVAC system. It does not control humidity, air temperature, suction pressure, head pressure, or capacity. Some have attempted to alter its intended purpose to control these other features, but doing so only diminishes system efficiency and can lead to compressor failure. The thermostatic expansion valve diagram below shows the basics of how it is designed and how it operates. MasterTriangle12, CC BY-SA 4.0 <https://creativecommons.org/licenses/by-sa/4.0>, via Wikimedia Commons How does the thermostatic expansion valve control the system? The thermostatic expansion valve matches the flow rate of the liquid refrigerant against the speed with which the refrigerant boils off in the evaporator coil. It accomplishes this by sensing the temperature of the refrigerant as it leaves the evaporator and the pressure exerted in the evaporator. A movable valve pin operates against the spring pressure to maintain precision control of the flow of liquid refrigerant into the evaporator. In simplest terms, the bulb pressure and liquid pressure work together to maintain an even opening force, while the evaporator and spring pressure work together to maintain the closing force. This operation of the thermostatic expansion valve is developed to provide control with a precision not achieved before its introduction into HVAC systems during original equipment manufacturing. If you refer back to the diagram, you can better see how it operates. The valve pin is designed to restrict the flow of the liquid refrigerant. This causes the pressure of the refrigerant to drop and allows a small amount of it to be converted to gas. This is commonly called “flash gas”, a component that facilitates a high degree of energy transfer as the refrigerant is converted to latent heat. The low-pressure liquid and vapor move into the evaporator as the remainder of the liquid refrigerant boils off into gas form as heat is absorbed. It is the drop in pressure that happens within the thermostatic expansion valve that plays a key role in the system’s operation. While moving through the evaporator, the low-pressure refrigerant and gas combo vaporizes and absorbs heat from the system. The system won’t operate properly without this precise control exercised by the valve as it reacts to system conditions as they occur.
What is a Good SEER Rating for A Ductless Mini Split System?
There is no simple answer to “What is a good SEER rating?” That being said, doing your research on the highest SEER mini split system is also not as complicated as it might seem at first glance. When trying to determine the best mini split SEER rating for purchasing a system, you’ll first need to understand a bit about ductless mini splits and SEER. What is a ductless mini split system? Ductless mini split systems are one alternative to traditional HVAC systems. Due to their smaller footprint and ability to cool multiple zones in the home at different temperature settings, many homeowners find them preferable to alternatives. An added attraction is the superior energy efficiency they provide by allowing homeowners to keep certain rooms at lower temperatures when not in use while maintaining other zones at a more comfortable temperature. Since there is no ductwork or large components to install, they are also a space saver in homes that may not have room for the additional equipment traditional units occupy. There are no filters that need to be replaced or unsightly vents in floors, walls, or ceilings. Because they don’t require ductwork, they are an ideal solution for workshops or enclosed garages where ductwork is not an option, and an air conditioner might not be ideal due to a lack of windows or excessive noise. Individual remotes can control each zone set up rather than a single dial on the main controller, giving you a much more versatile solution to your home cooling needs. If you think this might be a solution for your home, continue reading to learn more about SEER ratings for this type system. What is a mini split SEER rating? SEER is an acronym for Seasonal Energy Efficiency Ratio. This ratio is calculated by first finding the cooling output of your HVAC unit’s cooling output over the course of a typical summer season. In Arizona, this season runs for about four and a half months, from the end of May until about mid-September. This calculation is then divided by the watt-hours used. So, SEER ratings are calculated by manufacturers throughout a simulated cooling season by running a mini-split at a constant indoor temperature setting while outdoor temperatures remain above 60 degrees Fahrenheit. This information is then used to calculate the highest SEER a mini split system can provide for the end-user. Keep in mind that the SEER rating is calculated as the maximum your unit can provide. Individual conditions or unit settings in your home may affect this, lowering the energy efficiency of your system. This is why you’ll want to get the highest SEER mini split system you can buy when installing a new one. You can learn more about how to calculate the SEER your current system is using on the AHWA site. What is the SEER mini split rating and which one do I need? As stated above, the highest SEER mini split you can buy is optimal. Of course, there may be factors that affect what you can purchase, such as cost or availability. While SEER ratings for ductless mini split systems range from as low as 13 to as high as 22, regulations in your area may dictate how low of a rating your unit can have. Currently, a ductless mini split system in Arizona must have a SEER rating of 14, but in January 2023, the regulations will change to 15. This is something you’ll need to keep in mind if installing a new or replacement unit after December 31, 2022. The actual SEER of your unit will depend on factors such as the size of your home and retention of cool air. For instance, a home that is mostly closed up all day will have higher energy efficiency than a home where doors are opened and closed more often, letting in heat that pulls cool air out and forces your system to work harder. Likewise, having too few units or smaller units than are needed for your home could affect the SEER you actually achieve. Improper maintenance can also affect efficiency. For these reasons, you must sometimes look beyond your mini split system to adjust best practices in your home. If you are currently using an older system, you could find it is rated significantly lower than the minimum standards. In a case like this, upgrading to even the lowest SEER rating allowed might lower your energy consumption enough to warrant the cost of replacement. Obviously, the highest SEER mini split system you can afford, the more money you will save in the long run. Comfort is important In addition to cost savings, a higher SEER rating will bring you more comfort in your home during those hot Arizona summers. If the cost of the unit is a concern, you can look into tax credits or manufacturer’s rebates that might help you get more bang for your buck. The environment will thank you for getting the highest SEER mini split you can afford, as well. With less energy consumption, dependence on fossil fuels is reduced. This equates to fewer greenhouse gases being released into the air. Still uncertain about the SEER rating best for your home? We get it. There are a lot of factors involved in this decision. In the end, it’s going to come down to the specifics of your home and what you can comfortably afford. If your current HVAC unit is struggling, you might find that even the lowest SEER rating available will provide you with better efficiency than you had. There are some older HVAC systems with SEER ratings as low as 8 or 9, so moving up to a 14 or 15 SEER rating is a vast improvement. However, if you are looking for more long-term efficiency and bigger energy savings, you can’t go wrong by getting the highest SEER rating on the market. American Home Water and Air is here to help you with your decision. You can schedule an appointment
2023 HVAC Efficiency Standards for Air Pumps and AC
In January 2023, HVAC regulations will change, setting new minimum efficiency HVAC standards for heating and cooling systems. These new HVAC requirements will impact the costs for both HVAC installation companies and home or building owners, so we all must be prepared for the changes. 2023 HVAC efficiency standards for residential air conditioning systems are set according to a border established between the north and south regions of the U.S. The minimum efficiency standards for residential air conditioners in the southern region, which includes Arizona, will increase to 15 SEER. The current standard in this region is 14 SEER. SEER Ratings and Changes SEER stands for Seasonal Energy Efficiency Ratio. This standard is determined by taking the ratio of a cooling unit’s output over a typical season and dividing it by the watts-hours used to achieve this level. Basically, SEER indicates how effective your air conditioning system is at utilizing your energy source to create cool air. The larger this number is, the more efficient your system is, which translates into a lower utility bill. According to the U.S. Energy Information Administration, HVAC requirements for air-source heat pumps will mean they must meet a heating efficiency standard determined by the equipment’s heating seasonal performance factor (HSPF). The minimum HSPF is currently set at 8.2. The new regulations will increase it to 8.8. Just like with the SEER ratings that apply to air conditioning, HSPF measures your heat pump’s ability to convert your energy source into heat. The higher the number, the more efficient your heating unit is, meaning decreased energy costs during the cooler months. What These Changes Mean for Homeowners So, beyond energy savings, why is all of this important to you as a homeowner or building owner? If your existing system is working fine and you have no intentions of upgrading or replacing it in the near future, maybe not that much. However, if you have a unit in danger of failure or you are planning to finance and install HVAC units soon, it could be very important for you to be aware of the changes that will kick in come January 2023. Building owners and contractors will need to be aware that any units purchased before the HVAC requirements change will need to have a bit more consideration given to when the units will be installed. Any units that do not meet the updated standards coming into effect will need to be installed no later than December 31, 2022. Otherwise, you’ll need to purchase units that meet the new 2023 standards. Failure to address this issue during the planning stages could result in unnecessary delays and extra costs. HVAC installers are already busy getting educated on the new air conditioning regulations before they are put into place. Likewise, purchasers are aware of the timeline for procuring HVAC units and their installation so that they don’t find themselves with units that can no longer be used once HVAC requirements change. This will become increasingly important as the end of the year approaches, especially for larger-scale jobs where more than one unit is required and must be ordered well in advance. Increased Prices Due to Added Requirements It is also likely that there will be increased prices along with the increased efficiencies. As the deadline grows closer, that price will increase as demand surges, so it is wise to plan wherever possible. Most of these price increases will be driven by the requirement for higher-performing components, improved fan systems, and large chassis sizes. All of these will require additional copper, plastic, and other commodities, and thus, buyers will incur more expenses for the acquisition, logistics, and production of HVAC units that meet the new criteria. Those added costs will have to be passed along to consumers. It is important to discuss any plans for HVAC updates with a reliable service professional who can give more personal advice and talk you through the coming changes for just these reasons. End customers will need to understand that these new standards will affect any upgrades that are being planned or unexpected failures that might take place toward the end of the year or after December 31. This is a suitable time for all homeowners and building owners to have their units inspected and replaced. A licensed professional can provide you with a full inspection and any recommendations pertinent to your needs. Armed with the information about the changes and added costs that are to come in the new year, customers will be much better equipped to make the best decision for their unique circumstances and plans. It is far better to have some time to evaluate choices now rather than find yourself forced to incur extra costs when you aren’t prepared to do so. Changes to Refrigerant Requirements In addition to the changes already discussed, there is also some indication that there will also be refrigerant changes. Since the government changed standards in 2020, legacy systems have been allowed to utilize only recovered, recycled, or reclaimed R-22 hydrocarbon refrigerant. The price of these refrigerants has gradually increased over time. Additionally, there will likely be a reduction in R-410A refrigerant on the market once the new HVAC standards are in place as new systems transition to newer refrigerants. This will also have to be a consideration for anyone planning to install upgraded units or replace older models. Conclusion While much of this might sound confusing to someone not familiar with HVAC systems and the regulations that affect them, the bottom line is that the 2023 HVAC regulations will require any new units to adhere to increased efficiency standards. This is the time to address whether you need to replace your old system before you’re faced with the extra costs of installing a new or replacement unit after the first of the coming year. It is highly recommended that anyone with an HVAC unit that might require an update look at doing it before the end of the year. Schedule an appointment to
Single Stage vs Two Stage Air Conditioner

Single stage and two stage air conditioners can both provide the cooling you need to survive a hot Arizona summer, but a two stage air conditioner can provide you with a much more comfortable home environment with low energy costs. Let’s discuss it further. What is a two stage air conditioner? Also known as a dual stage system, a two stage AC system utilizes a compressor that works at two different speeds. The compressor pumps refrigerant through your air conditioner to cool your home. On high, it runs at 100% capacity. At low, it runs at between 60-70% capacity. The two stage air conditioner works at high or low stages, depending on the level of cooling your home requires. So, on days that are warm enough to increase the temperature in your home but not truly hot, this type of air conditioner will initiate at the higher stage for faster cooling but then will switch over and mostly run at a lower stage to provide less cooling at a more energy-efficient level. When the temperature outside is substantially higher, the two stage air conditioner will run at full capacity for a longer period to get your home cooled down and then switch to its lower stage to keep the temperature regulated throughout the day. Basically, the time spent at each stage will depend on how much warmer it is outside than whatever your thermostat is set at in the area you are cooling, so the full capacity setting isn’t used very much unless the outside temperature is significantly higher than your thermostat setting. Single Stage vs Two Stage Air Conditioner As discussed, an air conditioner with two stages will spend most of the time on the lower level, running at less than 2/3 of its capacity. This is because it achieves the temperature selected for your home and then kicks back in whenever it slips below that temperature using its lower setting. A single stage air conditioner always operates at full capacity. Whether it has been off and has to bring a room back down to its preferred temperature or it only needs to cool it down slightly, it always operates at full tilt. Once the ideal temperature is achieved, the compressor will shut down and not kick back in again until it is needed—once again, at full speed—its only speed. Two Stage Air Conditioner Advantages Now that you understand the differences between single stage and two stage air conditioners, you may still have questions about why it matters which you choose. The answers to this are multi-faceted. Your air conditioning system will do a lot more work on long, sizzling summer days than it is in the cooler months of the year. This is where the two stage air conditioner excels. Dehumidification—One of the features of a two stage air conditioner is on-demand dehumidification. This feature allows you to maintain a higher temperature setting while still keeping the humidity low in your home. This decrease in moisture helps prevent mold and other air pollution that can thrive, leading to health issues. Energy Savings—This contrasts with single stage air conditioners that work at only one speed. You can manually turn them off when you don’t need as much cooling, but they will run at full capacity whenever they are on. With the two stage air conditioner, it takes less energy for it to keep your home cool. Increased Life Span—The advantage of the two speed air conditioner is that you aren’t overcooling your room and thus, using more energy than necessary or creating extra wear and tear on your unit that might result in a reduced lifespan. Noise Reduction—Though both types of air conditioner will be a bit noisier than standard cooling methods such as a central AC unit or mini-split ductless AC systems, the two stage air conditioner still has an advantage over the others. The lower stage of the unit is quieter than the higher stage. Since the lower stage is where this model operates most of the time, it is quieter for most of its operating time. Deciding Between a Single stage vs Two Stage Air Conditioner Remember that when deciding between a single stage vs. two stage air conditioner, a two stage air conditioner is designed for optimal comfort and efficiency. It accomplishes this by running its outdoor compressor and circulation fan and its indoor fan at full capacity when needed for more rapid cooling, but once it has cooled the area to its desired temperature, it switches to its lower stage settings to maintain the correct temperature. This second setting falls somewhere between 60-70 percent of full capacity. Thus, operating at a slower speed most of the time it’s in use. The two stage air conditioner functions at low speed for longer periods to keep your home comfortable. Compared to one stage air conditioning, which always cools at full speed, this means it is working more often to cool the air and remove moisture while still using less electricity. For this reason, a two stage air conditioning system is more efficient at keeping you cool and comfortable in your home for less money. You save on energy, but you also save on wear and tear that can create the need for repairs or earlier replacement of the unit. A one stage air conditioner always operates at full capacity. It pulls electricity at 100% every time it kicks on, thereby increasing energy costs. While you will pay a bit more for a two-stage air conditioner than its less expensive one-stage counterpart, the money you save on energy and maintenance, in the long run, will more than makeup for the initial expense of the system. You can also check our article on “Mini split ac vs central air” which might help you in choosing the right AC.
Installing Central Air in a House Without Ducts

If you have an older home without central heat and air conditioning or with an older system that needs to be updated, you might need to make some important choices about the system best for you. Installing central air in a house without ducts can be a costly and time-consuming process, but you do have options beyond window units, swamp coolers or a plethora of fans that never quite do the trick in a hot Arizona summer. Though you can have ductwork installed for central air conditioning, you might want to consider a ductless cooling system instead. It’s as good, if not better, than having a central air conditioner without ductwork. Let’s look at the difference in the two systems. Differences Between Central Air in House Without Ducts and With Ducts Ductless or mini-split air conditioning systems and central air conditioning work similarly. They each consist of an outside condenser and an air handler inside the home, which work in tandem to cool your home. However, there are some differences. A central air conditioning system routes air through the handler on our furnace, sending it through a series of ducts to distribute air throughout your home. A ductless system employs a thin cable that connects the outside condenser to a control unit located on the inside walls, eliminating any need for ducts and vents. If you are looking at installing central air in a house without ducts, it can be the ideal solution. When looking into how to install central air in a house without ducts, most people are going to want to consider both systems. They each have advantages and disadvantages that may be important to you and your situation with your requirements and financial situation. Let’s take a look at some of the factors you should be aware of when deciding on the best route to install air conditioning without ductwork. Cost The first question you’ll want to be answered is how much is it to install central air without ductwork? Cost includes what it costs to install the system and how much it costs to operate in the long run. In a normal installation, central air conditioning has the advantage here. The costs associated with installing a unit into a new home is considerably less, in some cases up to 30% less. However, if you install it in a home built without ducts and vents installed, that cost increases significantly. Installation While workers can usually install central air conditioning in about a week, this timeframe increases for a house without ducts. The more complicated it is to alter your home to include ductwork, the higher the costs and installation time. Installation involves removing sections of walls, ceilings and floors to run ductwork and vents. These must then be repaired and finished to match the rest of the surface. The costs will vary greatly based on what kind of materials are used in your home. There may be some surfaces that can’t be cut or matched and, therefore, require complete replacement. You might also require custom ductwork in certain areas. This can take up space in closets, attics, and basements. On the other hand, ductless systems can be added in a matter of a few days, sometimes less. There are no ducts or vents to be installed. Indoor units can be mounted with only a small hole for the conduit to be run through your walls to house suction tubing, power cable, refrigerant lines and condensate drain lines. With less time and labor involved, the installation is both less expensive and less intrusive to your home. Temperature Regulation Central air conditioning operates from a single thermostat that controls the temperature of the entire house. With a mini-split system, you can set up different regions and maintain the temperatures of those areas at different temperatures. For instance, you can keep rooms that are not frequently used a little warmer to save on energy costs. If you have members of your family who prefer to sleep at different temperatures, you can set up bedrooms as their own zone and adjust them to suit the occupants’ preferences. Perhaps you’ve enclosed your garage as a hobby room that you only use part of the time. You can set it up so that it is only heated or cooled when in use. Maintenance You won’t have to maintain your ductwork if you don’t have any. This means no insulation, no cleaning, and no seals to leak. However, you’ll find that central air conditioning has the advantage of warranty periods. Warranty periods for traditional central air conditioning are typically longer than those for ductless mini-splits. Efficiency Central air conditioners can last up to 15 years, while ductless mini-splits last 20 years. Due to the longer life span and the reduced energy required for a mini-split system, they have an advantage when it comes to efficiency in the long run. Space Saving Many homes without ductwork were simply built not to have any, meaning they lack the extra space or it has been utilized for other things. This can be a real issue when trying to install the larger components involved in a central air conditioning system. This is not a problem with mini-splits that require fewer and smaller components. The bottom line is that installing a central air conditioning system or a mini-split system in a home where there is no ductwork will still require some alterations to accommodate the system, but the mini-split system has a clear advantage here. You can apply a mini-split system to only certain rooms without running it through the entire home. Whatever your situation, the American Home Water and Air experts can help you decide. Get in touch to discuss what options are best for you and how we can help achieve your upgrade in an efficient, cost-effective manner.
How Often to Change the HVAC Filter for Your Home AC

As winter begins to subside and we enter the warmer months of spring and then summer, many of us will begin to use our HVAC systems more to keep our homes cool. One of the simplest, but most important things you can do to keep your system in good order and improve the air quality of your home is to know how often to change the HVAC filter. Keeping your HVAC filter clean will preserve the lifespan of your HVAC system but it will also reduce the time you must spend cleaning by removing many of the particles that can escape into the air and settle as dust in your home, which can also affect your health. On average, your HVAC filter should be changed at least every three months, but several factors can affect whether you need to change it more often. In a climate where the winters are fairly mild and you don’t run the heat that often, you may not need to change it as frequently as you do in the hot summers when your air conditioner runs considerably more. During periods where your system is being used more, you might want to change the filter as often as every month. Factors that Affect Your HVAC Filter’s Usage Before we talk more about how to change your HVAC filter, let’s talk about some things that might affect that decision. Air Quality: One consideration regards how people and pets reside in your home and how often they are present. Because your HVAC filter is used to trap particles in the air year-round, it must be routinely exchanged to maintain your air quality at its highest levels. More people and pets create more for your filter to process. The HVAC filter captures dirt, dust, pet dander, feathers, pollen, and smoke. It also traps bacteria that can spread disease and allergens that can adversely affect those with asthma or other breathing ailments. There is a direct correlation between the air quality in your home and your health. Environmental Impact: When your filter is dirty, your HVAC unit takes up more energy to push air around the system, which can lead to a buildup of dirt and debris in the ducts. Some of this buildup will be pushed out through the exhaust and into the air outside, creating pollutants in the exterior air. Energy Savings: With increased energy efficiency comes cost savings. A clean filter will maximize how well your HVAC system works, resulting in less energy being required for it to run. HVAC filters are designed to show dirt so that you can easily see when yours needs a replacement. HVAC System Longevity: Clean filters will extend the life of your HVAC equipment. As the system sucks air into the intake, it takes in particles that are caught in the filter. If the filter is clogged up with dirt and debris the air has a harder time moving through the ducts, causing the motor to work harder. This can lead to overheating, smoking, and further damage to your system With all of this in mind, let’s talk about how to change an HVAC filter. You’ll want to start by deciding what kind of filter you want to use. You can simply look at your existing filter and replace it with the same brand, but you may want to explore other types based on your preferences and needs. Types of Air Filters for Residential HVAC systems One of the things worth answering is how often to change your HVAC filter based on the type you’re using alongside its MERV rating. The MERV rating system ranges from 1 to 16; similarly, the MPR measures the size of particles in the air and are ranked from 0.3 to 1 micron. If you have pets or many people living in your home, you’ll want something with a MERV rating of at least 12. HEPA—High-Efficiency Particulate Air (HEPA) filters remove over 99.97% of particles as small as 0.3 microns in diameter. With a MERV rating of almost 16, this puts it at the top of the line, making it worth its extra cost. Keep in mind that this kind of filter might require alterations to your system to accommodate it. Washable—Consider a washable filter if you are looking for an environmentally friendly and cost-effective filter. You should change this filter every month or two, and it is a good idea to have at least two on hand, since you’ll want to make sure it is completely dry during use or risk unhealthy mold growth. The upfront cost for this type of filter is more expensive, but it will more than pay for itself in the long run. Fiberglass—This filter consists of fiberglass elements fitted over one another and reinforced with metal chips. It is relatively cheap but effective if you change it monthly. It is not the best for maintaining high air quality as the makeup of its fibers allows more bacteria, mold, and fine dust to escape back into the air. Pleated Polyester—Made up of two cotton elements bound together and arranged in a pleated pattern, this filter is where reasonable costs meet effective filtration. The pleated design provides more surface through which air can be filtered, capturing more of the particles that linger in the air. It is more durable than cheaper filters and provides better filtration for not much more cost than the fiberglass counterparts. How to Change the Air Filter for HVAC systems Maintaining your HVAC system is usually simple once you know how to change the air filter in your HVAC. To start with how to change your HVAC filter, you’ll need to find where it’s located behind the air intake in one of three places. For those located on a wall or in the ceiling, simply open the large vent door and replace the filter inside of it with the filter of your choice. Some units may have a filter located on the side of the HVAC system.
AC Capacitor Cost: 5 Things to Keep in Mind
Let’s start by answering a question: “What is an AC capacitor?” Your air conditioner comprises many parts that work together to keep you cool in the summer heat. One of the most important parts is the HVAC capacitor. This element is what provides the energy for your air conditioning to operate. If it fails, an AC capacitor replacement cost can be between $35-60 for the part, but with around 450v surging through it, it’s not an item you want to remove or install improperly. So, what is this little dynamo that wields so much power? This small cylinder is installed inside your air conditioner. It stores energy from your power source and supplies it to your AC unit. When your air conditioner kicks on, a great deal of power is required. Your home electrical system cannot produce this amount of power on demand, so the capacitor stores extra power to provide the boost it needs. It collects this power while your air conditioner is running in preparation for when it is needed again, much like how a rechargeable battery operates. The first thing you need to know about how much a new AC capacitor may cost is whether you need a new one. 1. How to Tell If Your AC Capacitor Has Failed If your capacitor stops working, it can lead to all kinds of issues. Though your air conditioner may continue to run, the fan may not be in motion. It is also possible that your fan will be running but no cold air is coming out. You might even have problems with your air conditioner staying on for any extended length of time. Another clear sign that the capacitor is experiencing a failure is the tell-tale clicking sound you’ll hear from inside your air conditioner’s cabinet. You can also check our article In case you see smoke coming out of the AC. 2. Troubleshooting an AC Capacitor Failure If your fan isn’t running, do a test with a small stick. Push the fan blades with it and see if the fan starts moving. If it does, then your fan is most likely fine, and your AC capacitor needs to be replaced. It may have become damaged, preventing it from storing the energy the fan needs to get going without assistance and keep moving. You can also look at the capacitor for signs of a problem. If the top has started to bulge rather than maintaining its former flat top, there could be a leak. The AC capacitor cost you’ll incur to fix the issue is considerably less than the damage that can be done with it not working properly. The question then becomes more about how much it will cost you not to replace your AC capacitor than how much it will cost to take care of the problem quickly. 3. What Causes an AC Capacitor to Fail? The sheer amount of energy that surges through a capacitor creates a lot of wear and tear. In the summer months, when the unit may be running most of the day, this is increased greatly. In perfect circumstances, a capacitor will last about twenty years. However, conditions may not always be so ideal as to cause minimal strain. The two most common reasons why your capacitor may give up on you too soon are prolonged exposure to heat and purchasing a capacitor with a voltage rating that is too low. Either of these could increase your ac capacitor costs due to excessive replacements being required. A bigger concern with AC capacitor failure is that it increases the chances that it might harm other parts. It can cause fans to wear down and electric connections to sustain damage. For this reason, you should replace a capacitor as soon as you realize it isn’t working properly. A chain reaction of damage can create additional costs for parts or even cause a unit to fail completely. 4. How to Cost-Effectively Replace an Air Conditioner Capacitor Before starting, review the process and decide if you’re comfortable performing the required steps. If not, contact a professional. While the process may vary a bit from unit to unit, there are some basic steps involved in any AC capacitor replacement: If, at any point in the process, you are uncertain about how to install parts you should call a professional for assistance. American Home Water and Air can help you finish up your repair and get your air conditioning back to work. If you see that your old capacitor has been leaking, then you will want to stop and call for help immediately. 5. How Much Does It Cost to Replace an AC Capacitor? If you choose to skip the DIY route and call for a professional technician right off the bat, you’ll pay somewhere in the ballpark of $220-$250 to get the capacitor replaced and the unit checked out to ensure proper operation. In some cases, where an AC unit requires branded parts or if you prefer to use branded parts, this may be as high as $400-500. However, replacing an AC capacitor costs much more if it is not installed correctly and causes more damage to your unit.
How Do Mini Splits Work?
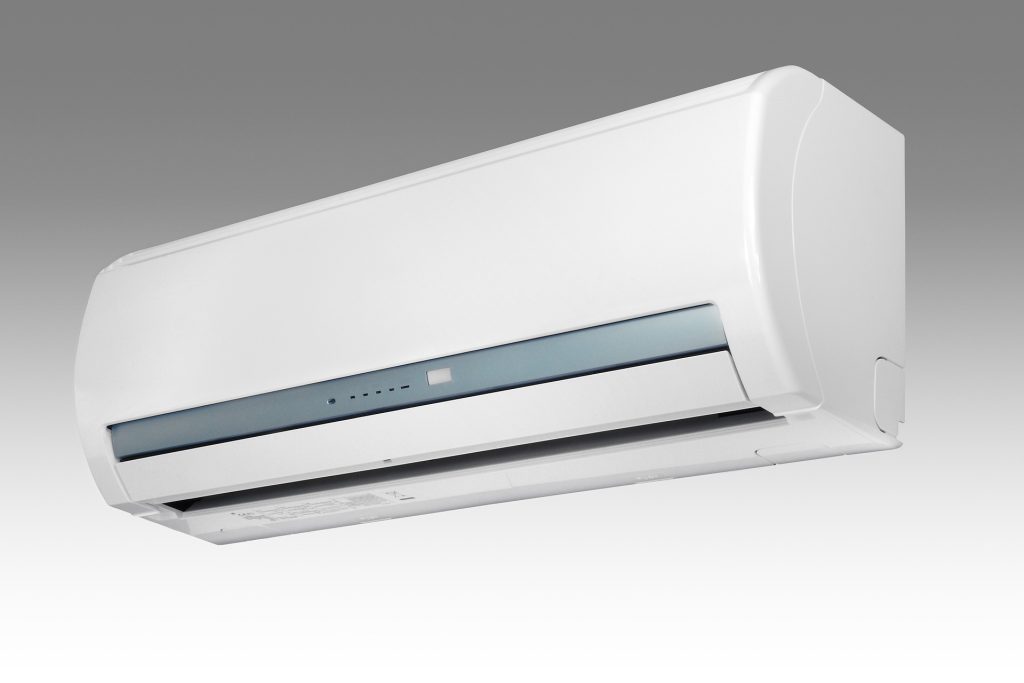
If you’re looking for a flexible solution for heating and cooling individual rooms in your home, you might want to consider a mini split system. So, how do mini splits work? First of all, let’s talk a bit about the mini split system in more general terms. Ductless mini split systems such as the Samsung Quantum 2.0 unit offered by American Home Water and Air do not need air ducts like the ones found in traditional HVAC systems. They also differ from traditional air conditioners that only distribute air conditioning to a limited coverage area from a single unit installed in that space. A mini split system can provide heat and air conditioning to multiple rooms or zones utilizing separate fans and evaporator coils connected to a base unit placed outdoors. Okay, but you still need to understand how multi zone mini splits work. Let’s get to that. An Overview of the Mini Split System A ductless mini split system consists of an outdoor and indoor unit. It is classified as “mini” because there are individual units called heads that are more compact than traditional A/C packages or furnaces. You’ll find them of great use in areas that generally don’t benefit from other types of heating and cooling systems. For instance, garages are usually unheated which is not optimal if you are one of those people who use your garage for purposes other than keeping your car. Since it is not legal to install ductwork in your garage in some areas, a ductless mini split system is ideal for heating and cooling your workshop, hobby room, or other converted garage space year-round. Best of all, it won’t take up much space and is highly energy efficient. The same applies to basements you’ve finished out as extra living space (if you are among the few who have such a unicorn), upper-level areas, or attic rooms. Even a separate external workshop can benefit from a ductless mini split system. A mini split can also make a useful addition to an existing system. It is useful in bedrooms that are at the farthest ends of your current duct-based system. If you find an area is not being properly heated or cooled by your existing system, a mini split system can be an ideal solution rather than an expensive replacement or modification to the existing ductwork or HVAC unit. There are other benefits to a mini split system, as well. The evaporator coil on the unit will collect condensate and drain it from your home. Thus, it acts as a dehumidifier. The filtration system helps catch harmful products and remove them from your air, acting as an air filter. It’s not a replacement for a larger air purification system, but it will help to purify the air in your home. How Do Mini Splits Work? A mini split functions like a heat pump. It gathers air from outside the home and moves it inside to heat or cool. A single outdoor unit can be split out to multiple indoor areas. Because each of these areas has its own control, you are better able to decide how to heat or cool each one. How Does a Dual Zone Mini Split Work? Unlike a central unit which is operated with a control set on one temperature, each area can be maintained at varying temperatures. Perhaps you like the living room warmer than the kitchen, or you aren’t using certain areas all the time and prefer to keep them cooler than the rest of the house. You may have rooms that you want to keep cooler during the day while no one is using them or while guests aren’t present in that area. A mini split gives you this capability all with the push of a button from a WIFI-controlled remote. How Many Zones Can a Mini split Have? A residential mini split system can handle up to eight zones. Keep in mind that a zone is different from a room. You may have smaller areas that can be combined into a single zone or individual rooms that require their unit. For instance, you might have an open floor plan that combines your living room, dining room, and kitchen area which can be combined into a single zone. Of course, having more than eight zones doesn’t mean a mini split system isn’t right for you. It just means you’ll need more than a single outdoor unit to power the extra zones you require. What About Maintenance? Just as with traditional systems, some routine maintenance can be easily performed by the homeowner. The main filter can be removed and replaced. Unlike systems that require a new filter monthly, mini split filters can be washed and dried to be reused. Other cleanings of internal parts should be handled by a licensed technician. How Long Will My Mini Split Last? Mini splits are among the most efficient systems on the market. Because they operate so well, there is less wear and tear on the equipment, meaning they require less maintenance and will last longer than many traditional options. With routine maintenance and proper care, you can expect your system to last 12-15 years, sometimes more. What Makes the Mini Split More Efficient? The answer to this question ties back directly to “How do mini splits work?” Without getting too technical, mini splits use inverter technology and a variable speed compressor. This combination converts incoming high-voltage electricity to DC voltage. By doing so, it requires less energy to do more work. The variable speed of the compressor matches the airflow to the temperature, so it only uses as much energy as is required to complete its task. Room sensors gauge temperature and adjust for hot or cold areas, automatically adjusting only as much as needed to maintain the desired comfort level. Whatever HVAC solution you choose for your home, American Home Water and Air can help you assess your needs and provide a quality installation that won’t break the bank.