
Through The Wall Air Conditioner Installation: Step-By-Step Guide
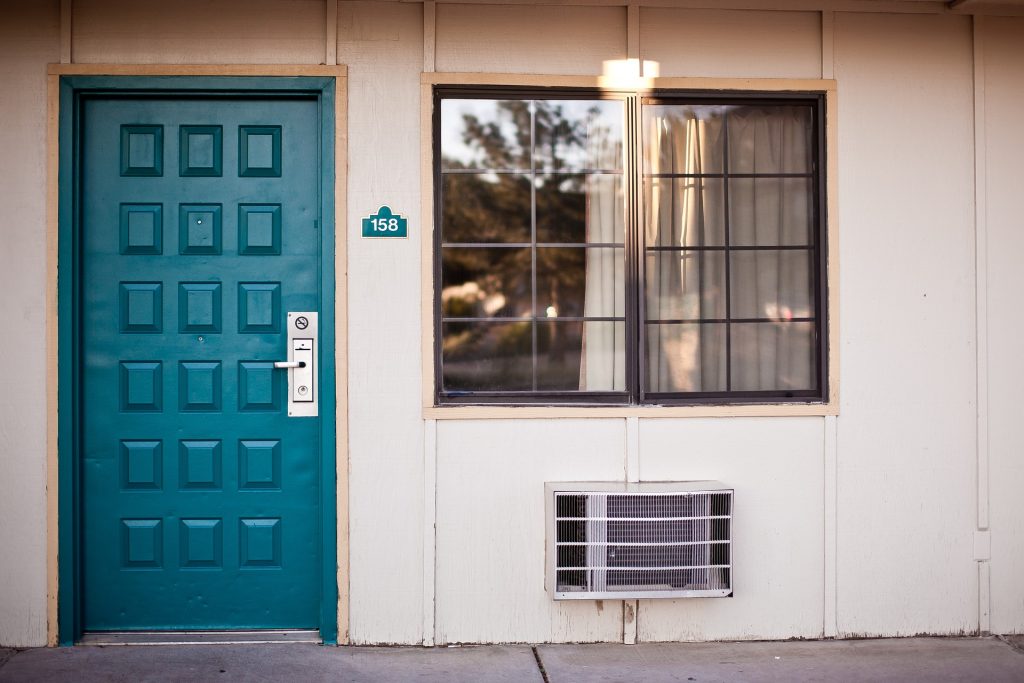
Through the wall air conditioner installation might seem complicated and finicky. In reality, it’s quite simple if you have the tools and knowledge. In this post, we’ll walk you through all of the necessary steps. By the end, you’ll know whether this is something you’d like to attempt on your own or if you’re better off enlisting the help of a professional. Through The Wall Air Conditioner Installation: The Basics If you’ve already done thorough research concerning what through the wall air conditioners are, feel free to skip this section. Otherwise, read this section for a brief rundown on their benefits. Contrary to what you might think on first glance, through the wall air conditioners aren’t just window units fixed to a hole in the wall. Functional differences include vents placed on the back of the unit rather than its sides. A through the wall air conditioner also doesn’t protrude outside as much as a window air conditioner. It sits relatively flush. Note that you shouldn’t confuse through the wall air conditioners with mini-split air conditioners, which (despite their similar name) look completely different and consist of two separate units. Installation of a mini-split air conditioner involves mounting the unit with screws and brackets rather than cutting a huge hole in your wall. Benefits Of Through The Wall Air Conditioners Through the wall air conditioner installation doesn’t involve any of the ductwork you’d find with many other types of air conditioners. A single unit serves both the outdoor and indoor functions of the air conditioner. If full use of your window is mandatory (say, you only have one and it’s your fire escape route), a through the wall air conditioner is a great option worth considering. Through the wall air conditioners can also be very efficient to run, with energy usage comparable to that of window air conditioners. Read more about how much electricity various types of air conditioners use here. Potential Downsides Of Through The Wall Air Conditioners Proper insulation is essential with a through the wall air conditioner. You’ll be cutting a hole in your wall that leads clean through to the outside. If you don’t insulate that hole properly, a draft will come through along with any insects or other pests that find their way inside. In and of itself, cutting a hole is also a serious commitment. You won’t be able to move the air conditioner without refilling the hole and repainting it, which can be time-consuming. While through the wall air conditioner installation isn’t impossible for DIYers, it can be quite difficult if you’re not handy with tools or lack confidence in your abilities. How To Install A Wall Air Conditioner Now that you know a bit about through the wall air conditioners, let’s discuss how to install a wall air conditioner. For your wall air conditioner install, you’ll need: Step #1: Find A Suitable Spot You’ll need to find a spot that is unobstructed and between 1 and 5 feet above your flooring. The wall you select should also be outward facing and close to an electrical outlet. Step #2: Locate Your Wall Studs Locate 3-4 studs using your stud finder. Studs are pieces of wood (usually 2 x 4) used to support your wall. They usually sit about 16 inches apart. When you locate a stud, mark it with a pencil and find the remaining ones. Most through the wall air conditioners come with some sort of guide that you can place on the wall to get an idea of the unit’s proportions. Position the guide in such a way that it passes through as few studs as possible. This will make your job a whole lot easier. Step #3: Switch Your Power Off At The Breaker Since you’ve chosen a wall that has an electrical outlet, you’ll need to take a few precautions. Locate the switch controlling electricity to the room in which you’re installing the air conditioner. Shut it off to avoid getting electrocuted when you start cutting into your wall. Step #4: Cut Your Hole Into The Wall Using the guide, sleeve, or bracket that came with your through the wall air conditioner, trace an outline that runs through as few wall studs as possible. Use your level to make sure whatever you’re using as a guide is perfectly flat as you draw. Once you’ve drawn that first outline, make another one roughly 2.5 inches larger than it. You’ll be using that outline to create a supporting frame. Score along the outline with your drywall knife and then either hammer the piece out or make a clean cut with your saw. If you notice insulation on the other side, wear the proper protective gear (a respirator mask, gloves and fully-sleeved/legged clothing) and cut the insulation as well. By the end of this step, you should see exposed wall studs. Cut those studs as needed so that their edges are flush with those of your outline. The exterior portion of the wall should still be present at this stage. Step #6: Build Your Air Conditioner’s Frame Cut your 2 x 4s so that they fit lengthwise into your wall opening. You’ll end up with four pieces of lumber. Nail those pieces together and fit the resulting rectangle into your hole. Fix it to your studs as much as possible using screws. Step #7: Make Your Exterior Wall Cutout Here’s where you’ll cut the hole in your exterior wall. From the inside, drill a hole through each of the opening’s four corners. You’ll be using these holes as a guide when you head outside to make the cuts. Once you’re finished drilling, head outside and draw perfectly straight lines connecting the holes using your level. When you cut through this outline with your circular saw, you’ll have a hole that aligns with your internal one. You should be able to see clean through to the inside of your home at this point. Step #8: Insert Your Metal Sleeve And AC Unit
How To Install A Mini-Split AC By Yourself
Mini-split air conditioners are quite popular – and for good reason. They’re one of the easiest and cheapest types of air conditioners to install if your home doesn’t have existing ductwork. In fact, the process is simple enough that you can install a mini-split on your own, provided you have the necessary skills and tools. In this post, we’ll walk you through the process of installing a mini-split in your home. Installing A Mini-Split: What You’ll Need First and foremost, you need to have determined that a mini-split air conditioner is indeed the right cooling solution for your home. Check out this post to learn about the pros and cons of mini-split (aka “ductless”) air conditioners. Generally, they make the most sense when installing a central air conditioner would be too costly. The most common scenario is when your home doesn’t have any ductwork. Installing ducts can add as much as $3,300 to the overall cost, on average. Mini-split air conditioners, of course, don’t use ducts so you’ll avoid this added cost. Next, you’ll need these tools and supplies: We’ll also note that this process is much easier if you have a second pair of hands to assist you with holding things in place while you install the unit. How To Install A Mini-Split Air Conditioner Step #1. Select The Right Unit There are two basic types of mini-split air conditioners. On one hand, you have multi-zone units, which segment your home into various regions and can handle several air handlers. These are more complicated to install so you may be better off enlisting the help of a local HVAC company if you’ve purchased a multi-zone unit. Contact us at American Home Water and Air if you live in Phoenix. There are also dual-zone multi-splits, which typically come with one condenser and two air handlers. These are simpler to install than multi-zone mini-split air conditioners. Check out this post to learn about properly sizing your air conditioner. This is a crucial step; inappropriately sized air conditioners can cause airflow issues and other undesirable effects. Step #2: Install Your Indoor Unit(s) When installing a mini-split air conditioner’s interior unit, refer to its manual. You’ll generally be fixing the unit to your wall using screws and drywall anchors. You should choose a spot to install the unit that meets these criteria: You will typically need to install the bracket first using your anchors and screws. Next, create a roughly 2-inch hole (or whatever size the manual has identified) next to the bracket. It should run right through the wall and lead outside. This is where you’ll run the refrigerant line and other cables that need to reach your outdoor unit. You should angle this hole slightly downward as it will help with drainage. Connect the control wire to the back of your indoor unit. You may need to remove a plate, depending on the model. Next, connect the refrigerant and drainage tubes. Proceed by fastening the cables together using electrical tape and running them through the hole in your wall so that they dangle outside. Finish this step by mounting your indoor unit to its brackets. Step #3: Install The Outdoor Unit Your next step in the ductless air conditioner installation process is to work on your external unit. You can place it on your roof or an outside wall. It should be within reasonably close proximity to the hole you made in Step #2 since you’ll need to run those cables to the outdoor unit. Once you’ve found a suitable position, mount the outdoor unit then connect your tubing and wires to the appropriate inputs. Once again, refer to the unit’s manual for the exact instructions. During this step, you’ll likely need to use your torque wrench for connecting the pipe joint. Step #4: Have A Professional Review Your Work Air conditioners use a lot of energy to cool your home. Improper installations can be quite wasteful, which is why it’s wise that you have an expert review your work soon after you finish the ductless air conditioning installation process. Check out this article for some tips on choosing a reliable air conditioning service company. Not Sure You Can Handle This? Hire A Professional While mini-split AC installation isn’t the hardest thing in the world for an experienced DIY enthusiast, it can be challenging if you’ve never done anything like it before. The above guide should leave you with a pretty clear idea of what needs to be done. If any of it is perplexing, there’s no shame in scheduling for an AC Installation In Phoenix, Arizona, and having a professional do the work for you. Check out our pricing page to learn more about how much we charge for HVAC services and contact us if you live in the Phoenix area and would like a quote. Hiring a professional for AC repair in Phoenix, AZ is especially important if you ever encounter issues in the long run. Doing so would guarantee that the issues are completely resolved, saving you time and money in the process.Also, check out our other articles on topics like venting a portable AC without a window and through-the-wall air conditioner installation. Frequently Asked Questions
Ductless Air Conditioners: Pros & Cons
Ductless air conditioners can be a tempting proposition, particularly for homes without existing ductwork. In this post, we’ll discuss ductless units in great detail to help you figure out whether they’re the right cooling solution for your home. What Are Ductless Air Conditioners? There are a few basic types of air conditioners. Ductless units (also often referred to as “mini-split”) consist of two components: an external condenser and at least one interior evaporator. In layman’s terms, the condenser is what draws air into the unit while the evaporator passes it through to cool your home’s interior. In some ways, ductless air conditioners are similar to central units. But while they both have outdoor units, a central air conditioner relies on your home’s ductwork to transport air from the evaporator to various registers (also known as vents) throughout your home. Ductless air conditioners, meanwhile, rely on what’s known as a “conduit.” This is a thin cable that passes electricity, heat, moisture, and refrigerant between the external and internal units. The cable runs through a relatively small hole in your wall, negating the need for ductwork. Read more about the difference between central and ductless air conditioners here. Ductless Air Conditioners: Pros #1. No Ductwork? A Ductless Unit Will Be Cheaper To Install As we discussed in this article, it can be quite costly to install ductwork in a home that doesn’t already have it. Drilling through the wall AC installation should be done by the professionals. On average, ductwork can add as much as $3,300 in installation costs but possibly much more if you live in an older home. Ductless air conditioners, as their name would imply, work without the need for ducts. Installers will just make a two-inch hole in your wall to pass the conduit through. #2. Easy Zoning It’s not uncommon to require different temperature settings in various parts of your home. Because each area/room gets its own evaporator, this is a breeze with ductless air conditioners. A single exterior unit typically allows for as many as four evaporators, which should be enough to properly zone the average family home. Just think of the possibilities here. While air conditioners in Phoenix and other southwestern cities typically need to run intensely throughout the summer, some in your house might like it cooler than others. Rather than fighting over the thermostat or alternating between opening windows and keeping the air conditioner running, just use your ductless system’s zoning capability! #3. Energy Efficiency Air conditioners use a lot of power, which equates to major expenses during the summer months. Even the best ductwork can spring leaks over time, which means some of that energy gets wasted. Ductless systems are more direct in that air passes directly from the evaporator into your room, with little opportunity for loss due to leaky ducts. As an aside, ductless air conditioners can also be advantageous if someone in your home suffers from asthma. Allergens can occasionally make their way into ductwork, contaminating the air that passes through it. In this situation, you’ll find much cleaner and more direct air with a ductless unit. #4. No Need To Repair Ductwork In The Future Ductwork isn’t just an “install it once then forget it” thing. You’ll occasionally have to check on and repair it as needed, which is an added thing to worry about and potentially spend money on as part of your air conditioner maintenance. Ductless AC Units: Cons #1. Upfront Cost Ductless air conditioning can be significantly more expensive than a central unit depending on how many evaporators and condensers you need. In a smaller home, this is unlikely to be the case. Once your home gets too big for however many evaporators your condenser can handle (the average is four, as mentioned earlier), the costs add up fast. That’s why the cost of a ductless air conditioner falls within such a wide range: $2,000 to $14,500. Before you settle on a ductless air conditioner, make sure you run the numbers and see if a central unit might represent better value. #2. Aesthetics A ductless air conditioner requires wall-mounted evaporators that can be bulky and disruptive to your interior design. There are some ways you can hide an air conditioner but these can only do so much. You’ll always have something bulky on your wall. #3. More Filters To Clean Cleaning air conditioner filters is an oft-neglected task that can have serious impacts on your unit’s performance and your health. Each evaporator in a ductless system has its own filter, which needs to be cleaned or replaced on a monthly basis. This differs from central air conditioners, which have just one filter you need to take care of. That’s why it’s essential to know how to clean AC filters for different types of air conditioning systems. Who Is Ductless Air Conditioning Ideal For? Now that you know the pros and cons of a ductless AC, let’s discuss the situations in which they’re a good fit. While adding ductwork to your home can increase its value, this may not always make sense depending on your financial situation. You won’t recoup 100% of the costs when you resell so installing ductwork as an investment may not make sense unless you’ll be staying in your home long enough for the installation to pay for the difference. Air conditioners should always be carefully sized to suit the area that needs cooling. If you add an extension to your home (new garage, room, etc), the cooling solution for it won’t be as simple as adding some extra ductwork and vents. Doing so may cause airflow problems depending on the circumstances. Instead, you can install a ductless unit to service that new part of the house. When you replace your central air conditioner, you can get a larger one and install additional ductwork at that point if you so desire. If you constantly need different temperatures throughout your house, a ductless air conditioner is a very easy solution. It’d often
How To Put Freon In An AC Unit: Everything You Need To Know
Curious about how to put Freon in an AC unit? There are several things you should know first. In this post, we’ll give you a detailed look at the process as well as precautions you need to take before attempting to do this. How To Put Freon In An AC Unit: First Things First While many people use the term “Freon” to broadly describe refrigerants, it’s actually the brand name for a specific product, which is also known as HCFC-22 and R-22. As of 2020, the United States Environmental Protection Agency (EPA) has banned the production and importation of Freon. As such, you’ll have to use recycled Freon going forward. By the time America’s Freon supply has been used up, most homeowners will have naturally switched to air conditioners that use more modern refrigerants. The issue with Freon is that it is ozone-depleting, with atmospheric heat-trapping effects being 1000 times that of carbon dioxide, per the New York Times. Newer refrigerants have a much lower impact. What This Means For You If you’ve kept up with your air conditioning service, chances are your technician has already moved you away from Freon in one way or another. Air conditioners produced after 2010 generally use newer refrigerants. Many older ones have been retrofitted to do the same. If your unit doesn’t fall into either category, chances are that it’s on the older side and will need to be replaced fairly soon, either due to a breakdown or the impending Freon shortage. Check out this post to learn about how long air conditioners last, then read this one to get an idea of how much you’ll spend on replacing the unit. If your unit is on its last legs and you need an immediate replacement, reach out to American Home Water and Air for your new AC Installation In Phoenix, Arizona. Wait, Why Would You Need To Put Freon In An AC Unit? The stipulations we’ve discussed so far still miss something very important. An air conditioner’s refrigerant loop is actually closed. In non-technical terms, this means that refrigerant shouldn’t ever escape unless something’s gone wrong. The most common scenario is that you’ve sprung a leak somewhere, which can actually be quite dangerous for your health and the environment. Knowing how to put Freon in a home AC unit won’t do you much good in this scenario if you don’t also fix the leak. The Freon will just end up escaping again and you’ll be right back to square one. This is why you should beware any technician that simply recharges your air conditioner without addressing why it needed to be recharged in the first place. If you find that your refrigerant is escaping because of a leak, reach out to us at American Home Water and Air. We’re one of the best providers of AC Repair in Phoenix, AZ, and our team of experts will make sure that any issues with your AC are resolved. How To Put Freon In An AC Unit Now that we’ve gotten a few disclaimers out of the way, let’s discuss how you can actually go about adding Freon in an AC unit. Step #1: See If Your Air Conditioner Is Blowing Warm Air If your air conditioner is blowing warm air, it’s very likely that whatever other issues you’re noticing are the result of a refrigerant leak. Address the source of the leak (usually some type of physical damage to your air conditioner) before proceeding. You’ll likely need to call a professional for this. If you live in Phoenix, Arizona, learn about our HVAC services here. Step #2: Perform Regular Maintenance Prior To Refilling Your AC Now’s a good time to conduct thorough maintenance and rectify any other issues your AC might be experiencing. Check out this post for an idea of what you should be doing as part of this maintenance. Step #3: Select And Purchase The Right Refrigerant While this guide is Freon-specific, the term is akin to “Kleenex” being used to describe all tissues. If you are indeed looking to refill your unit with Freon, the trademarked product, you’ll have to procure it. Note that prices have skyrocketed as Freon has become much harder to find. Use this tool to figure out where you can buy Freon near you. If you’re unsure what type of refrigerant your AC uses, contact a technician or refer to the owner’s manual. Common modern refrigerants include: Depending on the type of refrigerant you need and local regulations, vendors may request certification before selling to you. In this case, you’ll have to go through a licensed company. Step #4: Gather The Proper Safety Equipment Freon isn’t something you should be inhaling or even exposing your skin to. As such, make sure you use the following: If you have a respiratory condition or feel unsafe about this, don’t risk going through the process yourself. HVAC technicians are more than happy to refill your AC with refrigerant. It’s by no means a minor job that would be a nuisance to them. Only proceed if you’re the DIY type prepared to take all the necessary precautions, including any that may be outlined in the documentation that should come with your refrigerant. Step #5: Wait For The Right Temperature Freon will always move towards the coldest area. If the temperature outside is below 55 degrees Fahrenheit, the chemical will get “confused” and be more attracted to the outdoor air than the inside of your air conditioner. Step #6: Once More, Consider Seriously Whether You’re Confident Doing This While regulations in the United States don’t dictate that Freon refilling be done by a licensed professional, it’s a good idea to rely on someone with some experience. Freon can be deadly when handled improperly. While some common sense and following these steps will help keep you safe, accidents happen and you should only proceed if you’re 100% confident. Step #7: Add The Refrigerant Before you begin pumping Freon into your AC, shut it
Average Cost To Replace Heating And Air Conditioning

The cost of replacing an air conditioning unit or furnace can vary wildly depending on factors such as your location and what type of unit you choose. In this post, we’ll take a close look at the average cost to replace heating and air conditioning. By the end, you’ll have a solid idea of what to expect. Average Cost To Replace Heating And Air Conditioning Job Average Duration Average Cost Replacing the HVAC unit alone 1 Day $4,800 – $9,300 Installing a new AC plus ductwork 5 Days $6,800 – $12,300 New AC plus ductwork and add-ons 7 Days $13,000 – $17,000 Across all types of HVAC systems, the cost of replacement in the United States lies between $4,800 and $9,300. If you need to install ductwork as well, things get substantially more expensive, costing between $6,800 and $12,300. Cost Of Replacing An Air Conditioning Unit Type Cost Central $1,500 – $7,000 Mini-Split/Ductless $2,000 – $14,500 Window $150 – $1,000 Portable $500 – $1,000+ Heat Pumps $2,000 – $8,000 If you’re just looking to replace your air conditioner, expect to spend between $3,300 and $5,900 on average for a central air conditioner. If you need to install ductwork, budget for an extra $1,800 to $3,300. Learn more about central air conditioner costs here. Of course, there are other types of air conditioners to consider as well. For example, a mini-split system will cost you between $2,000 and $14,500 depending on how many evaporators you need. Window air conditioners are, by far, the cheapest, with average prices hovering between $150 and $1,000. Read our article about window air conditioner insulation for more information about window air conditioners. So if you encounter problems with your air conditioners and you hire a professional for AC Repair in Phoenix, AZ, you better keep these numbers in mind and see if you’ll spend more on the repairs compared to having a brand new AC unit installed. HVAC contractors will often try to nudge you towards selecting an option that doesn’t require ductwork. Installing ducts can be very labor-intensive, making it often more economical for a company to sell you a mini-split. This won’t inconvenience you in terms of cooling efficiency but it’s worth mentioning. Learn more about the difference between mini-split air conditioners and central units here. Cost Of Replacing A Furnace Type Cost Gas $1,800 – $4,400 Electric $1,600 – $2,500 Oil $4,200 – $6,900 Radiator $1,500 – $3,500 While air conditioning in Phoenix is essential, newcomers to our fine state may not realize that most homes actually have heating as well. Granted, these may not get used as much as in other parts of the world. Still, temperatures do occasionally drop to freezing during the colder months of the year in Phoenix. You can expect to spend between $1,800 and $6,900 on your furnace if it needs to be replaced. Add the same $1,800 to $3,300 if you need to install new ductwork. Is Ductwork Essential? As mentioned a few times now, the average cost to replace heating and air conditioning are considerably higher if you need to install new ductwork. As such, you may be tempted to just stick with a ductless type of air conditioner by default. That’s not necessarily the smartest thing to do if you have the means to pay for ductwork. It can increase your home’s value by about 10%. This alone often won’t cover the installation costs but it may still be worthwhile if a central air conditioner is the most efficient cooling solution for your home. The best way to determine whether this is the case is to measure how much cooling capacity your home requires. From there, compare SEER ratings of units capable of providing that capacity. As we discussed in this article, the SEER rating will give you an idea of how efficient your air conditioner is. This, in turn, translates directly into dollars and cents you’ll save. Contact your local HVAC company (that’s American Home Water and Air if you live in Phoenix) if you’re unsure of what the most efficient solution for your cooling needs are. Factors That Influence HVAC Costs As you can tell, HVAC replacement costs can fall into a pretty wide range. This is because there’s a great deal of customization involved in creating the right HVAC solution for you. Here are some of the factors influencing cost the cost of AC Installation In Phoenix, Arizona. Required Capacity If you need to cool a 5,000 square foot home, you’ll, of course, need a much more powerful (and therefore more expensive) air conditioner. You don’t want to cheap out in this regard. An undersized air conditioner will struggle to meet your cooling needs and cause airflow issues in your home. British Thermal Units are one way to calculate capacity. You can also consider tonnage, which costs an average of $400 more per unit. Desired Efficiency If you want to protect the environment or simply value efficiency, an air conditioner with a higher SEER rating may be desirable. While greater efficiency in the form of a higher SEER rating may save you in the long run, you’ll pay more upfront. This is especially important to consider if you’re planning on relocating soon. A higher SEER rating may not pay for itself before you move. Add-Ons If you’re installing more than just an air conditioner and ductwork, you’ll of course pay more. Thermostats, humidifiers, and air purifiers can all add to the cost depending on which company you choose. Make sure to get quotes upfront for these items. Here are some average figures. Item Average Additional Cost Variable-Speed Fan $4,000 – $8,000 UV Light Filter $400 – $800 Humidifier $100 – $300 Zoning Systems $2,500 – $3,500 Thermostats $145 – $230 Installation Complexity If the nature of your job requires access to tricky spots, such as a crawlspace, you might have to pay more in labor costs as a result. HVAC Brand As with anything, a higher-quality air conditioner will cost
Frozen AC Line: Why It Happens & What To Do About It
A frozen AC line can be a rather peculiar sight in a place like Phoenix, Arizona where nothing ever freezes. In this post, we’ll discuss what makes an air conditioner line frozen – and what you can do about it. Causes Of A Frozen AC Line These are the two most common culprits behind a frozen AC line. Dirty Air Filters Did you know that you should be cleaning or replacing your air filters on a monthly basis? Failing to do this can result in airflow issues that, in turn, cause your evaporator coils and lines to freeze over. You’ll notice a buildup of ice on both components, although the buildup on your pipes will, of course, be more evident unless you open your air condition up to reveal the coils. What To Do About It Give your air filter a good cleaning if it’s reusable. If not, replace the filter outright. Next, switch your air conditioner’s fan setting on and leave it there for 2-3 hours. This will draw warm air in, helping to thaw your evaporator coil. You can also check out this article for some tips on cleaning the coils themselves if you’d like to speed the process up. Before you switch the unit back to its normal state, make sure the supply vents are completely unobstructed and free of dust or other debris. If you keep having this issue even after replacing your filters regularly, contact a local HVAC repair company and have them inspect your evaporator coil, ductwork, and any other components that may be at fault. If you live in the Phoenix, Arizona area, give American Home Water and Air a call. Low Refrigerant Levels/Leakage Reduced refrigerant levels can cause a drop in your air conditioner’s pressure, which in turn reduces the remaining coolant’s temperature. If this dips low enough, you’ll end up with frozen pipes. What To Do About It Contrary to what air conditioner “recharge” companies often tell their clients about refrigerant, it should never need to be simply refilled. You see, refrigerant runs in what experts refer to as a “closed loop.” Refrigerant really shouldn’t be leaving that loop. If it is, you’ve got a leak. Paying someone to come and pump more refrigerant into your system (aka “recharge” it) isn’t the solution. Doing that will simply kick the can down the road. Besides, refrigerant leaks can be harmful to the environment and people in your home. Rather, you need to take care of the leak with the help of a technician. Check out this article for some more information about dealing with air conditioners that are leaking refrigerant. Before you contact a technician, switch your thermostat to the off position. Then, switch the fan setting on and let it run for 2-3 hours so the unit can thaw. Improper Temperature Setting Improper temperature settings can also cause a drop in your air conditioner’s pressure. What many people don’t realize is that air conditioners are actually designed to run when temperatures have fallen above roughly 60 degrees Fahrenheit. If you run the unit when it’s cold outside, you’ll run into many issues, including frozen components. What To Do About It Make sure your air conditioner is switched off during the colder months. While you may be tempted to use it for defrosting your windows or something of that sort, the downsides far outweigh any benefits. Faulty Or Dirty Blower Fan Your air conditioner’s blower fan is responsible for circulating air around the unit. If the fan’s blades have gotten clogged up with dust and debris, they’ll turn slower. As a result, your air conditioner will end up with reduced airflow. As you probably know by this point, that’s a recipe for frozen components. What To Do About It Alternatively, the blower fan can also slow down if it’s faulty. With a well-built air conditioner, this is usually the result of age. You can rule this out by opening up your air conditioner as if you were going to do a deep internal clean. Check out this post for instructions on doing that with a window air conditioner. If the fan is clean, contact a technician. You’ll likely need to have them replace the fan motor. If the fan is dirty, wipe the debris away from it. If the problem persists, contact a technician. Act Fast When You Have A Frozen AC Line A frozen AC line isn’t something to ignore or put off dealing with until later. Leaving the unit running while its components are frozen can stress the compressor. The longer you leave the system like this, the more likely you are to permanently damage it. Replacing a ruined compressor rather than the whole unit is often economically infeasible, meaning this can turn into a very costly repair. Even before something this catastrophic happens, you’ll notice that your air conditioner runs quite inefficiently, leading to higher electricity bills. This adds up quickly, making the cost of having a technician service your unit seem like chump change in comparison. To learn more about some common AC issues check out our other articles such as “AC Light Blinking (Causes & How to Fix It Fast!)” What Does A Technician Do When Rectifying An AC Unit Line That’s Frozen? A good technician will replace your filters if you haven’t done so already. If that’s not the issue, they’ll inspect your air conditioner’s various components to narrow it down. A good air conditioner service looks at many different factors in order to identify the underlying issue. At American Home Water and Air, for example, we have an unrivaled 40-point checklist we run through as part of our HVAC service. If you don’t live near us, check out this article for some tips on how you should go about choosing the right HVAC company for your needs. If you have other issues with your HVAC or AC units feel free to check out our other articles on issues like air conditioner still running when
How Many Degrees Can An Air Conditioner Cool?
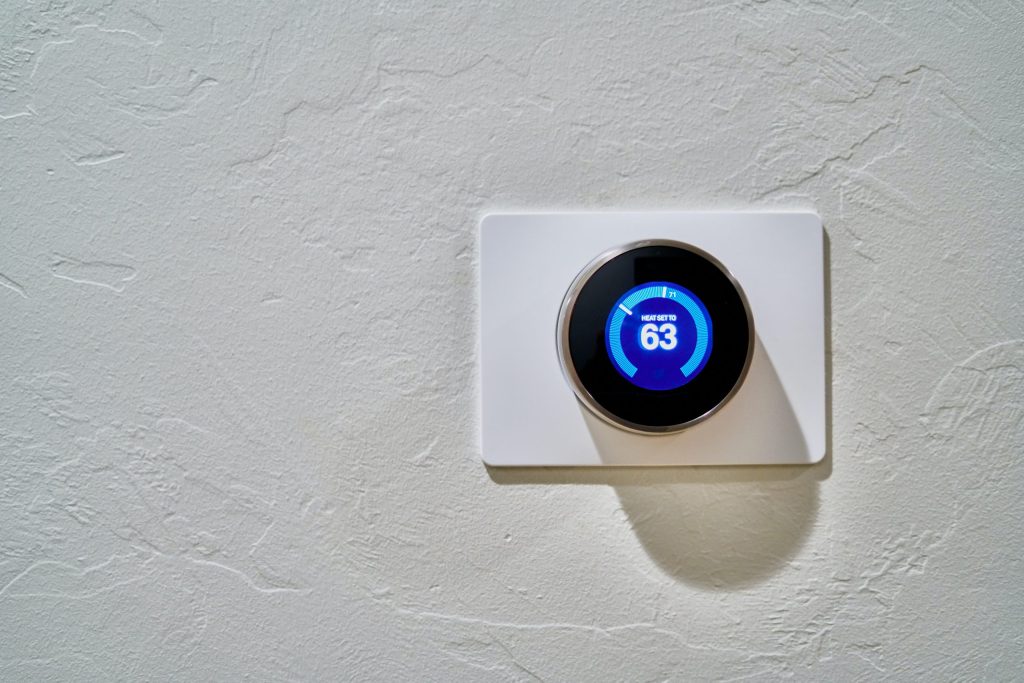
How many degrees can an air conditioner cool, you ask? Well, simply put, the answer is 15-20 degrees. There’s a bit more going on here than that, though, so keep reading for a very detailed explanation. How Many Degrees Can An Air Conditioner Cool? The Basics All types of air conditioners work in a similar manner. They pull warm air from your home’s interior, cool it, and then funnel it back outwards, where it mixes with yet-uncooled interior air, gradually reducing the house’s temperature. It’s important to note that the air coming out of the unit will not be at the temperature you set on your thermostat; it will merely be 15-20 degrees cooler than it was upon entering the air conditioner. The mixing of conditioned and unconditioned air is also important to note. Following a cycle, these two ‘sets’ (for lack of a better word) of air will reach an equilibrium, the temperature of which your thermostat will measure and prompt further cycles as needed. Depending on how low you set your thermostat, it may take several cycles for the room to get as cold as you might expect. All of this is the reality behind a common misconception people have that you can just crank your air conditioner to the maximum setting and cool your home faster. All this does is make your air conditioner use more electricity than it needs to since lower temperatures will still only be achieved through cycles of 15-20 degree reductions. Check out this post to learn about how much electricity air conditioners use and how you can make your unit more efficient. In a nutshell, you’ll be much better off choosing a comfortable temperature range and leaving your air conditioner set to it, even when you’re not home. You can turn it to a lower setting while you’re away but never turn it completely off. How Cold Can An Air Conditioner Get? Air conditioners are designed to make your home’s interior temperature no more than 20 degrees below the outdoor measurement. That’s quite substantial, even for air conditioners in Phoenix, where temperatures can be sweltering for much of the year. Expecting temperature reductions in excess of that is impractical and you’ll probably never be in a situation where you’d want that, anyways. Air Conditioner Minimum Temperature Settings Most air conditioners have minimum thermostat settings at around 60 degrees. Most manufacturers simply assume you won’t turn the air conditioner on if the temperature outdoors is 60 degrees. Some older units don’t have anything physically stopping you from turning the air conditioner on at this point, though. However, you run the risk of damaging your air conditioner. Here’s how it goes. Say the temperature outside is below 60 degrees yet you decide to crank up your air conditioner for whatever reason. If the manufacturer incorporated low ambient controls, nothing will happen. The air conditioner won’t run. If those controls aren’t in place, however, the low ambient temperatures will make your air conditioner compressor’s lubricants too thick to function. Whenever anything mechanical runs without proper lubrication, you end up with excess wear and tear that shortens your air conditioner’s lifespan. The bottom line? Don’t run your air conditioner when the temperature is lower than its minimum, which is usually 60 degrees. Refer to the owner’s manual for the exact minimum temperature. Of course, heat pumps are not subject to these same limitations. While some people think of them as air conditioners, they’re not really in the same category. Read more here. You can run your heat pump year round without issue, although it may be inefficient at cooling and heating if you live in an area where temperatures get extreme. How Low Should I Set My Air Conditioner? Now that you know how cold your air conditioner can get, you may be wondering how to actually go about determining the right temperature setting. Believe it or not, the U.S. Department of Energy actually has some recommendations in this regard. They say you should set your air conditioner to 78 degrees and turning it slightly lower (but never completely off) when you’re away from home. The goal is to set your thermostat as high as is comfortable since a lower differential between its setting and the outdoor temperature will, predictably, lead to lower cooling expenses. Keep in mind that, much like when choosing an air conditioner size, you have to adjust for factors such as how shaded your home is. If it doesn’t get much direct sunlight, you may be able to run your air conditioner at even less-aggressive settings. Once you find the ideal settings, consider installing a programmable thermostat that will adjust itself throughout the day based on your routine. To reiterate a point made earlier, never set your air conditioner to an extremely low temperature thinking it will cool your house down faster. That’s not how it works and you’ll just end up wasting energy. Important: Ensure Proper Thermostat Placement If your thermostat is unable to get an accurate reading of your home’s temperature, you’ll have a hard time achieving the expected results. Check out this list of common HVAC problems to learn what can be caused by a malfunctioning thermostat. Here are some general tips for finding the ideal thermostat placement: How Many Degrees Can An Air Conditioner Cool? Frequently Asked Questions
Central Air vs. Mini-Split: 7 Things To Consider
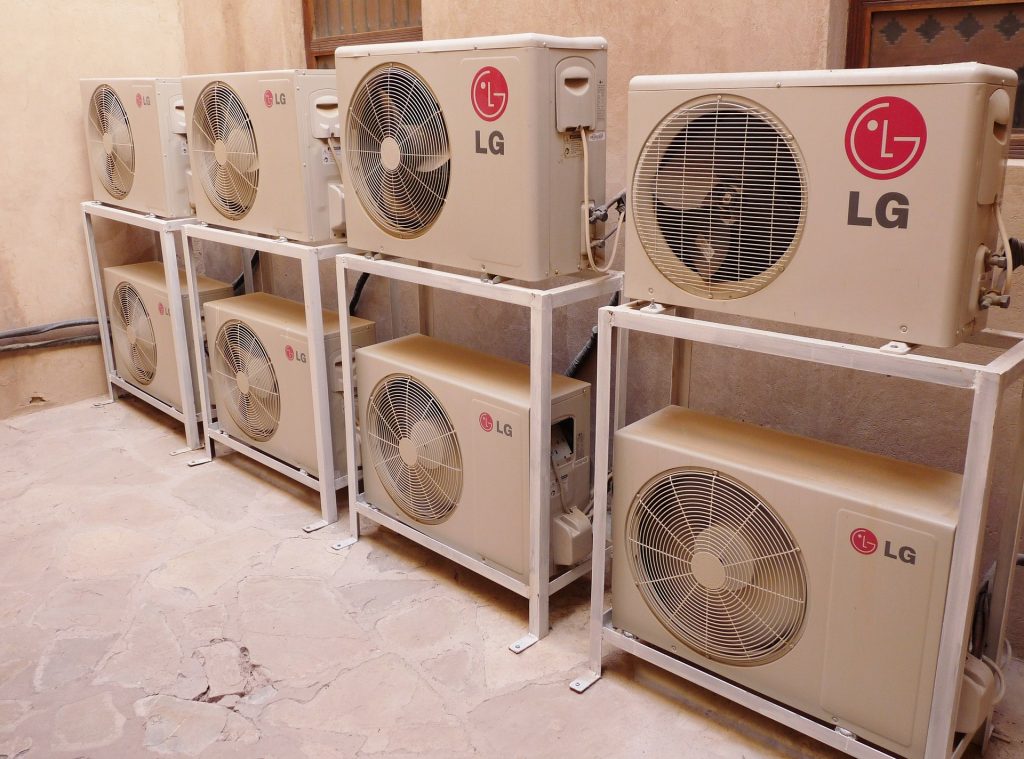
The central air vs. mini-split debate uncovers many factors worth considering as you choose an air conditioner. Each system has its own energy efficiency stipulations, price range, and more. In this post, we’ll explore these points to help you decide whether a central or mini-split air conditioner is ideal for your home. Central Air vs. Mini-Split: The Basics Let’s start by discussing what each unit actually is. To learn about all the various types of air conditioners out there, check out this post. Central Air Conditioners A central air conditioner transports air throughout the rooms in your house via a series of ducts and fans. There are two types of central air conditioners: packaged and split-system (not to be confused with mini-split). The former keeps the core cooling components in a single outdoor cabinet while the latter splits them between an indoor unit and an outdoor one. You’ll know you have a central air conditioner based on the characteristic outdoor cabinet that usually sits on a concrete slab near your home. Mini Split Air Conditioners Mini-split air conditioners also have an outdoor unit. Rather than connecting to a series of ducts, however, mini-split air conditioners lead to indoor wall-mounted units (known as evaporators) that disperse the cool air. It’s these evaporators that will typically give away that an air conditioner is a mini-split. Due this type of air conditioner’s lack of ducts, you’ll often hear experts refer to them as “ductless” units. Central Air vs. Mini-Split: 7 Things To Consider Now that you know how central and mini-split air conditioners differ in terms of design, let’s discuss the various considerations associated with choosing one over the other. Cost Of Ductless Mini-Split vs. Central Air According to Home Advisor, Americans spend between $3,778 and $7,427 installing central units. The same site lists mini-split units as costing between $2,000 and $14,500. Why the huge range for mini-split air conditioners? Well, there’s a bit more flexibility in terms of what you can purchase. A compressor and single evaporator won’t cost much. As you begin adding evaporators and other components to create a custom solution (which may be necessary for whole-house cooling), your costs will rise. A properly-sized central air conditioner, meanwhile, will be capable of cooling your home without the need for additional components – as long as you already have ductwork. If you don’t, a mini-split unit (which requires a mere three-inch hole to pass cables through) will almost certainly be cheaper. Aesthetics Central and mini-split air conditioners alike have large outdoor components that can be unsightly if you don’t use clever camouflage techniques. While central air conditioners are largely invisible from inside your home, however, mini-split units have evaporators that attach to your interior walls. If this is an issue, you may want to lean towards a central unit. Energy Consumption Air conditioners use quite a bit of energy. Central units are within the range of 3000-3500 watts per hour while mini-split units can run at about 2,000 watts per hour at peak cooling. If you don’t need much cooling capacity, you’ll benefit from a mini-split air conditioner, which will be much cheaper to run. Capacity Required Choosing a correctly-sized air conditioner (check out our Lennox AC reviews and “Trane Vs. Carrier Vs. Lennox” reviews) is key for avoiding airflow issues. Note that air conditioners in Phoenix and other very warm cities typically need more capacity than in cooler regions of the United States. Central air conditioners are generally greater capacity, although you can find capable mini-split units. Keep in mind that ductless air conditioners in cities like Phoenix may end up costing more as you’ll likely need several evaporators, potentially impacting the average electric bill in Arizona for those using this type of system. Do You Need Heating, Too? If you live in a place that gets cold, you’ll probably want an HVAC system that cools and heats. This is possible with mini-split heat pumps, which look a lot like regular old mini-split air conditioners but have some important distinctions you can read about here. You can also find heat pumps that behave like central air conditioners but these are better suited towards moderate climates. If you need robust cooling or heating during extreme months, a heat pump will be inefficient. Do Your Cooling Needs Vary By Room? One of the coolest features of mini-split air conditioners is the ability to set the temperature for each evaporator. Just imagine – you could have one evaporator per room with each set to its occupants’ preference. This isn’t possible with central air conditioners; as far as climate control goes with those, you’re limited to closing vents to rooms that don’t need as much cooling. This is therefore a central part of the central air vs. mini-split debate. Would A Noisy Air Conditioner Be Problematic? Central air conditioners can be loud. You’ll hear the outdoor unit kicking up, with the noise reverberating through your metal ducts. The outdoor component of a mini-split system isn’t silent but you can place it further away from your house. Its hoses also don’t carry sound as well as metal air conditioner ducts would. Mini-Split vs. Central Air: Conclusion Mini-split and central air conditioners are among the most popular types out there. Which one is best for you depends on factors such as budget and your home’s cooling needs. We hope this guide has been helpful in showing you what to consider. If you live in the Phoenix area and are still unsure, feel free to give us a call at American Home Water and Air. We’ve been in the HVAC business for more than 30 years and would be happy to lend you a hand! For more air conditioning, heating, and water filtration blogs, you can read these next articles on “How to Change Furnace Filters” and “How to Get Rid of Mold in Water Softener Brine Tank“. Frequently Asked Questions
How Much Power Does An Air Conditioner Use?

How much power does an air conditioner use? Knowing the answer to this question can help you in a number of ways. For example, you might be looking to predict costs before installing a new unit. Whatever the case, this guide will give you an idea of the energy usage associated with various types of air conditioners. How Much Power Does An Air Conditioner Use? Rough Numbers There are many variables that can impact your air conditioner’s energy efficiency. As such, calculations for your home may differ from estimates you’ll find online. While we’ll explore those factors in the next section, let’s first run through some general numbers. Predictably, these vary depending on what type of air conditioner you have. How Much Power Does A Central Air Conditioner Use? The average central air conditioner uses between 3000 and 3500 watts per hour during the warm month. Air conditioners in Phoenix and other very warm climates can run at that level for much of the year. If you’re running your central air conditioner on ‘fan only’ mode, however, energy usage drops to about 750 watts per hour. How Much Electricity Does A Portable Air Conditioner Use? Mid-sized portable air conditioners use an average of 2900 watts per hour. Particularly large units can exceed the electricity usage of even central air conditioners, expending about 4100 watts per hour. Check out this post to learn more about air conditioner sizes and how they’re measured. You can also read the guide on “How to use portable ac without window“. Window Air Conditioner Energy Usage A medium-sized window air conditioner uses 900 watts per hour. On the smaller side, you’ll find usage of about 500 watts per hour while larger units use 1440 watts. You can check out our article on “Window Unit vs Central Air Conditioner” for more information about window unit power consumption, also check out our guide on window AC insulation installation. Making Cents Of This Data Now, unless you’re looking to reduce carbon emissions, your primary concern when it comes to energy usage is probably not the nominal wattage statistics. Rather, you’re likely concerned about dollars and cents. In the state of Arizona, electricity costs an average of 12.8 cents per kilowatt-hour which is stems from the warm climate and poor air quality in Phoenix and other cities in Arizona. With this piece of information, calculating your energy costs is fairly easy. Simply divide your watt per hour estimate by 1000 and then multiply the result by 12.8 cents for every hour your air conditioner actually runs. That last part is important as air conditioners don’t run consistently for hours on end. Rather, AC cycles on and off as needed. Calculating the usage per hour your air conditioner is set to the ‘on’ position will give you an artificially-high number since most air conditioners run for cycles of 15 minutes as infrequently as twice hourly. All factors considered, Arizona residents spend an average of $400 annually on air conditioning. It is important to note that these average air conditioner energy consumption and energy costs are specific and therefore can affect the average electric bill in Arizona, for those who have air conditioning, heating or both. The exact numbers will differ depending on where you live. Numbers in states like Arizona, Nevada, and New Mexico are nearly double what people in cooler states pay, according to federal energy statistics. Factors That Affect Air Conditioner Electricity Usage Now that we’ve given you a general answer to the question “how much power does an air conditioner use,” let’s explore the more nuanced factors that can raise or lower those numbers. Your Air Conditioner’s Capacity Air conditioner capacity is, unsurprisingly, the biggest determinant of energy usage. Experts measure capacity based on British thermal units. Generally, you need about 20 BTUs per square foot, adjusted for your local climate and home’s conditions. The larger your home, the greater the cooling capacity required, and the more energy you’re going to subsequently spend. Your Air Conditioner’s Efficiency Rating Of course, not all air conditioners providing the appropriate number of BTUs will operate at the same efficiency. Air conditioners come with what’s known as a Seasonal Energy Efficiency Ratio (SEER) rating. It represents the ratio of cooling output per season divided by the number of watts used per hour. The higher your air conditioner’s SEER rating, the more efficient it will be. Federal regulations require a minimum SEER rating of 13 or 14 depending on your environment but you can find units with ratings as high as 25. Climate In regions like Arizona, you’re going to need a more powerful air conditioner than you would in, say, New York. Those additional BTUs will equate to greater energy usage. Another good idea would be to get a PRV to insure ensure safe operation of all plumbing equipment. Your Maintenance Routine At American Home Water and Air, we recommend having your air conditioner professionally serviced at least twice annually to keep it running at peak efficiency. In between professional services, however, there’s something very important you need to do on your own: change or clean your filters. You might be surprised at how quickly dirt and debris can clog up your filters and cause airflow issues. If your air conditioner’s filters are reusable, check out this post for some tips on cleaning them monthly. Disposable filters, meanwhile, should be replaced every month. Temperature Settings One simple way to improve air conditioner efficiency is by maintaining consistent temperature settings throughout the day. Some manufacturers recommend keeping the unit set to 75 degrees, which is often the default temperature. Setting your air conditioner lower or altering its temperature throughout the day can lead to higher energy usage. Insulation A properly-insulated home makes your air conditioner’s job much easier by not allowing cold air to escape. Pay special attention to your insulation if you live in an older home as these tend to be subpar in this department. How Much Power Does My
How To Hide Your Air Conditioner Outside & Inside: 20 Creative Tricks
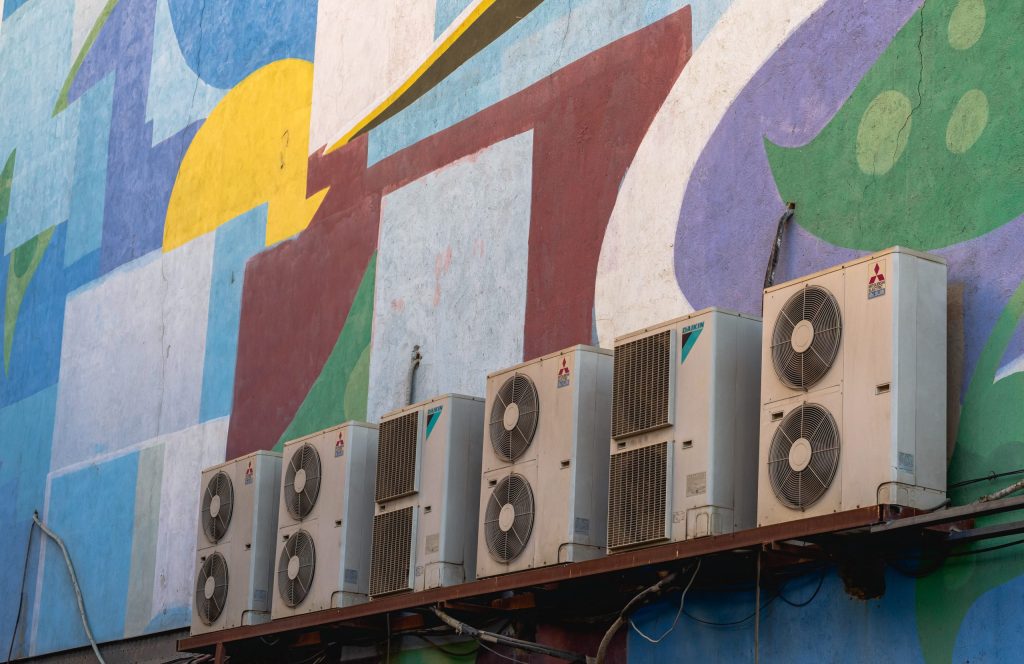
In many parts of the United States, you simply can’t live without an air conditioner and is well water safe to drink? Residents experience all sorts of troubles on a daily basis. Truth told, however, they can be somewhat of an eyesore, particularly if you’ve carefully crafted other aspects of your home’s exterior design. In this post, we’ll give you some tips on how to hide an air conditioner unit outside and how to hide ductless mini split and other AC systems inside the house. How To Hide An Air Conditioner Unit Outside: The Basics Before we discuss the clever disguises you can cloak your air conditioner behind, there are some caveats worth mentioning. First, your air conditioner’s compressor requires no less than six inches of clearance on one side and one foot on the remaining sides. Some experts recommend going with two feet of clearance. Keep this in mind when creating your disguise’s dimensions. No matter what type of air conditioner you have, the compressor almost certainly resides in the compartment you’re looking to hide – the exterior cabinet. You should also remember that this cabinet houses important components that will need servicing at least twice annually. A good disguise is one that doesn’t prevent you or your technician from performing this work. Here’s one last thing to keep in mind. Ideally, you shouldn’t make any attempt to cover your air conditioner. Technically speaking, it won’t be as efficient. If you cover it too tightly, the air conditioner may even harbor excess moisture. If you can live with an exposed air conditioner, great. If not, here are some camouflage ideas. How To Hide Your Air Conditioner Unit First, we’ll take a look at 13 ideas for hiding your central or mini-split air conditioner. Then, we’ll discuss how to hide your window air conditioner outside. Central and Mini-Split Air Conditioners #1. Tall Shrubs Place shrubs along the most distracting side of your air conditioner. That should be whichever side faces the parts of your lawn or backyard that people see most often. Keep at least one other side free of any obstruction to allow easy access for servicing. Air conditioners in Phoenix can be hidden with more quirky native plants like cacti but some simple shrubs will do just fine if you live in cooler parts of the United States. #2. Iron Trellis An iron trellis won’t completely hide your air conditioner but it does solve several issues in one go. First, you can put your trellis a lot closer to the unit since it doesn’t inhibit airflows like shrubs or fences. Second, it’s very easy to move a trellis when you need to access the unit. A trellis will also add some flair to your backyard. You can hang some decorative elements like plants and birdhouses on it. #3. Large Ventilated Shed If your air conditioner sits near other components you want to hide (i.e. your water meter and other external plumbing), a large ventilated shed can hide them all. Look for something with substantial openings that will allow air to pass through easily. #4. Shutter Screen A shutter screen can help you hide your air conditioner unit while also imparting a cool shabby chic look. You can choose a vibrant color that makes your backyard ‘pop’ or go with a more rustic-looking hue that blends in. In either case, position your shutter screen in such a way that it can be opened (or removed entirely) when you need to access the air conditioner. #5. Basic Slat Fence Slat fences are another favorite when it comes to hiding an air conditioner unit outside. It’s very easy to make one over the course of a few hours on the weekend with a few supplies from your local home hardware store. #6. Lattice Fence If the slat design is a bit too basic for you, consider a lattice fence, which offers a bit more visual intrigue. You’ll probably want to purchase this type of fence rather than build it yourself unless you’re particularly crafty. #7. Smart Air Conditioner Screen A smart air conditioner screen has widely-spaced slats on one side to ensure proper airflow and easy access. Using this type of design, you can get away with a less-open front-facing side. #8. Willow Panels Willow panels are another type of screen you can use to hide your central air conditioner. A rustic charm helps them blend in with the natural elements in your backyard. They look especially nice alongside any shrubbery that might be to the rear of your air conditioner. #9. Create A Little ‘House’ If you want to get really creative, create a wooden ‘house’ to camouflage your air conditioning unit. Pro tip: build the house in such a way that you can lift it up and away from the air conditioner when it’s time for a service. This will be much more efficient than trying to build a door that opens to allow for access. #10. Use A Pallet Planter Unlike many of the other types of fencing we’ve mentioned so far, A pallet gives you enough space to actually plant some flowers and other vegetation to help further disguise your air conditioner. Paint the pallet some interesting colors if you don’t like the rustic look of its ‘raw’ form. #11. Cement Block Planter Wall Stack a few cement breezeblocks around your air conditioner and place plants (or other decorative elements) within the gaps. #12. Patio Paver Wall If you’re not a fan of woodwork, place patio paver stones around your air conditioning unit. You can keep it basic with a square arrangement or create something curved for a more interesting look. Maintaining good clearance around the unit is especially key here since you won’t be able to remove the stones once they’ve been cemented in place. #13. Potted Plants If you live in an area with a climate hospitable to keeping plants outside year-round, take advantage of it! The upside with potted plants is that you can