
Heating Troubleshooting Tips for Phoenix Homeowners
Why Heating Still Matters in the Desert Many people assume heating systems aren’t crucial in Phoenix because of the long, hot summers. But anyone who’s been through a chilly desert night knows temperatures can drop quickly after sunset. Even in a warm climate, heating systems still matter for year-round comfort. When winter arrives, a neglected system can leave you shivering and scrambling for help. That’s why understanding heating troubleshooting in Phoenix is so helpful—it lets you prepare before the cold air sneaks in. In desert climates, heating systems often sit unused for months. During that downtime, dust and debris collect, wires can loosen, and filters clog. When you finally turn the system on, it might not start properly or may blow weak or uneven air. A little routine maintenance and a quick checkup can prevent these headaches and help your system run smoothly when you need it. Ignoring your heating system affects more than comfort—it can raise energy bills and repair costs. A furnace that struggles to start or runs inefficiently wastes energy and wears out faster. Paying attention to early warning signs like weak airflow or odd smells lets you catch problems before they turn into expensive fixes. This article covers common Phoenix heating problems, simple troubleshooting steps, and expert tips to keep your system in good shape all year. Strange Noises: When Your Furnace is Talking Back If your furnace starts making odd sounds, it’s usually trying to tell you something. A soft hum is normal, but loud banging, screeching, or rattling often signals trouble. These noises can come from loose parts, worn belts, or a failing blower motor. Ignoring them can lead to bigger issues, so if you hear persistent noises, it’s smart to schedule an inspection. Many Phoenix homeowners complain that the furnace is making noise every time it turns on. Dust and sand from the desert often work their way into the system, throwing moving parts off balance and causing friction in the motor. Over time, that extra strain can wear components down faster than expected. Keeping vents clean and replacing filters regularly helps cut down on those problems. Sometimes, strange noises point to more serious issues like a cracked heat exchanger. This part is critical for safely heating your home. When it cracks, performance drops and safety risks can rise. Learning to recognize cracked heat exchanger symptoms helps you act quickly. Regular maintenance lets technicians spot these warning signs early and recommend repair or replacement before things get worse. Furnace Blowing Cold Air: Summer Confusion It’s frustrating when your furnace blows cold air instead of warm—especially during Phoenix’s mild winters or on a cool summer night. Many people think it’s an AC issue, but often it’s actually a heating problem. Common causes include incorrect thermostat settings, dirty filters, or ignition issues. Knowing these basics helps you handle minor Phoenix heating problems before they turn into major repairs. Before calling for service, check your thermostat. If it’s set to “cool” or “fan only,” the system will push unheated air through the vents. If the settings look right but the air is still cold, the blower motor or ignition system may be the culprit. In that case, you might try a safe reset using manufacturer instructions or a guide on how to reset a furnace blower motor. Sometimes a simple reset clears minor electrical glitches. Filters also make a big difference. A clogged filter restricts airflow, forces the system to work harder, and can even cause it to overheat and shut off. Replacing filters every few months keeps air moving and helps protect the equipment. If these quick checks don’t solve the problem, it’s best to call a local technician who understands desert-climate issues and can ensure everything’s working properly before colder nights arrive. Interesting Facts About Heating Troubleshooting in Phoenix Even in the desert, Phoenix heating systems need attention year-round. Many heaters fail on cool nights due to untended system issues that develop during months of disuse. Strange noises like banging or screeching can signal a loose blower motor or cracked heat exchanger. Dust from desert winds adds extra strain, making routine noise checks a smart habit. If your furnace blows cold air in summer, it might not be an AC problem. Incorrect thermostat settings, dirty filters, or a simple blower motor reset are often to blame. Pilot lights in dry climates often go out because dust interferes with sensors. Knowing how to safely relight them with a pilot light guide can prevent unnecessary service calls. Even in low humidity, furnaces can leak from clogged condensate lines. Regular checks help catch issues tied to common furnace leak causes. Dust and big temperature swings cause unique wear on heating units. Adding systems like HVAC zoning or air scrubbers can ease strain and improve comfort. Good insulation boosts heating efficiency. Many Phoenix homeowners benefit from better attic insulation to keep warmth in during winter and reduce cooling demand in summer. Pilot Light and Ignition Issues in Dry Climates Many people troubleshooting heating in Phoenix run into ignition problems linked to dry, dusty conditions. Fine dust coats key components like flame sensors and burners, interrupting the ignition process. When that happens, the furnace may click repeatedly without lighting or the pilot may go out soon after it starts. This often points to buildup or misalignment that keeps the flame from being detected correctly. Relighting a pilot light should always be done carefully. Following a clear, step-by-step guide—like this furnace lighting guide—helps you do it safely. If the pilot keeps going out, there may be a deeper issue with the thermocouple or gas supply. In Phoenix, dust and dryness can cause corrosion or loose fittings over time, so it’s worth having a pro take a look. When a furnace clicks but doesn’t turn on, as described in common ignition failure scenarios, calling a professional is usually the safest move. A technician can clean the ignition assembly, check gas flow, and make sure electrical connections are sound so the
Water Heater Leaks: Causes, Risks, and Solutions
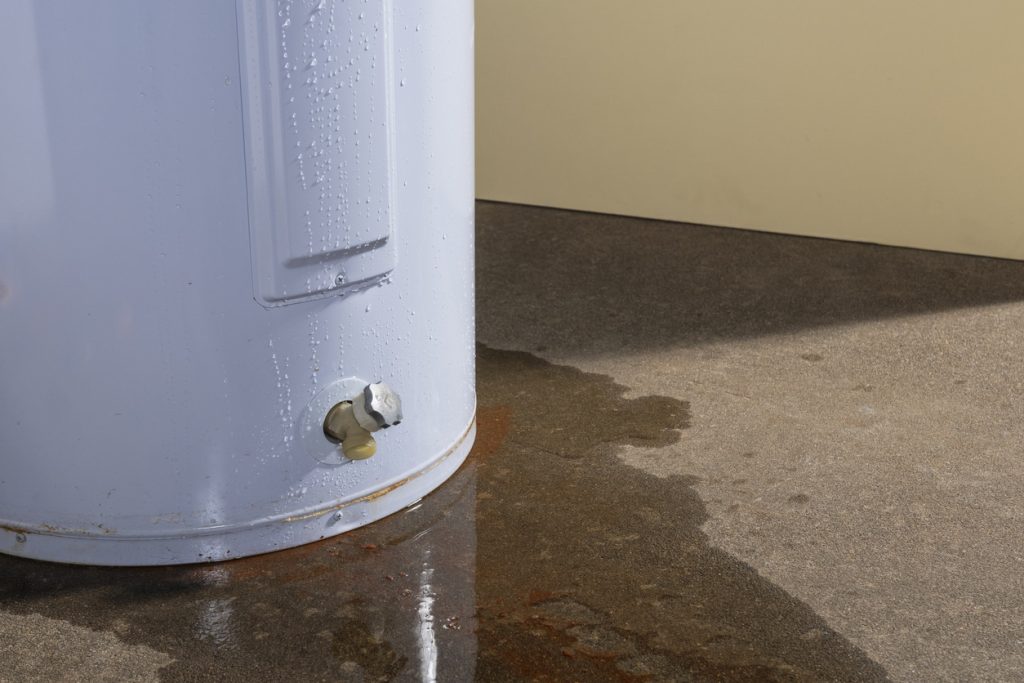
Why a Water Heater Leaking from Bottom Can’t Be Ignored Finding a puddle beneath your water heater can be an unsettling surprise. A water heater leaking from the bottom usually means something inside the unit is no longer working as it should. While it might look like a minor drip at first, ignoring it can lead to serious issues such as water damage, mold growth, or even complete system failure. Acting quickly helps protect your home, limit repairs, and keep everything running smoothly. When water collects under your heater, it may be coming from a loose drain valve, internal corrosion, or a failing tank. Each of these problems calls for a different solution. Understanding where the leak starts helps you decide whether the unit can be repaired or if it’s time for a replacement. Homeowners can follow the practical steps in this detailed guide on what to do when your water heater leaks to safely assess the situation before calling a professional. Leaks are especially common in older units that are nearing the end of their lifespan. Most water heaters last between eight and twelve years, depending on maintenance and local water quality. Factors like mineral buildup and internal wear can shorten that span. Learning how long water heaters typically last helps you plan and budget for replacement before major problems appear. This article explains what causes bottom leaks, what they mean for your system’s health, and how to choose the best next step for your home. Understanding the Cause: Why Is the Bottom of the Heater Leaking? When you notice the bottom of your heater leaking, it usually means water is escaping from an area that should be sealed. One of the most common reasons is sediment buildup inside the tank. Over time, minerals in the water—especially in hard-water areas like Phoenix—settle to the bottom. This sediment traps heat, causing the metal to overheat and weakening the tank lining, which can eventually crack or form small holes. Arizona’s tough water plays a big role, as outlined in this overview of Phoenix’s water hardness levels. Corrosion is another major cause of a leaking tank. Inside every water heater is an anode rod that attracts corrosive elements to protect the tank walls. Once this rod wears out and isn’t replaced, rust begins to attack the tank itself. When corrosion takes hold, leaks often appear at the bottom where heat and pressure are highest. In most cases, this type of internal damage can’t be safely repaired because it compromises the tank’s structural integrity. Sometimes, a bottom leak is only an illusion. A loose drain valve or a temperature and pressure relief valve can release small amounts of water that run down the sides of the tank and pool at its base. If you see moisture but can’t tell where it’s coming from, inspect the nearby valves and fittings to narrow down the source. For gas-powered units, problems can also tie back to ignition issues, such as those discussed in common reasons a pilot light keeps going out. Identifying the true source early helps you avoid unnecessary replacement and ensures your system runs safely. What a Leaking Tank Suggests About Your Water Heater’s Lifespan A leaking tank often signals that your water heater is near the end of its service life. When water starts escaping from the bottom of the tank, it usually means corrosion has eaten through the metal or long-term sediment buildup has caused permanent damage. Even a slow, small leak can quickly worsen under constant heat and pressure, eventually leading to a full system failure if it’s ignored. The average lifespan of a traditional tank-style water heater is eight to twelve years, though this can change based on maintenance and local water conditions. Homes with hard water often see shorter lifespans because minerals build up more quickly inside the tank. Regular flushing and inspections can help extend performance, but once rust appears or the lining fails, replacement is the only dependable fix. Understanding the average yearly cost of owning a water heater in Arizona can help you budget for maintenance and replacement before a leak becomes a crisis. When deciding whether to repair or replace a leaking unit, consider both its age and overall condition. A newer heater with a minor valve issue may only need a simple repair, while an older model showing rust or widespread wear likely needs full replacement. Newer units often bring better efficiency and safety features, making them a smart upgrade. If you’re exploring your options, different types of water heaters are available to meet various household needs and reduce future maintenance concerns. Knowing what a leak reveals about your heater’s lifespan helps you choose a solution that makes sense for both your comfort and your budget. Interesting Facts About a Water Heater Leaking from the Bottom When homeowners see water pooling beneath their heater, it’s usually a sign that something more serious is going on. Here are some key facts that explain what it might mean when your water heater starts leaking from the bottom. A water heater leaking from the bottom can be caused by a drain valve that didn’t close fully after flushing or maintenance, leading to a slow but steady leak over time. In hard water areas like Phoenix, mineral deposits collect at the base of the tank and can cause corrosion that eventually leads to leaks, as shown in Phoenix water hardness reports. When sediment builds up, it insulates the heating element, forcing the system to work harder and run hotter. This strain may shorten your unit’s lifespan, as discussed in average water heater longevity. If the tank itself is cracked or severely corroded, repair is rarely a long-term solution. In these cases, replacement often makes more sense, especially when comparing tank and tankless water heaters. Leaks at the bottom can also stem from internal rust caused by a worn-out anode rod. Regular checks, such as those in a water heater inspection checklist, can catch these issues early. Properly
Understanding Water Heater Leaks from the Bottom
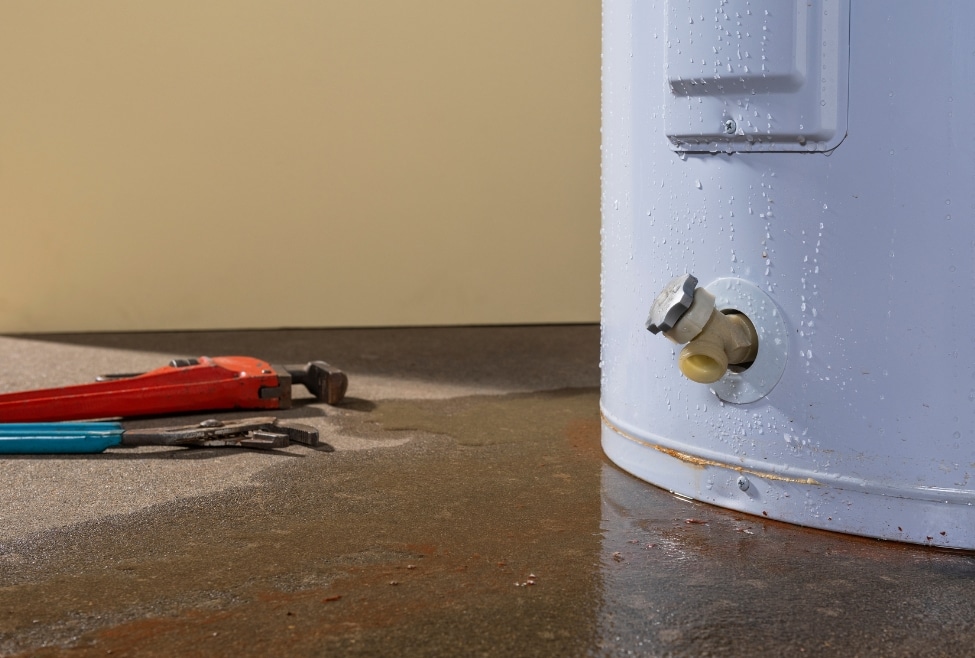
What It Means When Your Water Heater is Leaking from the Bottom A water heater leaking from bottom can be alarming for any homeowner. Seeing water pooling around the base of the unit often raises concerns about damage, repair costs, and whether it’s time for a replacement. While a small puddle might seem harmless, it can signal a problem that needs quick attention. Leaks at the bottom of a heater may come from several sources, and understanding where the water is coming from helps determine the right next step. When water collects around the base, it may come from a simple issue like condensation or something more serious, such as a leaking tank. If the tank itself has corroded, repairs may not be possible. However, if the leak is caused by a loose drain valve or excess pressure, a professional can often fix it. Acting quickly helps prevent water damage to floors, walls, and nearby belongings. It can also stop your energy bills from climbing due to an inefficient system working harder than it should. Homeowners can take a few steps to assess the situation safely. Turning off the power and water supply prevents further damage while waiting for help. For those unsure where to start, following these steps for a leaking water heater provides helpful guidance on what to do next. Still, every home and water heater setup is different, so it’s always best to have a licensed technician inspect the system. A professional can pinpoint whether the issue is minor or if replacement is the smarter investment. Acting early not only protects your home but also helps extend the life of your water heater. Common Warning Signs Before the Leak Starts Many people don’t know that their water heater can show signs of a leak before it happens. If you hear strange noises, such as popping or rumbling, it might mean there is dirt inside the tank. This dirt can make the tank get very hot and might cause it to break. If your water suddenly gets cold or changes from hot to warm in the shower, it could mean there’s a problem with the water heater. Smells are another early warning sign. A faint odor of sulfur or rotten eggs can suggest bacterial growth inside the tank. This issue often shows up long before you notice water on the floor. Learning more about why your water heater smells can help you understand what’s happening inside your system and when to call for maintenance. Ignoring these small signs can allow corrosion or pressure problems to develop unnoticed until a leak forms at the bottom of the heater. Regular inspections make a big difference in catching problems early. Checking for rust around fittings, moisture on connections, or small drips can prevent larger issues later. A simple routine based on a water heater inspection checklist helps homeowners stay on top of maintenance tasks that keep their systems running efficiently. As one certified technician at American Home Water and Air said, “Water heaters often give subtle warning signs long before a leak becomes visible.” Scheduling regular checkups ensures that you notice these signs early and gives you peace of mind knowing your system is in good shape. The Cause Behind the Bottom of the Heater Leaking When you notice the bottom of heater leaking, several possible causes could be at play. One common reason is a faulty drain valve. This small valve near the base allows you to flush out sediment, but over time, it can loosen or wear down, letting water escape even when closed tightly. Another cause may be corrosion inside the tank itself. As metal reacts with water and oxygen, rust forms, weakening the tank walls until small holes appear. Too much pressure inside a tank can cause leaks. If the temperature or pressure relief valve stops working, pressure can build up quickly. This added pressure can force water out through weak spots near the bottom of the tank. Sediment buildup also contributes to this problem. Over time, minerals settle to the bottom of the tank, trapping heat and increasing internal pressure. This combination of heat and sediment can lead to cracks or leaks in older systems. In areas like Arizona, hard water makes these problems more common. The high mineral content in local water supplies contributes to scale buildup, which shortens a water heater’s lifespan. Learning about Phoenix’s water hardness helps explain why sediment collects so quickly in tanks across the region. These minerals don’t just affect heating efficiency—they also speed up corrosion inside metal components. Over time, this buildup can lead to leaks that start small but grow worse if ignored. Understanding what’s in your local supply through insights on types of water contaminants found in Arizona water gives homeowners valuable context for why their systems wear down faster than expected. Because every home’s plumbing setup and water quality differ, consulting a professional ensures you get advice tailored to your specific situation and helps you make the best decision for your home. Important Facts About a Water Heater Leaking from the Bottom Understanding why your water heater leaks from the bottom can help you respond quickly and protect your home from unnecessary damage. Here are some important facts every homeowner should know about this common issue. A water heater leaking from the bottom often points to a problem with the drain valve or internal corrosion, both of which can worsen over time if ignored. Unusual sounds or a faint metallic odor may appear before visible leaks do, which is why reviewing a water heater inspection checklist regularly can prevent surprise breakdowns. Hard water in regions like Arizona can accelerate rust and sediment buildup inside the tank. Learning more about Phoenix water hardness helps explain why some heaters wear out faster than others. If the leak stems from a rusted tank, replacement is often the best option. Insights into how long water heaters last can help you plan for upgrades before major leaks occur. When the
Understanding Noisy Water Heaters: Causes and Solutions
Key Takeaway A hot water heater making a hissing noise often indicates steam escaping from pressure imbalances, frequently tied to sediment near the heating element. Regular checks of the temperature-pressure relief valve help prevent pressure-related sounds and protect the tank. Addressing hissing promptly maintains efficiency and safety. A hot water heater making hissing noise is more than a nuisance—it’s a maintenance signal. Popping, banging, and hissing usually trace back to mineral buildup, thermal expansion, or trapped air. Left alone, these issues chip away at efficiency and shorten service life. Daily demand adds up: showers, dishes, laundry, and cleaning. Minerals in hard water settle, fittings loosen, and valves age. Small sounds are often the first alert that the system needs attention. With a few practical steps—and an occasional professional check—most noisy behavior is preventable and fixable. Understanding expected service life also helps set priorities. Many homeowners look at how long water heaters last to plan maintenance and upgrades before noise becomes chronic. Below are the most common sounds, what they signal, and how to address them early. The Pop and Crackle: Understanding Popping Sounds Popping or crackling almost always points to sediment on the tank floor. As water heats, bubbles try to escape through that mineral layer, snapping and crackling on the way up. Hard-water regions see this sooner and more intensely. Flushing the tank clears the sediment layer and restores heat transfer. Temperature settings play a role, too—overheating accelerates mineral drop-out. A quick pass through water heater settings is often enough to settle day-to-day operation, while broader habits from water heating can trim energy use across the board. Banging Alerts: Troubleshooting Banging Noises Banging or knocking commonly comes from expanding pipes rubbing studs or hangers, or from movement at loose straps and fittings. Thermal expansion inside the tank can add to the commotion if the expansion tank is undersized or the relief path isn’t working cleanly. Tightening straps, isolating pipe contact, and verifying expansion capacity usually calm the system. If you also notice moisture at fittings or the base of the heater, walk through water heater leak troubleshooting and schedule a quick inspection to rule out wear at valves and unions. Interesting Facts About Noisy Water Heaters Noise is a useful diagnostic. These quick notes connect common sounds to maintenance wins: A hot water heater making hissing noise often points to steam escaping around mineral deposits; the temperature-pressure relief valve should open smoothly when needed. Popping is a sediment story—flushing and calibrated water heater settings usually quiet it. Hard water accelerates buildup; a water softener system slows the cycle and extends maintenance intervals. Banging can be pipe expansion or movement at loose supports; persistent banging after basic fixes deserves a closer look for leaks and pressure issues. Consistent upkeep supports the full service window; guidance in how long water heaters last lines up maintenance with age and usage. When problems stack up, trusted HVAC contractors in Phoenix can isolate root causes and restore quiet operation. Hissing Mysteries: Decoding Hissing Sounds Hissing is usually steam meeting cool surfaces or squeezing through mineral deposits near the heating element. It can also accompany relief events when pressure climbs. The temperature-pressure relief valve is designed to protect the system by venting safely; mineral film or corrosion interferes with that job. Regular testing and periodic replacement of worn components keep the safety path open. A quick seasonal check is often enough to confirm that the valve moves freely and reseats correctly. Broad plumbing habits matter, too—routine checks outlined in plumbing maintenance catch sticky valves, tired anode rods, and weak unions before they turn into noise and inefficiency. Sediment Solution: Preventive Maintenance Strategies Flushing once or twice a year clears the sediment layer, stabilizes temperatures, and cuts run time. In hard-water households, a pre-summer and pre-winter cadence works well; lighter-use homes can often stick to annual service. Upstream conditioning reduces the rate of buildup. A water softener system lowers calcium and magnesium, which means fewer minerals to settle in the tank and fewer noise triggers between flushes. Clean tanks heat evenly. Over a season, that shows up as steadier shower temps, fewer pops at start-up, and lower utility drift. Most owners see the quiet first—and the bill later. Professional Diagnosis: When to Call in the Experts If popping, banging, or hissing returns soon after a flush—or if you see damp fittings—bring in a technician. Heating elements, thermostats, and aging anode rods all contribute to noise when they’re past their prime. Pros verify pressure, flush thoroughly, and confirm that safety devices operate as designed. They can also compare tank and tankless options if age and repair history suggest it’s time for a change. A quick conversation with trusted HVAC contractors helps match capacity to household demand and space. Noisy Water Heater FAQs Why does my water heater make popping noises? Popping points to sediment trapping bubbles at the tank floor. Flushing restores heat transfer and quiets start-up. In hard-water regions like Arizona, pairing routine service with a water softener slows the buildup that causes repeat noise. Can a hissing noise indicate a serious issue? Hissing is often steam meeting cool surfaces or venting through deposits. Persistent hissing, moisture near the valve, or visible discharge deserves an immediate check. Routine plumbing maintenance keeps the temperature-pressure relief path clear and reliable. How often should I flush my water heater? Once or twice per year is typical. Heavy demand or very hard water may justify a six-month interval. A water softener reduces mineral load and often extends the time between flushes. Should I upgrade to a more efficient model? Frequent noise, rising bills, or age over 10 years are common upgrade triggers. Comparing options in tankless water heater vs tank helps match hot-water demand, space, and budget. Is some water heater noise normal? A low hum can be normal. Loud popping, sharp banging, whistling, or ongoing hissing usually means maintenance is due. If noise persists after a flush and strap adjustment, book a diagnostic with trusted HVAC contractors. Keeping
Troubleshooting Tips for When Your Faucet Runs Dry
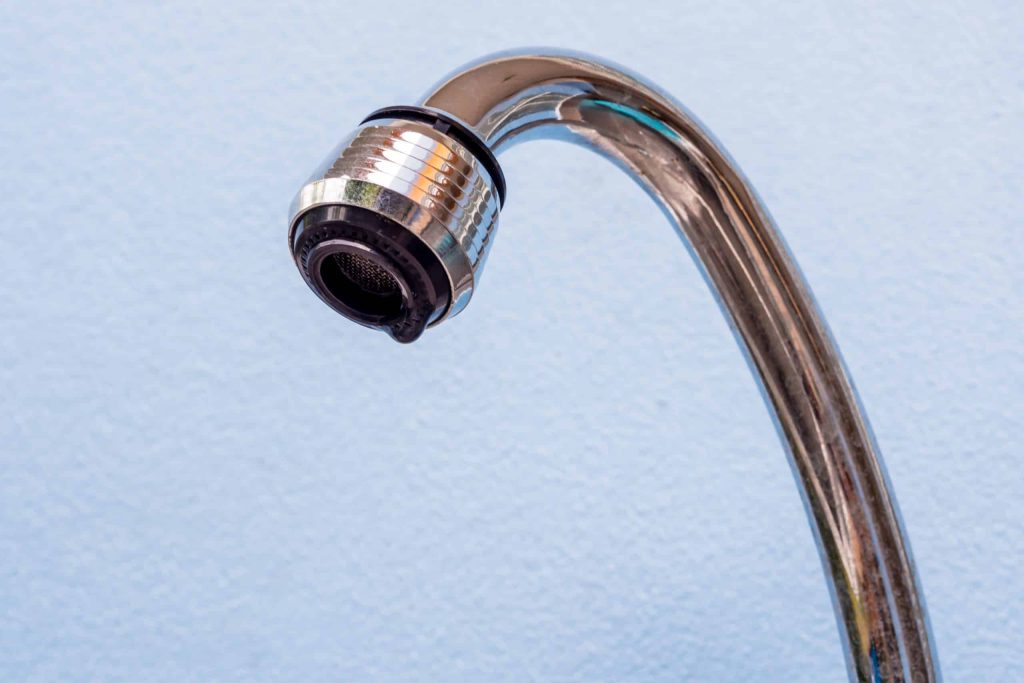
Key Takeaway: Water not coming out of a faucet often indicates issues within the plumbing system, such as blockages or leaks, or problems with the main water supply. Checking for blockages, ensuring the main water supply is stable, and inspecting the faucet components can help identify the root cause. If these steps do not resolve the issue, consulting a professional plumber may be necessary to address more complex problems. Troubleshooting Tips for When Your Faucet Runs Dry Imagine turning on your faucet, expecting a steady stream of water, only to be met with an unexpected silence. This frustrating scenario of water not coming out of the faucet can disrupt your daily routine and leave you scrambling for answers. Whether you’re preparing a meal, washing your hands, or simply quenching your thirst, the absence of water can be a significant inconvenience. Many homeowners face this issue at some point, and while it can be alarming, it’s often due to common and fixable problems. Understanding why there might be no water in the faucet can help you address the issue more effectively. In this article, we’ll explore potential reasons behind this problem and offer practical solutions to get your water flowing again. From plumbing system checks to evaluating your water supply, we’ll guide you through each step to help restore normalcy to your home. By identifying the root cause of why the faucet stopped working, you can take informed actions to resolve the problem. Whether it’s a simple fix or requires professional intervention, knowing what to look for can save you time and stress. Let’s dive into understanding the common causes and practical solutions for when no water comes out of your faucet. Identifying the Problem with Your Plumbing System When faced with no water coming out of the faucet, one of the first areas to investigate is your plumbing system. Blockages or leaks within the system can significantly impact water flow. If you notice low water pressure or hear unusual noises like gurgling or banging, these could be signs of underlying plumbing issues. Blockages often occur due to sediment buildup or foreign objects lodged in the pipes. Over time, minerals and debris can accumulate, obstructing the flow of water. Leaks, on the other hand, may result from worn-out seals or damaged pipes. Both scenarios can lead to a situation where there is no water in the faucet, disrupting your daily activities. Regular plumbing maintenance can help prevent these issues from escalating. If you’re unsure whether your plumbing system needs attention, consider checking for signs that you need plumbing maintenance. Identifying potential problems early can save you from more significant headaches down the road. If you’re experiencing persistent issues, consulting a professional plumber for tailored advice ensures that you have all the information you need to make a decision that is right for your specific needs. Checking the Water Supply If your faucet suddenly stops working, it might not be a plumbing issue at all. Sometimes, the main water supply to your home may be interrupted due to maintenance work or local outages. Checking with neighbors can provide clues if they are experiencing similar issues, indicating a broader supply problem. Municipal work or maintenance on water lines can temporarily cut off your water supply without prior notice. In such cases, contacting your local water utility company can provide information on any ongoing work in your area. Understanding where Arizona gets its water from can also offer insights into potential supply issues specific to your region. Before jumping to conclusions about faulty plumbing, always verify if there is a disruption in the main water supply. This simple check can save you time and effort in troubleshooting non-existent plumbing problems. If the issue persists after confirming that there is no municipal work affecting your area, it may be time to explore other possible causes within your home. Solving the Mystery: What to Do When No Water Comes Out of Your Faucet Water not coming out of a faucet can disrupt daily routines, indicating issues in the plumbing system or the main water supply. Plumbing maintenance can help identify these problems. Blockages or leaks often cause a lack of water flow. Low water pressure or strange noises could point to these issues. Using a plumbing enzyme cleaner may dissolve blockages. Checking the main water supply is crucial as maintenance work or local outages can interrupt water flow. Learn more about water sources by considering where Arizona gets its water. Clogged pipes often result from sediment buildup, stopping water flow. Routine inspections and cleaning can prevent future blockages. Faucet-specific problems like faulty valves or aerators can also cause issues. Understanding the basics of how house plumbing systems work can aid in troubleshooting. Sometimes, home appliances linked to water supply, such as water heaters, can affect water flow. Regular checks on appliances like water heaters ensure they operate correctly. Addressing Clogged Pipes Clogged pipes can significantly impact water flow, leading to scenarios where there is no water in the faucet. Sediment buildup is a common culprit, as minerals and debris accumulate over time, narrowing the pipe’s diameter and obstructing water passage. This can cause the faucet to stop working entirely, leaving homeowners puzzled and inconvenienced. To tackle this issue, consider using a plumbing enzyme cleaner. These cleaners use natural enzymes to break down organic material within pipes, effectively dissolving blockages. Regular use can help maintain clear pipes, ensuring smooth water flow and reducing the risk of clogs. However, if the problem persists despite these efforts, it may indicate a more severe blockage or a different underlying issue. In such cases, consulting a professional plumber can provide the necessary expertise to diagnose and resolve the problem efficiently. Evaluating Faucet Issues When water not coming out of the faucet becomes an issue, the faucet itself might be the source of the problem. Common issues include faulty valves or clogged aerators, which can impede water flow. These components can wear out or become blocked with mineral deposits over time.
Understanding Tankless Water Heater Cost Factors
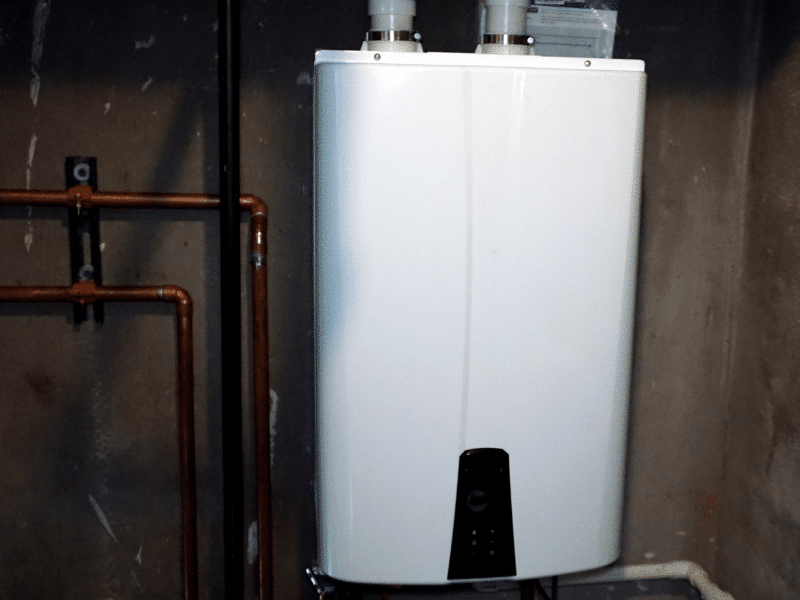
Making the switch to a tankless water heater is an excellent choice for homeowners upgrading their heating systems. These innovative on-demand water heaters deliver endless hot water, reduce energy costs, and free up space in your home. However, the cost of tankless water heater systems varies significantly based on factors such as unit type, installation complexity, flow rate, and energy efficiency. Understanding the common variables can help you budget effectively and choose the best system. In this guide, we’ll break down the cost of a tankless water heater, explore key pricing factors, and explain why this upgrade is a worthwhile investment for long-term energy savings and home comfort. The Basic Costs of a Tankless Water Heater When budgeting for a tankless water heater, it’s essential to account for both the upfront purchase price and the labor required for installation. Below is a breakdown of the average cost of different systems and potential additional expenses you might encounter. Cost Range for Different Types of Tankless Water Heaters Electric Tankless Water Heaters Gas-Powered Tankless Water Heaters Solar Tankless Water Heaters Labor and Installation Expenses Breakdown Professional Labor Costs Installation Variables Factors Influencing the Cost of Tankless Water Heaters Several factors affect the total cost of installing a tankless water heater, from the type of system you choose to the complexity of the installation. Understanding these variables can help you make an informed decision and estimate your budget accurately. 1. Type of Tankless Water Heater The type of system you choose will heavily impact the price. Electric tankless water heaters are typically more affordable upfront, with prices ranging from $230 to $800. At the same time, gas models can cost up to $2,300 due to the need for venting and gas line modifications. Solar heaters are an eco-friendly option for homes in sunny climates, though they come with a higher price tag, often exceeding $5,000. 2. Size and Capacity The size of your system is measured by gallons per minute (GPM), which determines how much hot water it can produce at once. Smaller units with a 2–5 GPM output are ideal for small households, while larger homes may require up to 10 GPM units. Systems with higher capacity typically cost more, but they ensure consistent hot water on demand for every tap and shower in your home. 3. Efficiency and Technology Modern high-efficiency heaters, like condensing tankless systems, are designed to reduce energy consumption by capturing and reusing heat. These systems are more expensive upfront but deliver long-term savings. In contrast, non-condensing units have lower initial costs but may require additional venting, which adds to the installation price. 4. Installation Complexity The labor required to install a tankless heater depends on your home’s infrastructure. Homes with existing gas lines or electrical systems suited for a new unit will incur lower costs. However, the price can rise significantly if modifications like plumbing upgrades or electrical rewiring are needed. Additional Costs to Keep in Mind Installing a tankless heater often involves additional expenses. Permit fees, vent kits, and hardware can add an extra $40 to $280 to your project. Moreover, some systems may require piping upgrades or insulation to maximize efficiency. Regular water heater maintenance, such as descaling, also helps extend the unit’s lifespan. This ensures you get the most value from your investment and avoids premature water heater replacement. Long-Term Savings with Tankless Water Heaters Although tankless water heaters have higher upfront costs than traditional storage tanks, they deliver substantial savings over time: Is a Tankless Water Heater Worth the Cost? A tankless heater is an excellent investment for homeowners who prioritize energy savings, long-term reliability, and eco-friendly water heating. While the upfront cost is higher, the benefits—including reduced energy bills, lower operating costs, consistent performance, and space-saving design—make it a valuable upgrade. With potential tax credits, energy savings, and a lifespan exceeding 20 years, tankless systems provide both immediate and long-term financial benefits. Choosing the Right Tankless Water Heater When selecting a tankless system, consider: Why Consult a Professional? A licensed plumber can: By partnering with trusted professionals who specialize in tankless water heater installation and repair, you’ll enjoy peace of mind knowing your system is correctly sized, safely installed, and optimized for maximum savings and comfort. Experience the Best with American Home Water & Air With over 35 years of experience, American Home Water & Air is Phoenix’s trusted heating, cooling, and plumbing solutions provider. We specialize in tankless water heater installation, offering transparent pricing, expert guidance, and tailored solutions for your home. Our licensed technicians ensure every system is installed to the highest standards, providing reliable hot water and long-term savings.Whether you’re upgrading to an energy-efficient water heater or need a fast and professional installation, our HVAC Contractor in Scottsdale, Phoenix & Gilbert are here to help. Contact American Home Water & Air today to schedule your consultation and discover why homeowners in Phoenix trust us for all their plumbing needs.
Where is My Water Pressure Regulator?
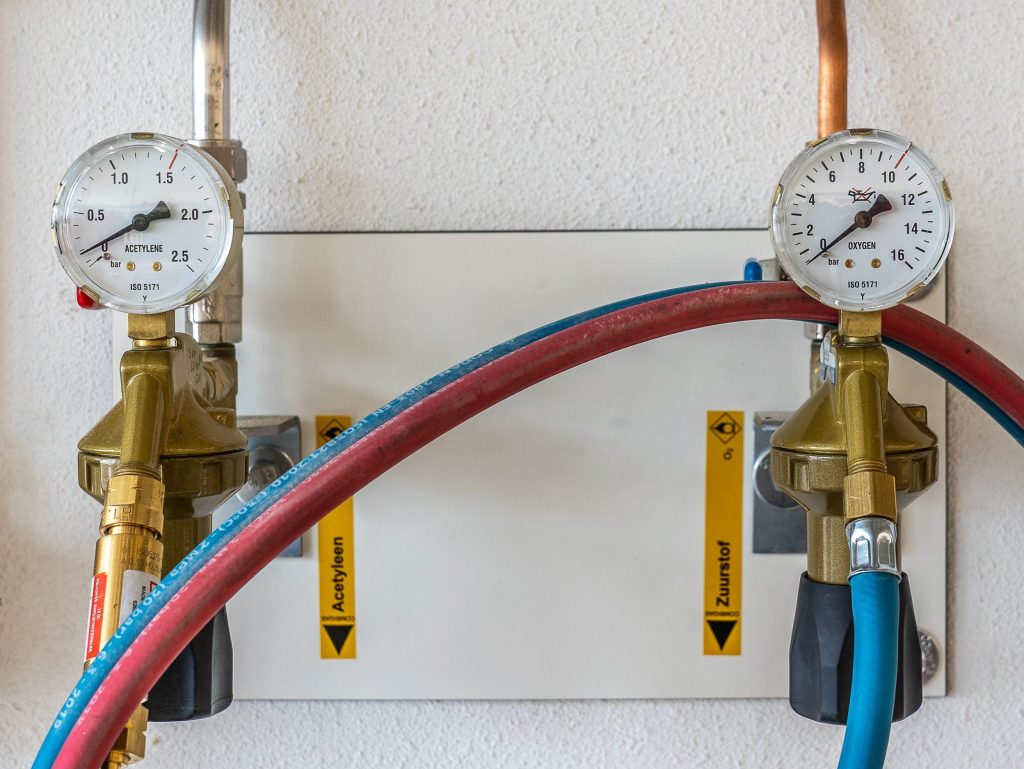
Water entering your home at high pressure can damage your pipes and fixtures. Over time, this added pressure on your system can result in leaks or burst pipes. For this reason, knowing the water pressure regulator’s location is crucial. Being able to answer the question of “where is my water pressure regulator” can be the difference in whether additional damage is sustained in the event of a pressure problem. This guide is intended to help you understand what your water pressure regulator does, how to find it and what it can mean for the well-being of your plumbing system. Where is the Water Pressure Regulator Located? The standard residential water pressure regulator location is usually outside your home, just past the main shut-off valve for your water supply. If you are familiar with your shut-off valve, you should have no problem resolving the question, “where is my water pressure regulator?” We can help you with that if you are unsure where to look. Let’s first discuss a bit more about what your water pressure regulator does. What is the Purpose of a Water Pressure Regulator? The water pressure regulator is a part of your plumbing system. The water pressure regulator or pressure reducing valve is installed on your incoming water supply line to regulate the water pressure flowing through your home’s pipes. You can recognize it as a bell-shaped component attached to your exterior pipes. This device is necessary because many water supplies leave the city’s pipes at a higher pressure than you want to flood through the incoming water lines of your home. With a water pressure regulator installed, you can adjust this pressure if you find it is higher than you would like. Doing so can increase the lifespan of the incoming pipes that make up a part of your home plumbing system. So, we must first answer the question: Where is my water pressure regulator? Where Is My Water Pressure Regulator? Have you ever had a leak or a burst pipe and had to turn off your water supply while you sought repairs? If so, then you should already have an idea of where to locate your water pressure regulator. Wherever you went to turn off the water is also where you will find the answer to where you can locate your water pressure regulator. The valve you turned to shut off your water is your main shut-off valve. Once you know where that is located, you should be able to see the water pressure regulator near it on the same pipe. Though this is usually located outdoors, in some instances, you might find it located in a basement, garage or other indoor water pressure regulator location due to unusual construction. Otherwise, you should see it outdoors, near the front side of your home. Another option is that it may be inside the underground area where your water cut-off valve is located. Look for the small plate resembling a maintenance hole cover. You should find it between where the city or county supply lines run alongside the street and the pipes leading into your home. If all else fails, consult any home inspection reports you may have from the purchase of your house. This item would have been included in your home inspector’s evaluation of your plumbing system. If you’ve tried all of these things and still aren’t sure where to find your residential water pressure regulator, it might be time to call a licensed plumber like American Home Water and Air to help locate it. Why Do I Need a Water Pressure Regulator? Preventative care is one of the most important things you can do to maintain the good order of your home operating systems. A water pressure regulator will keep water from entering your home with too much pressure, creating extra wear and tear that can cause damage and reduce its longevity, but there are other benefits to be found: Do All Homes Have a Water Pressure Regulator? No, and in some cases, you may not need one. Certain municipal supplies regulate their water pressure safely, but if that pressure runs above 80 psi, you’ll want to protect your plumbing system by installing one. Phoenix considers anything between 40 and 100 psi acceptable, so you may be best served by having one installed for when the pressure reaches the high end of the range. If you are unsure about the pressure of the water entering your home, it is easy to determine this by using a water pressure gauge. Checking it at different times of the day will give you a range, as most municipal water supplies vary based on peak usage times in your area. How Long Will a Water Pressure Regulator Last? A properly installed water pressure regulator should last ten to fifteen years. No maintenance is required during its lifespan, so there isn’t much you can do to extend how long it lasts. There’s not much active maintenance that can go into one of these, so it is difficult to extend its lifespan. However, it is vital to have one as it can help save your plumbing system from preventable damage caused by high water pressure. Hopefully, this guide has given the information you need about where to find your water pressure regulator and why having one is necessary. If you need more information, you can always contact American Home Water and Air experts to discuss your concerns or get answers to any remaining questions.
Do You Need a Hot Water Heater Expansion Tank?
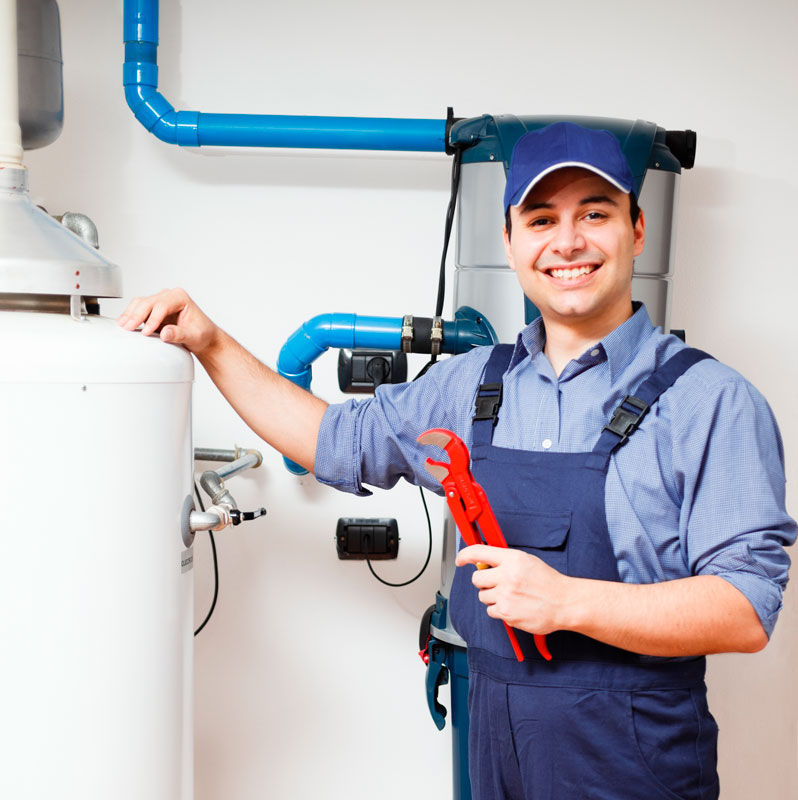
As water is heated, it expands and causes pressure to build up. In earlier water heater systems, this pressure forced the water in the tank to drain into its original water supply source. Modern plumbing systems don’t allow this kind of backflow. A check valve keeps this kind of wastewater from within your household from backing up into the water supply and potentially fouling the incoming water supply. Read on to learn more, or contact an American Home Water and Air expert to discuss your needs further. What Does a Hot Water Heater Expansion Tank Do? An expansion tank is a smaller tank that attaches to the water supply pipe that feeds water to your water heater. This additional tank provides a place for the thermal expansion of water to take place so that the pressure doesn’t become excessive, damaging fixture valves, supply line joints, or even the water heater. How Do I Know if I Need a Hot Water Heater Expansion Tank? The majority of households have a check valve on their main water supply line, but building requirements didn’t previously require expansion tanks. If your plumbing is designed in such a way that pressure build-up is not an issue for you, you may not need an expansion tank. However, if you are having issues with the washers in your plumbing fixtures requiring increasingly frequent replacement due to damage or if your water heater is leaking around the relief valve, an expansion tank might well be something that will save you money and headaches in the long run. It is far better to take preventative measures now than to incur the cost of expensive repairs once the damage is done. What If I Don’t Install a Hot Water Heater Expansion Tank? Choosing not to install an expansion tank for a hot water heater is certainly up to each homeowner to decide. Before you make your decision, you should fully understand what is happening in your water heater. Think of it as a pressure cooker. Most of us these days have never used one, but plenty of us are familiar with them or have seen our parents or grandparents use one. As the contents of the cooker heat up, the pressure builds. The small gauge on top of the cooker lets it escape so that it does its job inside the cooking but not so much that the cooker explodes. If your water heater has this kind of pressure building up inside and there is a valve preventing the excess pressure from pushing some water out of the way to make space, then it is trapped there. A water heater doesn’t expand, so where will it go? Let’s take a 50-gallon water heater as an example. If you heat this amount of water to 120 degrees Fahrenheit, it will expand to about 52 gallons. With nowhere to go, it puts more pressure on the surrounding hardware, causing more wear and tear and possible failures. Now, like the pressure cooker, your water heater has a pressure-relief valve. If the pressure gets so high that it is in danger of causing a water heater explosion, this relief valve will kick in to offset some of the pressure. However, there can still be plenty of damage done by this assault from the water pressure against the unyielding tank within your water heater. Over time, it will get worse, causing issues that you will eventually have to address with repairs or replacements. How Much Space is Needed For a Water Heater Expansion Tank? Because this addition to your water heater is nothing more than an empty chamber that gives expanding water a place to go, it doesn’t take up much space at all. As the expanded water flows toward the top of the water heater, it will flow into an insulated pipe leading to the expansion tank which needs to be only large enough to accommodate the excess. It is unlikely that your expansion tank will be any larger than a propane canister like the ones you hook to your outdoor barbecue grill. It is insulated to keep the water that enters hot. Any water that collects there during the pressure build-up will drop back into the water heater once the pressure subsides. Most expansion tanks are installed on top of the existing water heater, so they will take up no additional floor space. Is a Hot Water Heater Expansion Tank Legally Required? No, not currently. However, if you live in a home with a closed water system where a check valve prevents backflow, then you should definitely install an expansion tank to prevent damage. For those living in older homes with open plumbing systems where no such valve exists, the pressure is relieved by flowing back to the supply lines. So, you are at a much greater risk for damage and failures if you are living in a home with a closed system. Your first step toward deciding what’s best for you (and your plumbing) is to know which system you have. If you aren’t sure, it is wise to contact a professional for assistance. How Do I Get a Hot Water Heater Expansion Tank? If you think you need a hot water heater expansion tank, the best thing to do is contact a professional plumber for an evaluation and estimate. A licensed plumbing expert can check your home’s water pressure levels and examine your water heater to determine if you could benefit from adding an expansion tank based on your unique circumstances. How Much Will a Hot Water Heater Expansion Tank Cost? The cost of an expansion tank, including installation, will run you somewhere between $100 and $400 depending on what kind of water heater you have and what must be done to accommodate the added tank. If you are living in a home with high water pressure, this cost may well be nominal compared to what it may cost overall to address repeated repairs or a complete failure. If you’d
Water Heater Inspection Checklist: What to Look Out For
Many homeowners don’t give their water heater a second thought unless it stops working, but you can make sure this never happens in the first place with a hot water heater inspection and ongoing water heater maintenance. Unless your water heater is brand new, the water heater inspection cost you incur will likely pay for itself in the form of money saved on costly future repairs. AHWA is always ready to perform a water heater inspection for you at your convenience. Of course, you can also do a simple water heater inspection yourself. Let’s talk about the things you should check to make sure your water heater works at peak efficiency and enjoys a long life cycle. We’ll also provide you with a water heater inspection checklist to follow so you can ensure you’re checking the right things. How Often Does a Water Heater Inspection Need to Be Done? You can do a spot check on your water heater each time you frequent the room or utility closet it is in. Even a glance can reveal any problems that may be easily visible. You might hear unfamiliar noises or spot leaks this way. However, it is far better to schedule a more dedicated water inspection once every few months, whether you choose to do this yourself or have it done by a professional as part of a larger inspection periodically. What Should You Look for During a Water Heater Inspection? Many things can go wrong with your water heater. Look for the following when you perform your inspection. Aside from the physical condition of your water heater, you may note some other things that are an indication that all is not well. Any of these things might be an indication of trouble and should be addressed immediately. If you are concerned that there are problems with your water heater, a plumbing expert from AHWA can help you resolve your issue before it gets out of hand. No Idea Where to Start? Try This Handy Maintenance Checklist. Before starting your water heater inspection, you should review your appliance’s manual to familiarize yourself with the operations. Secondly, be aware that this appliance contains very hot water and electrical components. Do not attempt to repair any issues you find without killing the power to it completely by closing the circuit at the breaker box. Professional Maintenance Requirements While there are many things you can note during DIY water heater inspections, you’ll want to turn to the professionals if you are finding problems. While there are some repairs you can make yourself, it is not recommended unless you are completely comfortable with your ability to handle the inner components of your water heater. A professional plumber can do the following: With routine water heater inspections and maintenance, your water heater can provide you with headache-free hot water for years to come. Without them, you might well find yourself facing unexpected repairs or a complete failure that requires a full replacement. Whether you choose to do a simple review yourself or call in a professional for more intense maintenance is up to you, but if you find any signs of trouble, you can contact American Home Water and Air to clear up the problem right away or provide any other services such as installing tankless water heaters in Phoenix.
Troubleshooting Your Navien Tankless Water Heater Problems
When it comes to tankless water heaters, Navien is one of the best choices on the market today for your hot water needs. This powerhouse brand was built to provide you with an unlimited hot water supply on demand with minimal maintenance required. Its long life expectancy and energy efficiency make it top-notch among tankless water heaters. While you won’t find yourself running into problems often, they can occur. Here is a handy guide for dealing with Navien tankless water heater problems that can happen. Let’s explore some of the problems and their solutions you’ll find handy when troubleshooting a Navien tankless water heater. Navien Flow Sensor Problems If you are not getting hot water from your Navien tankless water heater, the flow sensor may not be working correctly. Open and close the pressure relief valve found near the heater’s outlet, as this usually corrects the problem. If not, contact us to service the sensor. Older models can experience flow sensor issues if sensors become corroded over time, causing the heater to shut down. This can be corrected by removing the clamps from the sensor and pulling it out to clean it, but the problem will likely recur in time. A better option is to replace the sensor with a corrosion-free stainless steel version. You can also install a filter in the water inlet ahead of the heater to remove water impurities. If your heater has aged and you continue to have issues with your tankless water heater flow sensor not working, you might be better served by a replacement model. What Does My Navien Tankless Water Heater Error Code Mean? Much of your Navien tankless water heater troubleshooting is made simple by the error codes built into the unit’s motherboard to help you diagnose Navien tankless water heater problems. Here is a quick guide to some of the more common codes. Fix: Ensure the main gas supply valve is open. Fix: Check the electrical cord to be sure it is correctly grounded. Fix: Unplug the unit. Remove the intake filter and wash it beneath running water. Let it dry and then put it back into place before restarting the unit. Fix: Check the electrical cord to make sure it is properly grounded. Fix: Refer to your manual for instruction or contact a plumber. For most other codes found when troubleshooting your Navien tankless water heater problems, you’ll likely need to contact a service technician to assist you. Not to worry – we’re always just a call away! Other Issues with Your Navien Tankless Water Heater For older models, you may experience other problems that are rare in newer models but can happen. Here are some of the more usual issues that can be addressed by a qualified plumber or Navien technician: Cracked Heat Exchanger If your heat exchanger has begun to crack, it will create a gap that allows toxic gasses to escape. This cannot be fixed. You will need to upgrade to a newer Navien tankless water heater. While this rarely happens while a unit is still in warranty, be sure to check if you think you might be covered and contact the manufacturer directly. Control Board Failure If your Navien tankless water heater has begun to shut on and off without explanation, it might be a sign that the control board is failing. Your error code may display 003, which usually means the igniter is malfunctioning, but if no problem is found there, it may be because the motherboard operating it is having issues. Have your unit evaluated by professionals like AHWA that can replace your control board or make other recommendations. Navien tankless water heater is noisy If you continually hear odd sounds coming from your unit, there can be several causes for this issue. You’ll need to contact a professional to assist you in correcting the problem. If your unit is under warranty, failure to correct the problem could result in voiding coverage. Recirculating pump is not working Make sure the heater is set to recirculation mode. Your user manual can help you locate the hot button you’ll need to press to activate hot water recirculation. If this does not correct the issue, consult a professional to ensure it was installed correctly. Water Isn’t Staying Hot There can be several causes for a loss of hot water. Here are some of the most common ones. Here are some of the leading causes. For all other concerns or problems, you should consult your user manual or contact a repairman to assess the issue and recommend repairs.