
Residential Pipe Sizing Chart Guide
Your home plumbing system includes all the pipes installed between the main water line that provides water from the city or county and the entrance to the sewage system that carries away your waste. When installing or repairing your plumbing system, you will want to assure you use the appropriate water pipe sizing by consulting with a standard water pipe sizing chart. There are several factors that influence the decision of what size pipe to use. In addition to a standard pipe sizing chart, builders employ local plumbing codes, water pressure factors, and your building structure to determine what water pipe sizes to use. These uniform selections will make it easier for you to locate the correct replacement on a pipe sizing chart when replacing pipes. What Size Pipe Do I Need? If you are replacing a pipe in your home, the easiest solution is to simply purchase the same size pipe and reinstall it. However, if you are adding something new, you’ll need to know what is the best size pipe to use. Before you start a new project, you should first consider the water pressure in your home. Your local building code can provide you with what is called a fixture unit that shows you the cubic feet of water used per minute of any given appliance or fixture. You can use this information to determine what type and size pipe is best for your project. If your project is on a larger scale than just a single appliance, you’ll want to consult a pipe sizing chart, but first, you’ll want to determine the fixture unit ratings discussed above and estimate the length of the pipes needed to supply them. Generally speaking, the main pipeline from the street to your home is either ¾ or 1 inch in diameter. Supply pipes are ¾ inch in diameter and individual components are ½ inch in diameter. Your water pressure decreases by about a half pound per square inch for every foot a pipe extends above your water supply, which is especially important when running new lines to an upper-level area of your home. What this means is that pipes being run to second or third floors might need to be larger than what you’d use on a ground floor or in a basement. Once again, you should consult with your local building code’s pipe sizing chart for the proper pipe sizes to use or contact a plumbing expert, but the chart below will give you some idea of the usual pipe sizes. Fixture or Appliance Cold Water Pipe Hot Water Pipe Toilet 3/8” Bathtub ½” ½” Bathroom Sink 3/8” 3/8” Shower ½” ½” Kitchen Sink ½” ½” Dishwasher 3/8” to ½” 3/8” to ½” Washing Machine ½” ½” Laundry Sink 1/2” ½” Water Heater ¾” What Sort of Pipe Should I Use? PEX This non-recyclable pipe is an inexpensive cross-linked polyethylene pipe used to supply water. It is rigid enough to handle water pressure but flexible enough to snake through walls, ceilings, and crawlspaces. Because of its flexibility, it must be well supported. It must be installed properly since any leaks can be disastrous to walls or ceilings. It is color-coded, making it easy to determine whether a pipe is carrying hot (red) or cold (blue) water. It can be cut easily and joined with copper pipe where needed. PVC This inexpensive polyvinyl chloride piping is used for drain or vent lines. It is lighter to work with than the galvanized steel pipe used before it gained popularity. It is easy to cut and install using glue solvents, which means that you’ll have to cut and replace those sections if repairs are needed later. It must be well supported with all fittings installed accurately and tested. Diameters are marked on the outer surface of the pipe for ease of selection. This pipe can degrade in sunlight, so be sure it has been stored properly before purchase and covered well during installation. Copper Rigid copper pipe is usually used for water supply lines in the home. It is easily cut with a hacksaw or a tube cutter designed for the purpose. This pipe is connected by soldering it, which means you will require expertise in that area and careful safety must be observed. However, copper handles heat exceptionally and endures under pressure. Copper is more expensive, but is recyclable and holds value as scrap. ABS Acrylonitrile butadiene styrene pipe is most often used for vents and drain lines. It looks very similar to PVC pipe, but it is black and stronger than PVC. It is an excellent choice for exterior underground use and has a high tolerance for heat. It must be properly installed and supported and can only be used on the exterior of the home for non-potable water. Because it is thinner and highly flexible, it can be prone to breakage more so than other options. Galvanized Steel and Cast Iron If you have an older home, you might find one of these two types of pipes in places. Galvanized steel pipe was used for years as multi-purpose piping for drains, supply lines to tankless water heaters in Phoenix, gas lines, and other purposes. The ends of this type of pipe are threaded and screwed together using fittings. Cast iron pipe was used for sewers and drains. It can still be found in some homes and continues to be used in commercial or large-scale residential buildings. It is heavy and hard to cut, plus it will eventually rust through over time, though it will take quite some time depending on the environment in which it is used. It is usually replaced by ABS if it needs to be upgraded. Armed with this information, you should be able to at least begin planning your project. With the right tools, you can complete the addition of any new appliance or fixture yourself. However, you might be better served in the long run by having a quality plumber perform
Sewer Smell in the Bathroom? 6 Easy Fixes
If you’ve ever dealt with a recurring or persistent odor emanating from your bathroom, you may have asked the same question most of us have asked at some point: Why does my bathroom smell like sewage? There can be several reasons for that sewer smell in bathroom spaces. While most of us immediately think our toilet smells like a sewer because of their function, it could just as well be any other fixture with an exit into your drainage system or several of them. That means that, in addition to your toilet, you’ll want to consider your shower and sink drains. In most instances, you can take care of the problem yourself or do a toilet repair. If you try all of these and your bathroom still smells like sewage, try some simple remedies before turning to a plumber to investigate possible more serious causes. How does the bathroom smell? If it has the odor of spoiled eggs, you may have bacteria in the water that has backed up from the drain system. A gassy sewer smell in bathroom spaces could mean there’s an issue with the p-trap on your sink, which could be affecting your toilet. A toilet that smells like urine might mean the wax ring sealing it around the floor drain is leaking. Let’s look at the solution for each of these issues, as well as some other simple solutions. 1.Your P-trap is empty If your bathroom has a gassy smell, your sink drain may be the culprit. The p-trap beneath your sink is that little u-shaped section of the drainage pipe. This section holds a small amount of water and sometimes that water can evaporate. With no water in the trap to protect from sewage smells from rising back up, your bathroom can fill with the stench it usually prevents. To fix the problem, simply pour one quart of water down each of the drains in your bathroom to refill the traps. Alternately, pour 1 cup of white vinegar and 1 cup baking soda down the drain to eat away the bacteria, then flush it away. Pour these directly into the toilet, baking soda first, as they will bubble up when mixed. Let them work for about 20 minutes and then flush. 2.Your toilet bowl needs to be cleaned The simplest answer for a stinky bathroom may just be that the toilet requires cleaning. Even if it has been recently cleaned, let’s face it, sometimes it needs to be cleaned again due to use. You can create a natural solution for cleaning using ingredients you likely already have on hand, such as white vinegar or lemon use, or use one of your own, but your first step should be to clean your toilet inside and out, from top to bottom. 3.Urine has collected around the base of your toilet Use a paste made from baking soda and lemon juice to clean around the bottom of the toilet where the base meets the floor. Also, rub it around the seat and inside the rim. Let it sit for ten minutes and then use white vinegar in a spray bottle to spray on the areas where you smeared the paste. The three ingredients will foam for a few minutes. Once they seem to stop working their magic, wipe the remainder away with a wet cloth. 4.Your toilet bowl needs heavier deodorizing Sometimes your bathroom may smell just because it’s a bathroom and that comes with the territory. Try some natural deodorizers to cure the problem. A few drops of essential oil in your toilet water can work wonders. Just let the oil sit for a few minutes and then flush. Cloves, cedar, and lavender contain both antifungal and microbial properties that may help with bacteria problems. 5.There is bacteria in the toilet water Does your bathroom smell like spoiled eggs? That rotten egg smell is created by a gas called hydrogen sulfide. Bacteria that has formed in the drain and sewer lines is what gives off this foul odor. You’ll need to disinfect your pipes to get rid of it. You can use white vinegar or bleach to fix this problem. Simply pour about a half cup of one or the other into the toilet’s s-bend or drain and let it sit for an hour, then flush. 6.Your toilet drain may have a build-up not reached by general cleaning If the bathroom smells like urine, it will only get stronger if left to accumulate. It will not only stink up your bathroom, but it will permeate into the rest of your home if not eliminated quickly. A simple homemade toilet drain cleaner may take care of the problem. Pour ½ cup lemon juice with ½ cup baking soda into the toilet, baking soda first. The two ingredients will bubble up and work their magic to clean any residue that might be creating the offensive odor in your bathroom. Let them sit for ten minutes and then flush. Not only will this help to rid your toilet of an unpleasant smell, but it can also help break up simple clogs that may be further down the drain and kill bacteria. The key to eliminating the odor in your bathroom is to identify it and then treat the issue using one of the solutions above or with a preferred sink enzyme cleaner. This can often be a matter of just trying different things until one of them works. If you’ve gone through all of the practical solutions and there is still a sewer smell in bathroom areas, it’s time to call a plumber to address what may be a much more significant issue. You may have a blockage further down into your drainage system that will need to be addressed by a professional, or your wax ring may need to be replaced. If either of these is the case, you won’t want to delay as they will only get worse with time. In some cases, you may want to
Plumbing 101: How Your House Plumbing System Works
There is no single answer to the question “How does plumbing work?” Each home is set up differently based on internal configuration. However, it’s easier to cover the basic commonalities and differences in your home’s plumbing system. As a result, we’ll aim to comprehensively discuss and break down Plumbing 101 for the average reader. Whether you are looking at doing a bit of DIY work or needing to hire a plumber, you will want to understand the basics of your plumbing system so you can discuss your needs and explore your options. Let’s talk about some of the things you’ll want to know about your house’s plumbing. Plumbing 101: What is Plumbing? Home plumbing involves two systems. One is your water supply system, and the other is your drainage system. These two make up the core of your home plumbing. Water Supply System Your water supply system brings fresh water into your home, from a city or county water supply or a well. If you purchase water from your city or county it is supplied via the main pipeline that usually runs alongside your street. The water is then transported from this main line through a smaller supply line that connects to your home. This is where your home’s plumbing begins. While the main water supply is the responsibility of the provider, everything outside the main is yours to install and maintain. If you are using a well, the pipes pumping water from it are a part of your home plumbing system. Drainage System Though they are considered a part of your plumbing system, your water supply system and your drainage system are not connected—and for good reason. Instead, you have what plumbers refer to as bridge fixtures. You know these by more common names: sinks, faucets, washing machines, etc. Your water supply will enter a fixture, but will not leave using the same pipes. Instead, it filters through the bridge fixture and exits through separate drainage pipes. While your incoming water may be pressurized, your drainage system is mostly gravity-based and relies on the flowing water to push the contents that enter it down the line and out of your home through a series of pipes, traps, and vents. Interior Plumbing: The Kitchen Most of your kitchen’s plumbing is behind the walls or hidden beneath cabinets. It consists of incoming cold water lines connected to the supply line running from your water source and hot water lines that are connected to the water heating system you have in your home. You may have other items connected to the incoming cold water line such as a dishwasher, coffee maker, or ice maker in your fridge. Your sink empties into your home’s drainage system through a larger pipe that feeds out to the main drain line. There may also be a separate line running to a washing machine. Interior Plumbing: The Bathroom Like your kitchen, your bathroom faucets in sinks and showers are fed from the same cold water line that supplies your kitchen sink. In most instances, your toilet also fills from this source, although a few homes may utilize a secondary source to fill their toilet tanks, like from a well that isn’t fit for drinking. The drainage system in your bathroom connects through pipes to the same main drainage line as your kitchen sink and shower. This is why any blockages present may push back out through different places than where they exited. In short, if you have drainage from your toilet backing up into your sink or shower, it’s not a simple fix like if you have a bit of hair stopping up the trap in your sink. Your problem is likely located much deeper in your system, either in the main drainage leading to your city or county’s sewage system or in your septic tank. You’ll need to call a professional right away. Tips for Maintaining Your Plumbing Water Heater Maintenance – Drain or flush your water heater at least twice per year. Sediment that builds up in your water heater can reduce its efficiency and shorten its lifespan in addition to causing damage, especially in a tankless variety. Check for leaks and if you see signs of problems, call a plumber. Winter Is Coming – Make sure your pipes are protected so they don’t freeze. Frozen water expands and can burst pipes that are in hard-to-get places, doing great damage as they thaw. Install strainers – Strainers placed on drains will keep debris from entering and clogging up pipes. Be sure to check and replace them as needed, as they will wear down over time. Clean Your Pipes – There are a lot of pipe cleaning products on the market, but some are ineffective, and others are far too harsh. Opt for a natural enzyme-based cleaner to keep your drains clear and keep them in good working order for years to come. Instead of harsh chemicals, enzyme cleaners put harmless bacteria in your plumbing that will break down clogs and send them away. Keep the Pressure Up – If you notice a reduction in water pressure and there is no indication that this is a result of something your supplier has done—they usually will post on their website if there is a temporary issue affecting your pressure—you need to call a plumber immediately. Failure to do so could result in even more damage from leaking or broken pipes. Likewise, too much pressure can be a problem. Have a plumber install a pressure reduction valve. Outside Plumbing Lines – Know where your plumbing lines are located before planting trees where roots may grow into them or digging where you may hit a pipe. If there are already trees near your line, you may want to have a professional come out and snake them regularly as a preventative measure. Don’t Flush That! – Make sure everyone in your home knows not to flush items that may clog your toilet’s drainage system or fill your septic tank.
4 Effective Ways on How To Get Rid Of Rust In Your Well
In water wells, rust contamination can cause a variety of problems. The result is usually brownish-red water that can stain clothes, damage appliances, and change the taste and color of your drinking water. Tap water in Arizona is generally safe to drink, however it is important to be aware of the water quality in your area. Minerals such as iron can cause discoloration in sinks and toilet bowls, as well as require additional detergent when using dishwashers. Testing your tap water is the best way to know if you can drink it, and if not, you can purchase bottled water or install a water purification system. The Arizona Department of Environmental Quality provides resources on water quality in the state, so if you are unsure of your tap water quality you can always check it. So, in answer to the question: Can you drink tap water in Arizona? The answer is yes, as long as you are aware of the water quality in your area. Is well water safe to drink? Iron oxide (what we call rust) may not be harmful to your health, but it can impart a strong, unpleasant taste to food and beverages that is produced by the iron in the water. As a whole, it can be quite an unpleasant substance that causes a number of issues, especially when stemming from its presence in water wells. Which is why it’s recommended to have your well water tested as well. Why Should I Be Concerned About Rust In My Well? As a homeowner, if you notice that your water is showing signs of rust contamination (discoloration, metallic taste, water pressure changes) taking early steps to solve the problem could save you thousands of dollars down the line. There are a lot of concerns regarding the damage that rust causes to expensive appliances and piping within a home. Home appliances and pipes can be costly to repair or replace, which can result in significant value loss for your home. While you may not necessarily be the person making the repairs yourself when these problems occur, it’s still important to be informed so you know what you need to look for in order to detect problems in the early stages. What Causes Rust in Well Water? Rain and snow can cause iron to dissolve into the water when they fall upon metal surfaces and when they seep out from soil or rock containing iron. The presence of iron can also be a result of corrosion from iron or steel well casings or water pipes. Iron minerals in the water turn to rust similar to how iron rusts in a metal pail if it is exposed to water and oxygen. The pH of your well water also has an effect on the rate at which corrosion occurs; if your water is too acidic, it can speed up the rusting process and cause issues beyond the scope of regular maintenance. To effectively deal with this problem in the long term, you will need to manage the pH of the well water and make sure it remains at a balanced level. How Can I Get Rid Of Rust In Well Water? As previously mentioned, the long-term solution to rust contamination is the management of the pH of your well water. But there are solutions to remove rust in the short term as well which will depend on your current preventative measures, your budget, and the seriousness of the issue. Water Softeners “Hard” water is defined as water containing a higher mineral concentration. Over time, this build-up can cause hard deposits of minerals leading to clogged piping (These hard mineral deposits are what give hard water its name). “Soft” water has less mineral content which means you have a better chance of not having rust form. A water softener is a device that reduces the amount of minerals in your well. This will help you get rid of rust by reducing the hardness of the water which can quickly add to the accumulation of rust in your water well. As a solution to rust, water softeners are a good place to start. They are relatively affordable considering the damage they can help prevent. Iron/Rust Filter Home water treatment is the most common method for controlling iron in the water. If you already have a whole house water softener system installed, the most effective solution is adding an iron filter. An iron filter is a device that filters out any rust from your water. It has an ion exchange resin that attracts and traps the rust so it won’t get inside of your pipes or fixtures. However, note that they use replaceable cartridges which typically need to be replaced every 3-6 months. Iron filters are a great addition to existing water filtration systems, and they offer an additional preventative measure against rust. Use a Rust Remover Enhancement Product Rust remover enhancement products are a relatively quick and inexpensive way to deal with rust in water wells. Two hours is all it takes for this product to remove rust buildup from well water. Rust Out is an example of a popular rust remover that is often used alongside a water softener. Instructions are provided specifically for using the product with a water softener to remove rust from water wells. You should read the instructions carefully before using this method because if you don’t use it correctly, the rust can end up solidifying after it’s been dissolved. Use a Hydrogen Peroxide System A hydrogen peroxide system is one of the most effective but expensive water treatment solutions. Not only does it get rid of rust in your well, but it can also help eliminate hydrogen sulfide gas, which is notoriously known for the damage it can do to some of the previously mentioned water treatment systems. Hydrogen peroxide water treatment systems work over a wide range of water pH levels, as opposed to chlorine systems which are limited in the pH range they are able
How Do Water Softeners Affect Septic Systems?
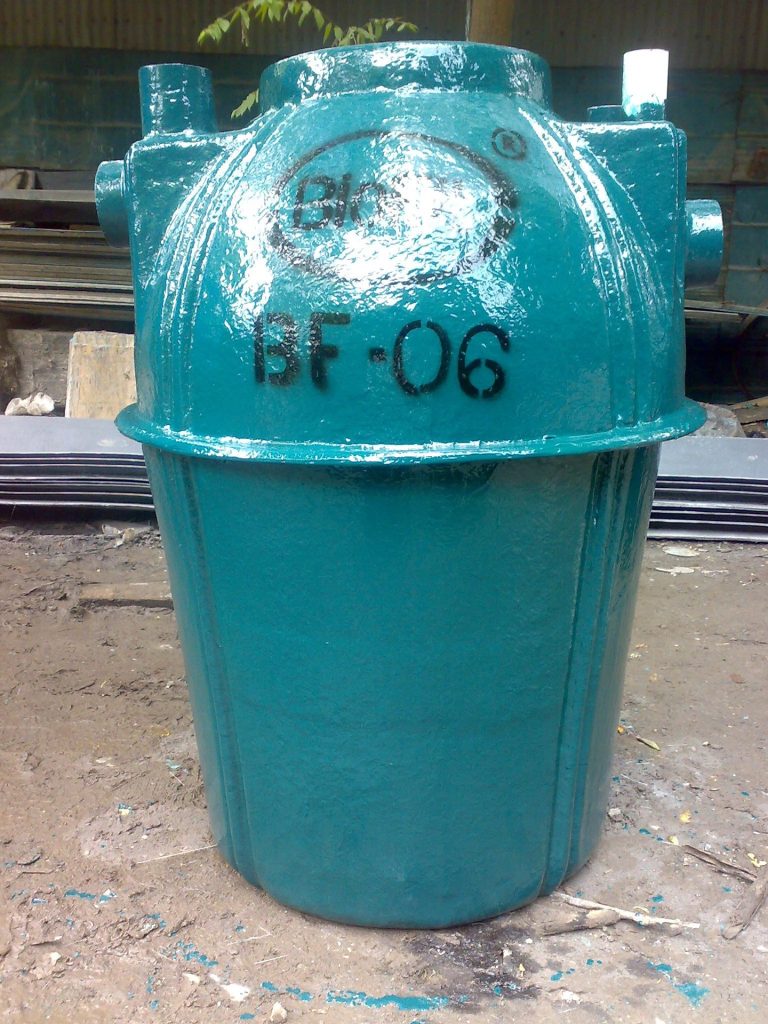
Due to calcium, magnesium, and other hard elements in our water sources, water softeners have become quite common in many homes. Water softeners help make the water soft by removing or reducing the amount of these elements that get to our plumbing system. This, on the other hand, makes it ideal for laundry, cleaning, drinking, showers, etc. Hard water not only makes soaps and detergents less effective but also results in scum formation, which affects the color of your garments. Also, it leads to various problems in the plumbing system as the minerals corrode the pipes and appliances. This subsequently leads to leakages or clogging of the system, necessitating costly repairs. With water softeners, all these problems are solved, and you can enjoy using soft and clean water in your home. However, there have been several concerns about the relationship between a water softener and septic systems. How does softening your water affect your septic system? But first, here are some vital statistics to note. Important Facts and Statistics to Note Effects of Water Softeners on Septic Systems Over the years, as early as the 70s, various studies have been conducted to determine the effects a water softener would have on your septic system. These studies have had varying results about the issue. Some of the earlier studies indicate that these two systems don’t affect each other. However, newer studies have come out to dispute these findings. They claim that, in reality, water softeners have effects on septic systems. Earlier research mistakenly used aerobic bacteria instead of aerobic ones, leading to some misguiding findings. To remove the hard elements from water, we add sodium. Experts believe that this sodium has serious effects on both the anaerobic digester and the drain field’s hydraulic conductivity. Since septic tanks are not designed with excess hard water regeneration in mind, the backwash might also result in hydraulic overloading. Other negative effects of water softeners on septic tank systems include: All this shows the negative effects of water softener salt and septic systems. But how can you rectify this? Is it possible to have both systems working harmoniously without affecting the other? Let’s find out. Solutions to the Water Softener and Septic Systems Problem Both of these systems are pretty much important in our homes. The effects of hard water in our homes could be more devastating if water softeners were not installed. But how do we eliminate the problems these softeners pose for the septic systems? 1. Install Modern Water Softeners Newer water softeners are always more efficient than older versions. This means that they will require less sodium chloride in the softening process, thus causing less salinity in septic tanks. Less salinity in the septic means a reduced effect on the anaerobic bacteria. This, on the other hand, allows the bacteria to properly do its intended work – digestion of the organic waste. 2. Substitute Sodium Chloride with Potassium Chloride Instead of using sodium chloride as the softening agent, Potassium Chloride would be an excellent substitute. While it might be a bit pricier, it offers a solution for several issues. One, your household is safe from consuming too much sodium chloride. And two, less sodium chloride reaches your septic tank. Also, Potassium chloride doesn’t easily cause hydraulic conductivity as the amount needed to cause the effect is way too much compared to sodium chloride. 3. Set your System’s Regeneration Based on Water Flow Most people set their water softeners to automatically regenerate after several minutes. This might cause an unnecessary increase in the amount of backwash. The higher the amount of backwash, the more the amount of sodium chloride that goes into the septic tank. You can tackle this by setting the system to regenerate based on demand or necessity. This will significantly reduce the amount of backwash. 4. Only Treat the Necessary Water While you might be tempted to soften every drop of water getting into your home, it’s not always necessary. Softening water that gets into the house might reduce the amount of sodium chloride used and reduce negative effects. For instance, it’s not a must you treat the water being used outdoors to water the garden, lawn, flowers, etc. You can use this in its hard form. 5. Get a Bigger Septic Tank Designing a larger septic tank than the actual one needed can go a long way in accommodating the load from the water softener’s backwash. This way, the hydraulic effect won’t have much effect on the septic system’s absorption capacity. 6. Avoid Soil Containing High Clay Content The septic system’s absorption area shouldn’t contain high levels of clay soil. The hydraulic conductivity of clay soils is relatively low, thus not the best quality for a leach field. However, sometimes it’s not always possible to avoid clay soil completely. When this is the case, ensure you avoid a leach field rich in montmorillonite (swelling clay). The less a soil contains this type of clay, the less it will be affected by the water softening agents (potassium or sodium chloride) 7. Reroute the Backwash Away from the Septic System With the help of a professional, you can redirect your backwash brine from the septic tank. This is if you want to prevent any failures in your septic system. Many people will say that this is a complex and expensive process, but it certainly isn’t. An expert can make some minor adjustments to your water softener and plumbing system to ensure that a pipe directly discharges the backwash brine into a designated discharge container. This might prevent many problems you would have to deal with if the backwash reaches drains into that septic tank. So, while the problem between the water softener systems and septic tanks might seem too complex, one can find a simple solution. Any combination of these tips can help you enjoy the services of these two systems without interferences.
What Causes Pipes to Burst in your Home?
Water pipe bursts are a common scenario in many homes. And, even if you have never had one in your home, you certainly know someone who has dealt with this plumbing issue. The fact is, whether it’s in your home’s plumbing system or even on the main supply pipes, bursting of pipes is a common issue that can happen any time and without any warning. This might, in several cases, cause serious damages, which require an expert’s input and cost you some considerable amount of money. These bursts can result from several factors, including rusty pipes, structural damage to the house, or even improper plumbing. Detecting and preventing factors that cause pipe bursts, can go a long way in helping you avoid incurring costly plumbing repairs. Lucky for you, we are here to explore this. We will discuss what causes pipes to burst, how to prevent it, and how to deal with it when it occurs. Top Reasons Why Water Pipes Burst These are the most common causes of water pipes bursting: 1. Freezing If you’ve ever wondered what causes pipes to burst in the winter, this is the main culprit—frozen pipes are pretty prone to bursting. But what causes frozen pipes to burst? When temperatures remain below the freezing point for long periods, the water running through these pipes also starts freezing. More accumulation of frozen water into one place applies pressure to that particular area of the pipe. This is because icy water is usually heavier than liquid water. In addition, it expands, causing it to push against the pipes’ walls. When this pressure is too much, it becomes hard for the pipe to withstand it, eventually bursting. Usually, water freezes at 32 °F or 0 °C. However, this number can go a bit lower, if the water contains impurities. How to Prevent Pipes Bursting During Winter ● Keep the Water Flowing Mainly, the water in the pipes freezes when it stays still for long, in below 0 °C temperatures. One way of avoiding this is by keeping the water flowing. To achieve this, you can slightly open some faucets in the house to allow slow dripping of water. This will help in ensuring that water is not entirely still in the pipes, thus, in a way, preventing freezing. ● Allow Warm Air Circulation to the Cold Areas Since pipes are often found on the outside walls, they face all the cold exterior weather elements. Directing some warm air to these places, where pipes are located, might significantly help to reduce freezing and subsequent water pipes bursting. Identify where the pipes are, and then direct the warm air there. ● Install Heat Tape These are products used to help keep the pipes warm. All you need is to wrap the heat tape on the pipes, and your water freezing problem is sorted. This can be a DIY project, but consulting a professional plumber might be the ideal option. ● Keeping the Cabinet Door Open When your sink is near the exterior wall, the pipes are exposed to the cold weather outside. Leaving your cabinet doors open allows the circulation of warm air in these cabinets, keeping the pipes warm. These simple steps will significantly reduce the chances of water freezing inside the pipes, subsequently reducing water pipe bursts. 2. Rusty and Corroded Pipes Besides frozen pipes, aging rusty pipes are another cause of pipe bursts. If your plumbing is old, it’s only prudent to inspect regularly to ensure it’s safe. This way, if some old rusty pipes need replacement, they can be before significant damage occurs. Rust and corrosion occur mainly due to the pipes being exposed to oxygen and corrosive elements like minerals. Oxygen plus water equals oxidation. This weakens the water pipes resulting in water leaks and bursting of these pipes. If rusty pipes are identified well in advance, you can avoid some costly plumbing issues caused by the bursting of water pipes. How to Prevent Pipes Bursting Due to Rust The simplest and probably the most effective way to prevent rusty pipes from causing damage is through a routine inspection. Regularly checking the state of your pipes and doing some maintenance of these pipes is paramount. This ensures that you can detect a problem earlier and repair it ahead of any significant damage. A professional plumber will be instrumental in this. Also, water pipes that are most prone to rusting are made from iron, galvanized steel, or copper. Using materials not affected by rust can be the ultimate solution for your rusty pipes issue. 3. Improper Installation Sometimes, the plumbing on the house you are living in isn’t done right. And, if you never took time to do a thorough inspection before buying, you might be facing some water pipes bursts soon. Improperly connected pipes or poor soldering are significant issues of poor plumbing that can lead to expensive damages later on. Poor joints and weak spots in the water piping system will lead to the bursting of pipes, mainly due to the changes in water pressure. High water pressure is a perfect catalyst to pipe bursts, which can cause significant damages and unwarranted damages. So, if you are buying a new house, ensure that a professional plumber has done a thorough inspection for you to avoid all this. Also, when considering piping for your home, don’t cut corners to save some bucks. It might be cheap to do so in the short run, but it can be pretty costly in the long run. 4. Tree Roots While it might not be too prevalent, this can also cause serious damage to your house water piping system. As trees on your compound grow, the roots sometimes elongate until they come into contact with water pipes. When this happens, the roots may press against the pipes until they crack or burst. This can lead to significant water loss, especially when you don’t realize the problem in time. While trees look beautiful, you might want to plant
Guide On How to Install a Water Pressure Regulator
Unregulated water pressure can cause serious damage to your plumbing, more than you can imagine. This can happen when the water pressure from your primary water source is too high. However, this doesn’t have to become your everyday worry. A water pressure regulator is a handy tool that ensures water in your house flows at the correct pressure. This prevents any damage that the excessive water pressure can cause to your fixtures, which might subsequently lead to costly repairs. Learning how to install a water pressure regulator is crucial, whether you are a DIY person or you prefer hiring a professional. Therefore, this guide is meant to offer you all the nitty-gritties of water pressure regulator installation to ensure you do it right. But first things first! Let’s understand what the device is, and how it works. What is a Water Pressure Regulator? It is a device used to regulate the pressure of water entering your house from the central city’s supply. Commonly referred to as the PRV (pressure-reducing valve), the device determines the pressure at which water reaches your pipes, allowing safe flows. This way, the water flowing through your plumbing fixtures, such as the water heater, sink faucets, shower, toilet, or any other appliances, is controlled. In essence, a water pressure regulator determines the PSI (pounds per square inch) of water flowing through your plumbing at any given time. How to Know if Your Water Pressure Regulator is Working Properly? Detecting a broken PRV isn’t too difficult. The easiest way is to look at how your faucets react when you turn the water on. If there is pipe knocking, then the water’s pressure is significantly high. However, you need to check well if the pipe’s mounting is loose. Usually, vibrations and knocking when you turn on your taps are significant indicators of too much water pressure. If you notice such occurrences, ensure that you check what pressure the regulator gauge indicates, and if necessary, tune it down. If this persists, it’s most likely that your regulator is broken and might need changing. The next and most effective way to monitor your home’s water pressure is by installing an automatic water leak detection device. Such a system will ensure that you’re always on top of matters concerning water pressure in your home. Smart water leak detection devices give homeowners the freedom to not worry about water leakages. The device notifies you on your phone whenever there is a leak. It also shuts off water mains to avoid any damages. With that in mind, let’s now get into installing a device. How to Install Water Pressure Regulator Firstly, this job should be done by a professional plumber. However, if you know you are good at this and can do it yourself, always ensure that you have the right tools and the proper regulator. Also, know exactly where you’ll be fitting the regulator. It’s not too hard a task, and quite often, some people prefer the DIY option. Remember, you can even save up to $350 on labor costs if you know how to do it. So how do you do it? These are the steps: Identifying the correct location to install your water pressure regulator is the most crucial step. A water pressure regulator is usually fixed where the main water line joins your home’s plumbing, just next to the meter. The valve will ensure that water under excessive pressure doesn’t get through to your pipes. This is a great way to get the baseline pressure, and you can do so by fastening a pressure gauge onto one of the outside taps in your compound. The pressure gauge will give you the current water pressure for your home. You can get this device from any of the local plumbing shops near you. According to the “Plumbing Code,” where water pressures exceed 80 PSI, one should use a pressure regulator to reduce this to below 80 PSI. Before trying to fix your water pressure regulator, ensure no water is running through the pipes. Start by shutting down the water main, and then run the faucets to drain the water completely. This will give you an easy time when fixing your pressure regulator. With an existing pressure reducing valve, the work becomes much easier as you now just need to unscrew it and fasten the new one. For a first-time PRV, first check whether it has an arrow indicating water flow direction (most valves have this). Remember, if you install the valve facing the wrong direction, it won’t work to reduce water pressure. Once you’ve completed all those checks, it’s now time to fix the pressure regulator. The good thing is that the device comes with all the necessary instructions for an easy installation. First, cut some 6 inches off your pipe after the shut-off valve. Connect the fittings on each end of the cut pipe, and then fix your pressure regulator between the gaps. Fasten it onto the fittings with pliers and ensure that it’s tightly fitted. This is the last step when installing a water pressure regulator. Check and adjust the pressure to the desired levels, then turn back your water on from the mains. This is done by turning the screw located on the top of the PRV. That doesn’t sound hard, does it? Importance of a Water Pressure Regulator So, why do you need to control the water pressure in your house? The excessive water pressure might lead to water leaks, eroded washers, banging pipes, and dripping faucets, which can be a nuisance and eventually cause considerable losses. Typically, uncontrolled water pressure is the leading cause of significant home plumbing issues we see every day. The leaks mean that potable water will go to waste, something that might lead to a surge in your water, sewer, and energy bills. This means that ensuring the flow of water in your house is always within the correct pressure levels can save you some bucks in the long run. Also,
Average Cost of Drilling a Water Well in Arizona
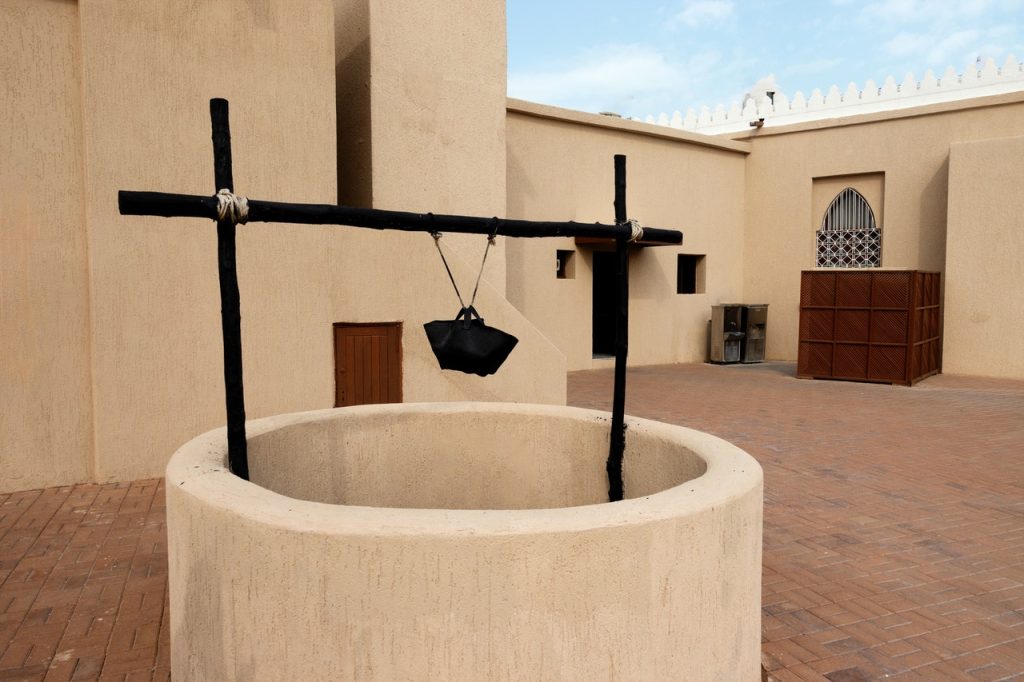
Introduction to Water Well Drilling Cost in Arizona Water wells are an ancient technology that still play an important part in the lives of many in the modern world. Roughly 13% or 42 million people use a household well in the United States every day. With that many Americans using wells, the well-drilling industry has grown to meet the demand. If you need a well, we can help you to make some decisions. We’re going to take you through some ways to decide if you need a well, as well as some information about how they’re drilled and serviced, and also how much they cost. Please bear in mind that this is a very general guide, and not necessarily representative of the well-drilling companies around you. We’ll give you some more guidance later on how to decide on who to trust to drill your well. This should give you a good idea of the overall water well drilling cost in Arizona. How to Decide You Need a Well Many Americans live with challenges when it comes to water availability. In many areas, lack of groundwater and lack of rainfall have contributed to creative solutions for water. Most of the cities in the South-West have access to water through municipal water treatment. However, if you live outside of the city limits, your options become much more limited. That’s why many ranches and off-grid homes choose wells as the source of their water. When done correctly, wells can be a perfectly serviceable source of drinking water. Many homes in areas without regular water sources turn to water tankers, including deliveries. This is absolutely an acceptable choice for water, with a few caveats. Firstly, the cost may become prohibitive over time. Also, it puts a significant strain on the water delivery as, without it, a home could very quickly run out of water. How are wells drilled? To understand how much a well should cost to be drilled, we will start by running through some of the terms and technology associated with the drilling. This will give you an overall view of how the industry works and will empower you to communicate with the company you eventually choose for this work. There are three main types of wells. Dug wells are exactly what they sound like, wells that are dug out by a backhoe. These are shallow and very wide. They’re often used in areas where the water table is accessible close to the surface. These types of wells aren’t very common in Arizona as the water levels and soil makes this method inefficient. Driven wells are made by forcing pipes into the ground. These are also more common in areas with water near the surface, as these types of wells usually don’t run deeper than 50 feet. Drilled wells are made using drilling machines. They drill a hole into the ground and encase the hole with a tube-shaped structure. These wells can run thousands of feet deep and can be created on most types of soil. That’s why these are the most common type of well found in Arizona by a wide margin. These drilled wells are created using specialized drilling techniques and machinery, making them one of the more expensive types of well. However, most Arizona residents won’t have access to another type of well. Now that you understand some of the industry lingo, you can begin to understand what the water well drilling cost in Arizona is, and how it’s derived. Water Well Drilling Cost Arizona Depth This is one of the main factors when looking at well-drilling. In Arizona, we’ve seen prices from $20-$44 per foot, just for the drilling. Some of the factors that could affect the price include the type of soil, ease of access for the drilling equipment, and diameter of the well. Since people have different needs, different wells would be appropriate, depending on the potential usage. Someone using a well for agricultural purposes would likely need a wider diameter pipe than a small family just using a well for drinking water. Bear in mind that your well needs to be drilled until it hits sufficient water levels. The level at which depends entirely on the water table in your area. This is often the main factor when looking at the water well drilling cost in Arizona. Location Each state has an average well-drilling cost. Arizona has a fairly high average cost, partially due to the climate. The locations of your actual home and well site are also very important, as places that are more out of the way are more likely to cost a bit more. Length of Travel One factor that is often overlooked is the length of travel for the water. If you’re drilling very close to your home, it will be much cheaper than drilling farther away and pumping the water into your home. Testing and Permits One of the first things you want to is to test your water. Arizona has the potential for groundwater contamination, so you want to make sure your water is acceptable for your purposes. This can cost anywhere from 50-500 dollars depending on the types of testing that are necessary. Make sure you ask your drilling contractor about this. \ Equipment This refers to the ancillary equipment that is associate with your well. Most wells require a pump. Have you budgeted for a pump? They can cost anywhere from $500 to $2000 depending on the type of pump and the required use. Again, you should make sure you understand the pump cost if your drilling contractor is installing one. Choosing the Right Contractor This is arguably the most challenging and important part of getting a well. You need to find a trustworthy, safe contractor who understands your needs and can give you a solution that ends with you getting access to the water you need. Start by looking at the reviews. They can be manipulated, but they’re often a good barometer of what type
Here’s Why Water Backs Up Into Your Tub
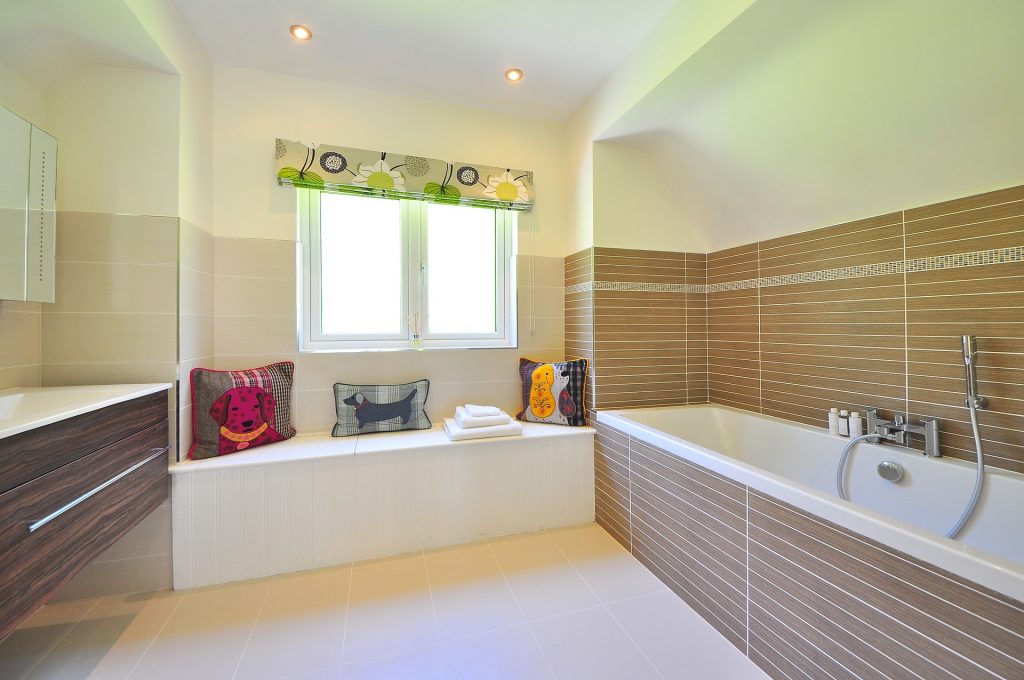
When you are using your tub you want a relaxing experience that is pleasant to both your eyes and nose. Unfortunately, there are occasions when water and other liquids rise into your tub. There are many reasons why this occurs and it is important to properly understand and learn how to prevent this from happening. Some kitchens and bathrooms are high-traffic areas in most homes, therefore people depend on their plumbing to function properly every day. When your bathroom is out of commission it causes a large disruption to your daily routine. Dirty water coming back up through your drain is never a good thing. It is even worse if there is sewage with dirty water. The most common reason this happens is due to a clogged drain. When you have a clogged drain it indicates there is a sewer issue that causes sewage backup through your bathtub drain. If you’re having problems with your bathtub or shower, you can reach out contact American Home Water & Air today top-notch bathtub and shower repair services. Warning Signs for a Clogged Drain There are many warning signs you can be aware of when draining your bathtub. The initial moment you should start to be concerned is when the water drains slowly after taking a bath or shower. This is not normally a sign for an emergency, but it could indicate there may be a clogging issue. Some common warning signs you should be aware of include: All of these water occurrences can indicate either a minor or major plumbing or sewage line issue. You should not waste time with your plumbing. There are many reasons as to why your pipes are having issues. Reasons for Plumbing Issues Backed up sewers can create large amounts of damage to your home. Your walls, furniture, electrical systems, floors, and belongings are all impacted with plumbing issues. Some possible reasons for your issues include: The age of your pipe increases the likelihood of sewer backups. The older your sewer lines are the increased likelihood of pressure and blockages. Along with the age of the system, you also need to be aware of the purpose of your pipes. When the pipes are multipurpose they handle excessive stormwater and raw sewage from rainstorms. Both can result in poor drainage and sewage backup in your basement. Other considerations are understanding if your city’s sanitation system is backed up. This is rare but can occur. How to Fix a Clogged Drain You can fix your clogged drain through many differing ways. You can provide a video inspection that determines the problem and analyzes the location of your pipes. This inspection determines how bad the pipes have deteriorated and corroded over time. Plumbing cameras are state of the art technology that offers a great way to determine how serious the problem is and fix it safely and efficiently. Fixing a clogged drain is serious and often a messy business. You can investigate the problem and its seriousness through video inspection. You can also perform a hydro jetting. Hydro jetting effectively drains your clogged system. When your pipes are draining water slowly, this shows there is an issue with buildup within the pipes. You can purchase enzyme plumbing cleaner to help unclog your pipes, but these chemicals often cause more harm than good. The harm these chemicals can cause is damaging your septic tank system. By using a hydro-jetting system you can clear your pipes without the use of harsh chemicals. Pipe replacement is time-consuming and costly. Having a hydro jet clean the buildup in your pipes is more cost-effective that saves you excessive time and money buying cleaning supplies. Detailed Clog Cleaning Techniques You can also use a snake to clean your drains. A snake drain cleaning tool is a long metal cable. This metal cable is twisted into spirals at the end that performs with more flexibility. It is a low tech tool that does not require advanced training or understanding to use correctly. To use this tool you must put it down your drain to help break up any blockages within your pipes. This helps with small clogs that are found in your drain, these can be toys or shaving items. If these are not working to clear up your bathtub drain you can also invest in the mainline replacement. This involves a clog within the root of your mainline. The most common causes are tree roots or debris that twisted in the line that leads to your septic tank. To help ease this issue you must use trained professionals that can dig out your mainline and replace it with one that is not filled with tree roots that clog up your pipes. Proper plumbing function is essential to healthy living that provides peace of mind. What is Dirty Water? Dirty water refers to any water that was used previously and is not clean. The many types of dirty water include: All of the listed types of dirty water can be found when water runs back up through your pipes. The pipes in your sink, toilet, and bathtub all feed into your sewer line. When the water comes back up, sewage may also accompany the water and create many sanitation problems. Problems relating to water coming back up through your pipes are both a sanitation and health issue. It must be addressed and solved promptly. Your dirty water issues are in direct relation to your sewer line. What is a Sewer Line Problem? When there is a sewer line problem it is directly related to your toilet, sink, bathtub, or shower. Sewer line clogs are considered