
How to improve air quality in a home: 6 solutions to consider
Many people don’t realize that the air quality in their homes can significantly impact their health. This is particularly true if they have allergies or chemical sensitivities, but it also affects those who do not suffer from these conditions. So, how can you improve indoor air quality? To improve indoor air quality at home, you need to identify what sources of contaminants are present and take action accordingly. The most common culprits include tobacco smoke, mold spores, dust mites, and pet dander. You can read our guide on how to test air quality in your home to learn more. Make sure you have a good air purifier and clean the filters regularly. The best solution might be to remove or avoid these potential allergens altogether, especially if you have any known allergies. Let’s talk about how you can eliminate these harmful substances and learn how to improve air quality in your home today. Upgrade to a new AC/Furnace Sometimes an AC or furnace can cause poor air quality. For example, if you have an older home and the previous homeowners were smokers, your unit has likely absorbed these odors. Replacing a furnace or AC will help improve air quality in this situation. What’s more, new units are far more energy-efficient than their older counterparts, so that means you will save money on your monthly utility bill. Remember that when searching for a new unit, you should speak with your local HVAC experts to get recommendations. We can help you install an AC or furnace in your home and give you other excellent tips for improving the air quality. Thoroughly clean your AC/Furnace If your AC and furnace are in good working order but still have unhealthy air quality, it is probably due to build-up. An excellent way to check for this would be by turning the furnace on and letting it run without heating anything for a few minutes. After that period has passed, open some windows or doors in your home if possible. If there are no changes in pressure inside of the room with the running unit, then the chances are high that there is build-up within your system, which can cause future problems, including decreased efficiency. It can be hard to find this build-up, however. This is why you should get a professional out to clean your AC/Furnace. Clean the vents throughout your home Keeping air ducts clean can be beneficial for many different reasons. Cleaning out these areas will decrease chances for allergen build-up, which equals a healthier living space overall. However, the cost to have professionals come and perform this service may seem costly. Still, over time, it could save you money on health-related issues and energy bills if there are no blockages within the system itself because cleaning does so much more than just keep things fresh inside of your house. It also helps circulate cold or hot air better throughout rooms. Open windows for fresh air and sunlight Opening your windows can allow fresh air to circulate in your home, especially if you live on a busy road or near an industrial area. However, air pollution can be a significant factor if you have allergies, and opening windows does not entirely solve the problem. By only opening the windows when the air outside is still, you can avoid this hassle. Try to open your windows for at least 15 minutes every day to increase air quality. Use an air purifier to remove allergens in the home This is a game-changer for many people. Whether you want to improve air quality because you suffer from allergies or because you live in an area with poor air quality, an air purifier should be considered. An air purifier can remove allergens like pollen and dander from the home, reducing the number of irritants floating around inside it. This helps reduce allergy symptoms and promotes comfortable living. Install a humidifier to add moisture back into dry air Humidifiers are a great way to add moisture back into dry air, the leading cause of poor indoor air quality. A humidifier adds humidity by releasing water vapor during the heating process and will work best if your home’s thermostat is set between 60°F -70°F. A cool-mist humidifier works very differently from a warm-mist one because it uses cold water instead of hot, so there are no mineral deposits or white dust that come with using this type with any humidifier. However, these should be cleaned regularly and before the winter months when you use them less often. This can be done by rinsing out all components every few weeks with vinegar and then running an empty cycle to remove residue build-up inside. Conclusion Now you know how to improve air quality in your home to help yourself and your family members breathe easier. These tips will help homeowners reduce harmful pollutants, irritants, and allergens that can contribute to allergies, asthma, and other potential health problems. Homeowners should first identify the contaminants present in their home and then work toward investing in the best solution for improving indoor air quality. With indoor air quality solutions such as upgrading to a new AC/furnace, cleaning air ducts, installing a humidifier, and more, homeowners can rest assured they are taking the necessary steps to create a healthy home environment.
Air Scrubber vs. Air Purifier Differences: Which One is Right for You?
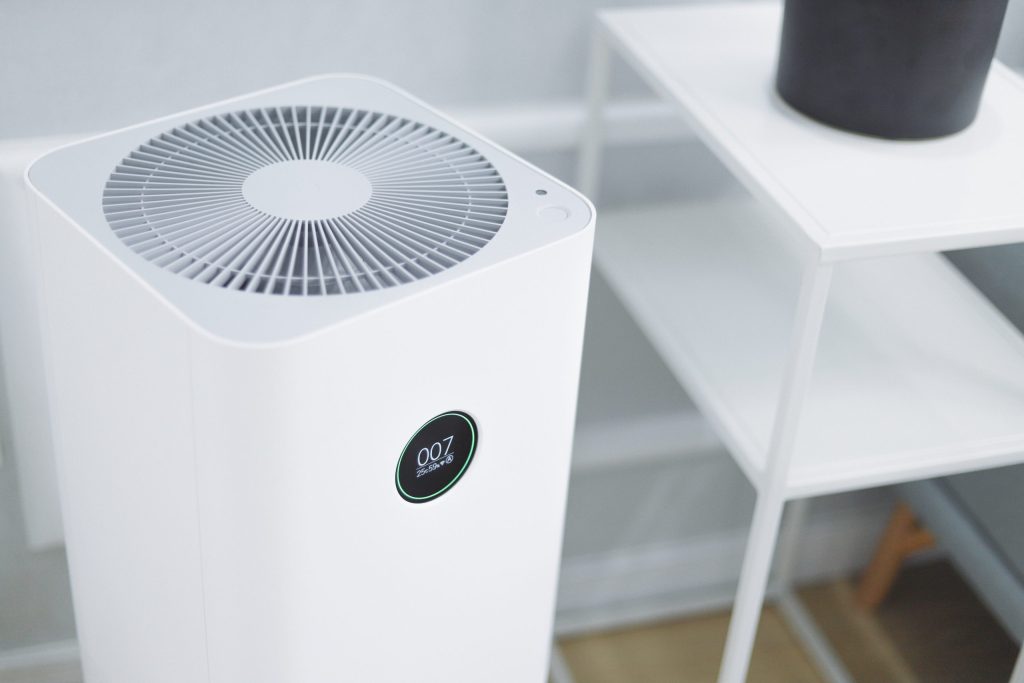
The debate to determine which is better between an air scrubber vs. an air purifier will never end soon. Air scrubbers and air purifiers help clean the air, but there are some key differences between them. For instance, air purifiers work by trapping particles in a filter, while air scrubbers work by emitting ozone into the room to kill bacteria and viruses. Which one is right for you? In this article, we’ll discuss the difference between these two types of machines, how long you should run them, and which type is ideal for your needs. But before we get into the details, let’s first find out what these devices are. What’s an Air Purifier? An air purifier is a device that you can use to clean the air in your home. Homeowners often use them in areas with an unusually high amount of dust, pollen, or mold spores floating around. People with asthma and allergies commonly use them because they effectively remove these irritants from the air. What’s an Air Scrubber? An air scrubber is a specific air purifier that uses activated carbon to remove toxins from the surrounding environment. It works very similarly to your faucet water filter, which removes contaminants so that you can drink clean and healthy tap water. Air Scrubbers vs. Air Purifiers There are many ways air scrubbers and air purifiers relate and differ from each other. Here are a few key points to consider. Air Scrubbers Can Work in Both Large and Small Spaces; Purifiers are Limited Air scrubbers are generally designed to cover larger spaces, not just one room. They can work in both commercial and residential spaces thanks to their large airflow capabilities. On the other hand, purifiers can only effectively clean a limited amount of space at any given time. Depending on which model you choose, they usually purify the air around 200 square feet of space or less. Therefore, if you’re looking for an air purification solution for your residential space, an air purifier is the ideal option. Are Air Scrubbers Great for Both Indoor and Outdoor Environments? When you choose an air scrubber, it improves your indoor air quality and helps purify the planet. That means when you clean your home with a proper air scrubbing device, you not only eliminate contaminants in the air inside your home but outside as well. On the other hand, an air purifier is ideal for your air quality inside the home alone. An air purifier’s powers and capabilities are limited to confined spaces, making them only effective for indoor use. Air Scrubbers are More Efficient than Air Purifiers Air scrubbers can purify the air of any room up to four times per hour. In comparison, air purifiers can only work one to two times per hour. Air scrubbers are also better than air purifiers in catching smaller particles such as mold and bacteria, making them more efficient for allergy sufferers. In addition, many air purifiers come with a pre-filter that needs changing after each use. You’ll also have to regularly replace these filters throughout the year for optimal performance of your device. In other words, air purifiers are expensive, while air scrubbers are cost-efficient. Is an Air Scrubber Safer for Children and Pets Than an Air Purifier? Most air scrubbers don’t have a child lock safety feature, so they may put children and pets at risk. If the device is unsecured, kids can easily reach it and push buttons that increase the fan speed or change its settings without your knowledge. On the other hand, air purifiers come with child/pet lock features to help protect them from children and pet interference when you’re away. If you have pets, you should know that most animals are susceptible to smells and odors. They could be irritated by strong scents coming from an activated air purifier. Air Scrubber vs. Air Purifier: Which One’s Best for You? Depending on your air purification needs, you can always choose between an air scrubber and a purifier. Air scrubbers remove contaminants from the air while keeping odors and scents intact. An air scrubber will always meet large-scale and small-scale air purification needs, making it a better option than a purifier. It has a higher air-purifying efficiency and is more durable. Since air scrubbers have more pros than air purifiers, they stand out as the better for homeowners with large-scale needs and for commercial setups. Air Scrubber vs. Air Purifier: FAQs Some of the most common questions homeowners ask about air scrubbers and air purifiers include: How Long to Run an Air Scrubber? An air scrubber should be run for a minimum of 24 hours and a maximum of 48 especially when removing dust particles, pollutants, and mold from the air. How Long to Run an Air Purifier? You should run an air purifier for about 12 to 24 hours before cleaning it for the next cycle. Air purifiers need regular maintenance, which means you’ll have to pause the purification process now and then to reinstate it to perfect working conditions. Do Air Scrubbers Eliminate Mold? Air scrubbers will eliminate mold easily, provided that they have enough airflow and original HEPA filters. Anything less than that will present challenges when dealing with mold elimination. Bottom Line Air purifiers and scrubbers are both important devices that everyone should have. They both work to create a healthy environment by removing dust particles, polluting agents, and mold from the air you breathe daily. For commercial setups and large-scale air purification needs, it’s best to use air scrubbers. Air purifiers will be your best shot if your needs are much less extensive.
9 Reasons Your AC Keeps Tripping the Circuit Breaker
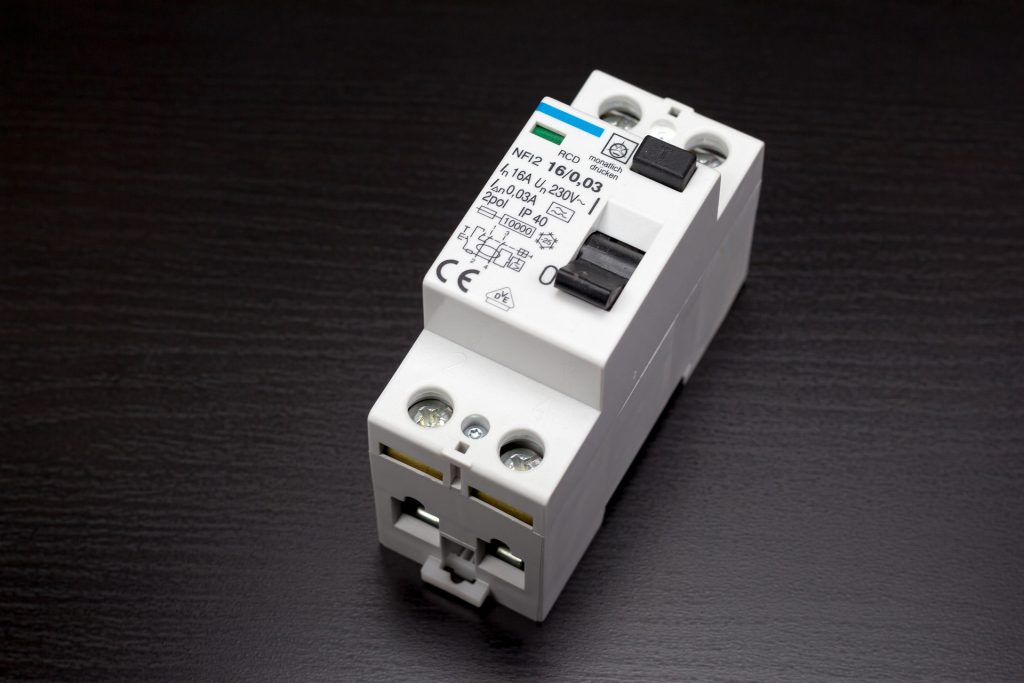
It happened again! Your AC circuit breaker keeps tripping and can’t figure out why! This is never the best experience, especially during that scorching heat of summer. However, this shouldn’t be too bad, right? If it happens repeatedly, it certainly is something serious and needs to be checked by a professional. But not to worry, at AHWA, our experts have the ultimate solution. The fact is, a circuit breaker is your home’s guard against current overloads that might result in disasters like fire. If your circuit breaker keeps tripping, it’s mainly because it’s receiving more current than it can handle. For instance, if your air conditioner demands 30 amps and the circuit breaker is meant to cut power at 20 amps, it will continually cause tripping. The main question is, what is causing your AC system to demand more voltage than it usually needs? Top Reasons Why Your AC Trips Circuit Breaker 1. Insufficient Refrigerant An AC uses a refrigerant to cool the hot air in your house. If there isn’t enough of this component in your AC system, the result is inefficiency. The system has to work harder and for longer times to provide the desired environment. This means that the AC will demand more power than usual to do the same task it does at lower power. If this power demand surpasses the circuit breaker cut-off point, it will undoubtedly trip. This will also lead to your system’s overheating and might ultimately damage your AC. If you want to rectify this and avoid costly repairs later, calling an expert from AHWA is a perfect solution. The expert should assess the problem, refill the refrigerant, and even seal leakages that might have caused the refrigerant levels to go down. 2. A Dirty Air Filter A simple thing as not properly maintaining your AC’s air filter can be the main culprit in your tripping problem. First, dirty air filters mean inefficient AC systems as the unit works extra hard to offer the ideal temperatures at your house. The AC unit will not only be required to work harder, but it will also need to run longer to maintain that right temperature. This result of an overworking AC is drawing more power. This, on the other hand, causes tripping of the AC circuit breaker, as the AC’s power demand surpasses the breaker’s cut-off point. Overworking of the AC will also cause your unit to overheat and wear down rapidly, The simple solution here is proper maintenance – changing the air filter as required ensures that your AC runs efficiently. 3. Dirty Condenser Coils Dirty, unmaintained condenser coils might be to blame for the tripping, just like the dirty air filters or low amounts of refrigerant. And, it all stems down to poor maintenance of your AC. When the refrigerant in your indoor AC system absorbs the excess heat from the rooms, it transfers it to the condenser unit outside. The condenser coils are then responsible for dispersing the hot air into the external environment, thus cooling the house. If these coils are covered with dirt or debris, you can be sure that the heat absorption and dispersing process will be affected. As a result, the AC again overworks, overheats, and demands more electricity to keep cooling the house. This will ultimately lead to the tripping of your circuit breaker. While washing the coils can be a DIY task, the best thing would be to notify an HVAC expert. This will ensure that the entire system is checked and any problem rectified. 4. Broken Coil Fan When the condenser coils absorb the heat from the refrigerant, the coil fun blows over these coils, dispersing the heat into the outside environment. If this fan is broken or not working optimally, the result is obvious – less or no heat dispersion. One main reason why the fan might not be working properly is a broken motor. However, dirty fan blades covered with grime might also cause strain on the fan motor, causing it to overheat and malfunction. If your condenser coils can’t cool down, it means that the system will overwork and overheat, causing it to require more power. More power demand only means tripping of the AC’s circuit system. If you experience such a problem, ensure you have the right person rectifying the problem. Call an expert from AHWA. 5. Compressor Hard Start A compressor is the main component of an AC system. If this part fails, the entire system fails too. While the compressor doesn’t break down as often, age eventually catches up, and it’s no longer as efficient. One way this happens is by experiencing hard starts. A hard start is when the compressor starts having difficulties starting and running. This makes the system demand more power to start working, which might cause tripping of the circuit breaker. As the heart of the system, a failed compressor might cause even bigger problems than tripping, requiring you to change the entire system. Now, this is costly and such an inconvenience. So, if you notice continuous tripping on the circuit breaker, don’t keep turning the AC back on and ignoring the problem. You require a professional to check the system and prevent resulting costly repairs. 6. Grounded Compressor A grounded compressor implies broken electrical windings inside the compressor. If this is the case, the windings hit the compressor’s side, resulting in a direct short to the ground. When this happens, it ignites the oil, ultimately causing burnouts. This, on the other hand, results in tripping of the circuit breaker. This isn’t a simple situation, and it requires you to replace the entire compressor, as well as clean your system’s refrigerant lines. 7. Loose wires or Aging Components Simple issues like a loose wire or aging AC parts might also be responsible for the tripping. This necessitates an overhaul inspection by an HVAC professional, to determine where the loose connection is or which parts need to be replaced. If proper and regular maintenance
Trane Vs. Carrier Vs. Lennox Air Conditioner Review 2021
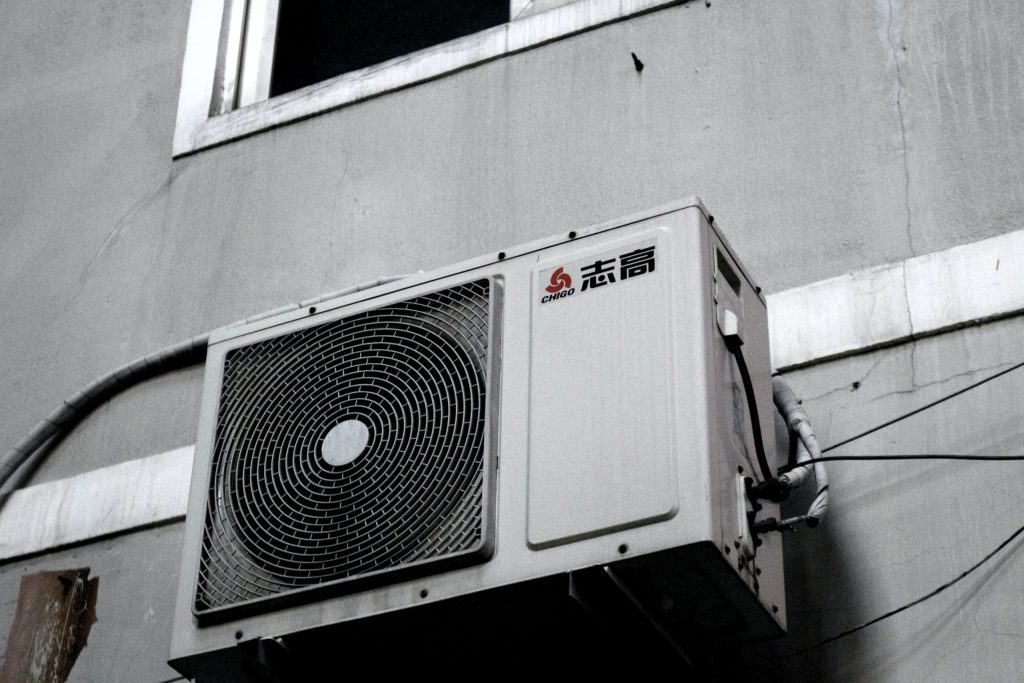
Having the right temperatures in your house is paramount for enhanced comfort. No one wants to endure the wrath of scorching summer temperatures or the chilly winter months. However, choosing the perfect air conditioning system for your home is not always easy. With so many great brands in the market, one has to wonder whether there is a unique criterion for choosing an AC that fits your needs. Different homeowners will go for various features in an AC, depending on their needs. But in essence, it still streams down to the value that a customer expects from the equipment. Some of the main factors that determine homeowners’ AC choice include the AC’s total cost (including installation), durability, warranties, the size of the home, and the SEER (energy efficiency) ratings. Today, we compare three of the top brands in the industry: Trane vs. Carrier vs. Lennox, and which brand makes the best AC systems and what differentiates it from the rest. Similarities between Carrier, Trane, and Lennox AC Units These three brands have several similarities, even as they are different. This means that understanding them better requires us to look at both their uniqueness as well as their common features. Some of the shared similarities include: Carrier vs. Trane vs. Lennox Air Conditioners Differences What makes each brand unique? What are their selling points? Well, each of the three brands has distinct aspects as follows: In terms of efficiency levels in these AC units, Lennox takes the lead. Their Lennox XC25 leads the way with a SEER rating of up to 26. Lennox is famous for making high-efficiency products, including heat pumps, air conditioners, and furnaces. Trane brand comes second, with their leading model having a 22 SEER rating. Although at one time Carrier brand was known for their highly efficient ACs, they currently hold the third position with their Carrier Infinity 21, with up to 21 SEER rating. Below are the most energy-efficient models in each brand: Brand models Energy efficiency(SEER) Premium Models Lennox XC25 26 Trane XV20i 22 Carrier Infinity 21 21 Mid-range AC Units Lennox XC20 20 Trane XV18 18 Carrier Infinity 17 17 Basic Ac Units Lennox XC14 16 Trane XR14 16 Carrier 24 ABC6 16 From the above data, it’s clear that Lennox outdoes the rest of the brands in every category. The interesting fact is that Lennox is the packs’ leader compared to Carrier and Trane and the rest of the AC brands in the market. When choosing an energy-efficient brand that minds the environment, Lennox always comes first. Any machinery or equipment with moving parts, breakdowns are almost inevitable. This means that you will need to undertake repairs, either minor or major, at one time or the other. AC systems from these three top brands are not different. When comparing Trane vs. Lennox vs. Carrier AC systems, it’s good to note that most of them will have a 10-15 years lifespan. Very few of these brands’ central air conditioners last beyond 15 to 20 years without demanding repairs. So, as you install that AC system, remember that you’ll need repairs at some point. However, proper and regular maintenance will prevent early breakdowns and costly repairs. When it comes to maintenance and repairs, the following issues are worth noting: Carrier: This brand sets itself ahead of the competition for convenience in repairs and maintenance. This is because their parts are readily available and not overpriced. Trane: Spare parts for Trane air conditioners might cost a little more than those of Carrier ACs, especially in small towns and communities. This is mostly because the supply houses selling to the HVAC companies only supply Trane’s OEM parts—no cheaper generic parts. Check out our guide on troubleshooting Trane furnace for in-depth information. Lennox: While there have been various complaints about repairs from homeowners and contractors in the past, this has taken a new turn. Initially, complaints were about costly spare parts since Lennox doesn’t accept generic spare parts, which also saw the repair time take too long. But, from 2015, Lennox committed to overhauling its entire parts supply chain, consisting of over 110 000 spare parts inventory. Besides efficiency levels, these AC brands also differ in terms of the available features as follows: Features Lennox Trane Carrier Humidity Control Climate IQ Comfort-R Infinity Touch Variable Fan Yes Yes Yes Wi-Fi Premium Models Premium Models All Models Smart Thermostat iComfort S30 ComfortLink II Infinity, Côr Communicating Premium Models Premium Models Premium Models Compatible with Alexa Nexia Alexa &Côr Smart Home Features Definition: When it comes to prices for these three air conditioner brands, you won’t easily find them at online marketplaces. Essentially, Trane, Carrier, and Lennox use authorized dealers only to sell their products. This means that you should get the price estimates for each unit plus installation from your local dealer. But, if you want to have a rough idea of how the prices vary for these brands, you can check out individual Carrier, Trane, or Lennox pricing reviews online. This will give you a clue of what to expect. Typically, all these manufacturers pre-check their competitors’ pricing when setting theirs. This allows them to set competitive prices that don’t vary too much with others in the market. All in all, when we talked to various authorized dealers and existing customers, Lennox models seemed to be more expensive than the rest. For instance, Lennox premium models are more expensive than premium models in other brands, by 10-20%. For the mid-range and lower tiers, some models were expensive, and some cheaper. It all depends on the dealer you talk to. Part of the reason why Lennox AC models tend to be relatively expensive lies in the superior efficiency they offer. In fact, their most efficient models are sold in three performance levels, including: This implies that Lennox’s higher prices are justified by their high-efficiency rating on their AC units. When it comes to the performance of these brands, there are only small variations present. All three brands manufacture
Lennox Air Conditioner (AC) Reviews 2021

Lennox is one of the leading names in the AC and HVAC industry. They are known for manufacturing high-quality products that give your home the best living conditions for the longest time. In fact, all their air conditioners are among the most energy-efficient brands in the market and are Energy Star Certified. Whether you want it essential, better, or best, Lennox is a perfect product for everyone. However, when searching for an air conditioner, homeowners look for more than just efficiency. Customers want to know about the product’s durability, installation costs, and repair costs, among other issues. You can read our review on “Trane Vs. Carrier Vs. Lennox” for better understanding differences of between top AC brands Since every brand has its strengths and weak points, having sufficient information about Lennox will help you determine if it’s your brand of choice. We have prepared this Lennox air conditioner review to equip you with just that—the right and unbiased information. Note: The AC installation process is critical and, in most cases, is the cause of many problems that occur later if it’s not done right. Lennox AC Reviews: Air Handlers Features Lennox manufactures some of the best air handlers for residential and light commercial uses. Their air handlers are pretty flexible, allowing variable or multi-speed blowers configuration. The variable-speed feature allows the air handler to deliver quiet but high-efficiency comfort for your home. On the other hand, air handlers with the multi-speed blower feature are designed to offer economical, high-efficiency comfort. Lennox has a wide range of air handler models designed to offer the much-desired comfort, even during the worst climates. They offer both quality economical models, as well as exclusive high-efficiency ones. Still, all these models have one thing in common—they have the necessary features to keep your home’s environment comfortable. Main Features of Lennox Air Handlers One thing you will notice with Lennox is that they don’t make simple products. Their products are complex, and some people have even reviewed them as over-engineered. Types of Lennox Air Handlers Lennox manufactures four types of air handlers. These include: All these air handlers enjoy 4.5 stars ratings and above, meaning that customers are satisfied with what the brand offers. Lennox AC Reviews: Condensing Units Features Condensing units from Lennox come in different designs with varying features. This allows customers to choose and buy a unit based on their needs and budget. Based on various Lennox reviews online, most customers are content with what their condensing units offer. However, like most other brands, there are still some complaints. Lennox condensing units are known to be of high quality, guaranteeing high performance for long periods. And, whether you need a condensing unit for your air conditioner or heat pump, Lennox manufactures units for both. And, they come with a wide range of features to suit different applications. Main Features of Lennox Condensing Units Lennox condensing units comes with the following features, depending on the model: Designs If you want it simple, don’t look for it in Lennox. The company is known for its complex-engineered products, which offer the best service for long periods. Unlike most other brands, Lennox condensing units don’t have many problems when it comes to operations. They are reliable, dependable, efficient, and will offer the desired comfort in your home for years. Lennox AC Reviews: Quality Installation As mentioned earlier, we cannot overlook the importance of proper and professionally installed AC systems. If a shoddy job is done, chances of you encountering endless system problems along the way are high. That’s why hiring a reputable HVAC professional to ensure proper AC Installation In Phoenix, Arizona is paramount. A reputable contractor/dealer will ensure that the AC installation job done on your property is flawless, guaranteeing you comfortable temperatures for years. If you cut corners just to cut on some costs, you might be tying yourself to endless system failures and costly repairs. While some manufacturers don’t maintain effective training programs for dealers, Lennox does. For this reason, installations from Lennox dealers will, almost certainly, be faultless. The fact is, air conditioner installations are not cheap. For such costly projects, you need to do it perfectly the first time to avoid extra costs. Make sure that you hire only the best professionals that specialize in AC installation and AC Repair In Phoenix, AZ to get the job done correctly and efficiently. Lennox AC Reviews: Categories and Models Lennox manufactures three types of AC categories; Signature collection, Elite Series, and Merit Series. Each of these main categories has various models as follows: Signature Series Elite Series Merit Series Lennox Air Conditioner Reviews: Model Comparisons Signature Series(XC25) Elite Series (XC20) Merit Series (14ACX) SEER Rating Max 26 Max 20 Max 16 Warranty 10 years on covered parts and compressor 10 years compressor, 5 years covered parts 5 years on covered parts and compressor Compressor Variable-speed blowers Variable-speed blowers Single-speed blowers Cooling stages Variable-capacity Variable-capacity Single-stage Energy Star certification Certified Certified Certified Sound rating 59dB 65dB 76dB Cabinet design PermaGuard Cabinet, SmartHinge Louver PermaGuard Cabinet, SmartHinge Louver PermaGuard Cabinet Refrigeration pressure switch No information No information No information Diagnostics iComfort®-enabled iComfort®-enabled Conventional controls Category Premium Mid-range Economy Tax Credit eligibility Eligible Eligible Eligible Lennox AC Reviews: Warranties When it comes to warranties, Lennox might run a bit behind other HVAC companies. However, to compensate for this, the company manufactures top-notch products that guarantee extended service. Also, Lennox invests heavily in maintaining an extensive network of well-trained dealers. This ensures that every installation made by their dealer is a quality installation. And, while this isn’t a guarantee for completely flawless systems, the chances of breakdowns are limited. When purchasing that air conditioner from Lennox, going for the available extended warranties is a great idea. This ensures less stress when something goes wrong—especially if you have extended product and labor warranties. Lastly, don’t just go through Lennox HVAC reviews only. Browse through other reviews for other brands to ensure you have all the necessary information.
2021 Guide on How to Vacuum AC System without Pump
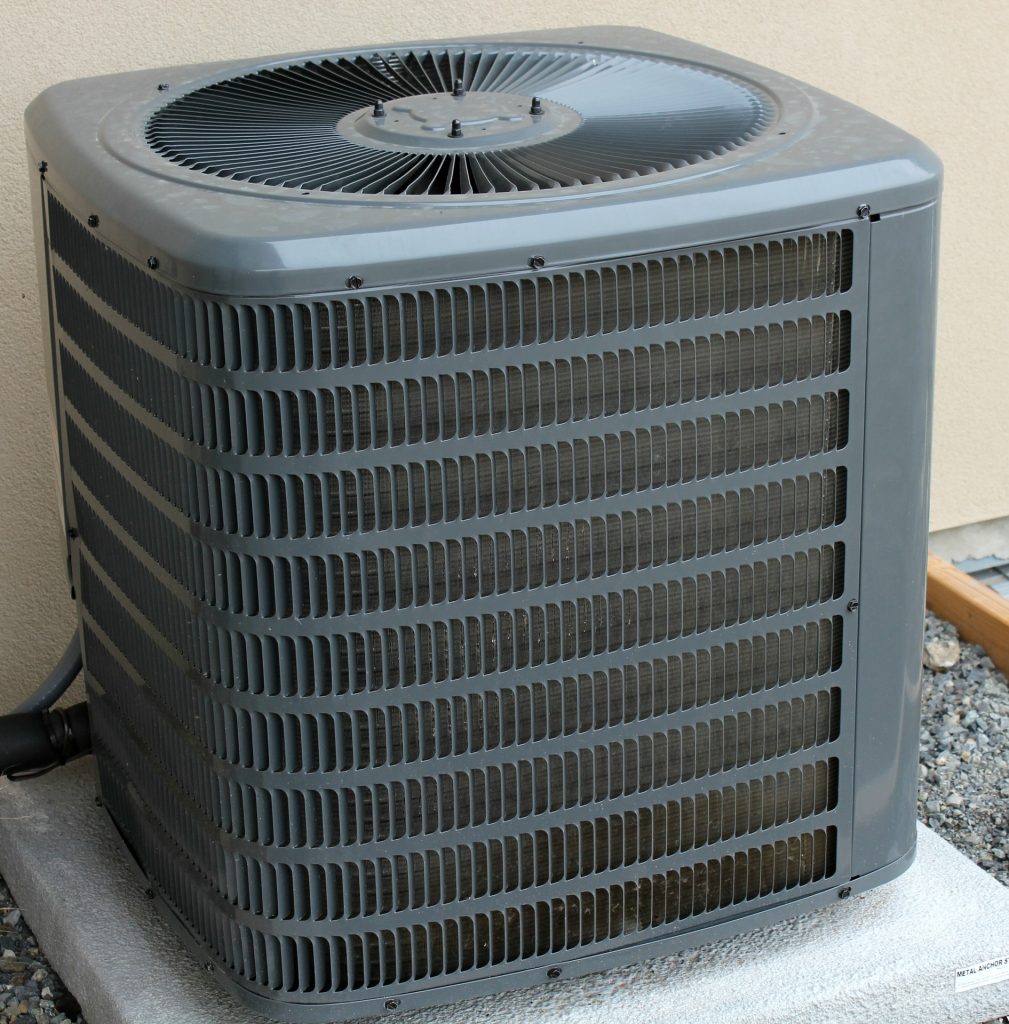
Not vacuuming your AC system, especially after installation or service, will result in you not enjoying the system’s optimal performance. Why? When the air conditioning system is exposed to the atmosphere, elements like air, humidity, and moisture might accumulate in the system. Even a minute amount of these elements can significantly affect the AC’s performance, or even worse, lead to severe problems. So, if you were wondering whether it’s that important to vacuum your AC system, the answer is, yes! Vacuuming allows you to remove any moisture and air from the system, guaranteeing optimal performance. But how do you do the vacuuming? Is it possible to do it without a vacuum pump? Well, this article delves deeper into how to vacuum your AC system without a pump. The following tips will guide you into just how to accomplish this. How to Vacuum AC System without Pump Refrigeration systems are designed to work only with refrigerant and oil flowing within them. Any other substance that gets inside the system is seen as foreign and needs to be removed. Whether it’s air, moisture, debris, or oxides, they must be removed to ensure the proper functioning and prevent freezing of your system. While a vacuum pump is the best solution for an AC evacuation, it’s not the only one. However, the best alternative to a pump requires the installation of access valves, both on the low and high-pressure sides of your system. Here are some steps to show you just how to vacuum your AC without a pump. 1. Depressing the Access Valve With your compressor installed, plus the low and high-pressure access valves in place, switch on your compressor. After this, depress the high-pressure side access valve on your AC. Note: Keenly observe the lower side pressure while doing this. Once the higher side pressure hits the lowest point, close the high-pressure access valve and switch off your compressor. By following these simple steps, you’ll have depressed your access valve. The process is straightforward and will take merely five minutes. 2. Charging the Low-Pressure Side This step comes after you’ve effectively completed the access valve depressing process. Here, you are required to charge the lower pressure side to approximately 14 psi. After doing this, you should carefully monitor both the low and high-pressure sides for around three minutes. This is to ensure that the pressure on both sides equalizes. 3. Repeat Step One (Depress the High-Pressure Side Access Valve) After you are done with step two, and the pressures are equal on both sides, switch your compressor on again. Subsequently, depress the high-pressure access valve again, just as you did in step one. However, instead of monitoring the pressure on the high side, monitor the low side pressure. When it hits the lowest point it can go, allow the access valve on the high side to close. Again, when the valve is completely closed, switch off the compressor. Step three is complete. 4. Repeat the 2nd and 3rd Steps Just as you did in the second step, charge the low-pressure side of your AC to approximately 14 psi. Again, wait and monitor the pressure on both sides for around three minutes until they equalize. Then, switch on your compressor and repeat the depressing step of the high-pressure access valve. For a successful evacuation, you will note that the low-side pressure doesn’t go as low as it had gone in the previous steps. This results from the absorption and gradual release of the refrigerant in the compressor oil. At this point, if the high-pressure side valve is not releasing any gas, allow it to shut off. By this time, your AC system will be free of any air and moisture previously present. 5. Charge With Refrigerant This is the last step on how to vacuum your AC system without a pump. First, charge your AC system with the right amount of refrigerant. After this, go ahead and switch off your compressor, and the system is good to go. Note: You can make some adjustments to the process, depending on the type of AC system you are working on. Why Should You Vacuum Your AC System? Accumulation of air and moisture in an AC system brings more problems than you can imagine. While some of the issues might be more severe than others, vacuuming ensures that your home’s air conditioning is not compromised. Let’s explore some of these problems and how regular vacuuming can help avoid them. Key Takeaway Regular maintenance of your AC system is always paramount. Whichever type of home AC you have, maintenance ensures that you get the best service from it. Vacuuming is one of the several activities included in a maintenance schedule. It ensures that water, moisture, air, and other unwanted debris are removed from your AC system. While using a vacuum pump is the easiest way to do this, the above methods can do the same task. This way, you can conserve and protect your AC from damage caused by these simple elements.
How to Effectively use HVAC Manifold Gauges

You probably have come across manifold gauges if you have worked with heating, ventilation, and air conditioning (HVAC) systems. They can be small handheld devices or bigger machine-like devices like those in professional HVAC shops. Manifold gauges differ based on the number of ports or manifolds used when attaching the accessories. They are also designed to withstand different levels of pressure. HVAC manifold gauges are some of the most crucial tools for troubleshooting and fixing HVAC systems. So if you work or have an interest in handling heating and cooling systems, you need to learn how to use HVAC manifold gauges. Below is an overview of manifold gauges and how you can use them effectively to maintain your HVAC systems. What is a Manifold Gauge Set Used For? HVAC Manifold gauges can play both diagnostic and service functions. For diagnostics, they are used to establish whether an HVAC system is working well or not. They also help to identify problems like leaks or pressure issues. As a service gadget, the manifold gauge is used to release moisture and sludge. It also helps remove any contaminated or unknown refrigerants that may cross-contaminate the system. You can also use it to add refrigerant to HVAC systems. Please note that although you can use most gauges to measure any refrigerant pressure, there are variations in function and specifics. So ensure the manifold gauge you are using matches the refrigerant used in the HVAC system. The refrigerant used is always indicated on the system. However, it is good to note that there are gauge sets that can measure multiple refrigerants. Below is an overview of manifold gauges and how you can use them effectively. Basic Components of HVAC Gauges An HVAC manifold gauge has the following essential components that you need to know before you start using it: ● Chamber Devices A manifold gauge set has both high-pressure and low-pressure chambers. It also has valves that are turned on and off to control the flow of gases and pressure in these chambers. There is also a utility chamber that can be used for external connections. ● Readout Gauges An HVAC manifold gauge set usually has two read-out gauges; one is for low-pressure readings, while the other is for high-pressure measurements. Although rare, there are a few brands that incorporate a third that is used to measure compressor output. The blue manifold gauge is used to measure low-pressures, while the red one is used for high-pressures. There are red and blue valves on the side that you can turn on and off to regulate the gas going to the low and high-pressure valves. There are two main types of readout gauges available; analog and digital. 1. Analog Readout Gauge Analog readout gauges have an indicator needle that shows the level of vacuum/pressure in an HVAC system. They are more common and are also easier to use when compared to digital ones. However, they are prone to errors. 2. Digital Gauges Digital gauges are the newer versions that allow for numeric readings for both vacuum and pressure. They provide more accurate measurements compared to analog readout gauges. They also have more features that make work easier. For example, digital gauges usually convert the readings for you, minimizing the chances of error. However, not many people are conversant with this new technology. ● Hoses Each manifold gauge set usually has three hoses, colored red, blue, or yellow. They are color-coded to distinguish them. The blue hose is for the low-pressure gauge, while the red one is for the system’s high-pressure valve. The yellow hose can be used for both low and high-pressure valves. It goes to whichever valve is open. ● Manifold Centerpiece The centerpiece that holds everything together is what is called the manifold. It has many connections at the top, bottom, and even on the side. The hoses are usually attached to the bottom of the manifold. On the other hand, the top connections are meant to keep the hoses clean. The other extra connections help prevent the hoses from tangling and can be used for other purposes. How to Connect HVAC Gauges If you want to understand how to use manifold gauges in HVAC, it is important to know how the different components are connected. The high-pressure side is always connected to the red port of the gauge. Therefore, you need a red hose that can withstand high pressure. The hose is attached using the flare fittings it comes with from the manufacturer. After that, fix the low-pressure side to the gauge’s blue port. Remember to use a blue hose (low-pressure) for that purpose. This facilitates the desired vacuum pressure flow for evaluation to occur. The high-pressure and low-pressure ports are of different sizes and thread pitches to minimize the chances of incorrect hookups. Do not forget to attach a waste hose. This should be done at the manifold’s central part. But if you are discharging the system, it is the larger, low-pressure hosepipe (black) that you should connect to the manifold’s center port. This allows you to attach the refrigerant recovery bottle and prevent the release of the refrigerant into the environment. The additional ports on your manifold centerpiece can be used to connect to other gauges, micron meters, or vacuum pumps. Once the connection is made, you can note the measurements shown on the refrigeration gauges. This indicates the pressure in the air conditioning and freezing units, as well as refrigeration, cold rooms, and cold filling devices. How HVAC Gauges Work Although they are simple gadgets, they require special knowledge of using them. Therefore, understanding how they work is crucial for a technician to know. Before you start using a manifold gauge, you need to understand how gas flows through the gauge. To review, the gas moves through the hoses that are attached to the manifold. The red hose goes to the red gauge, while the blue gauge goes to the blue because of the different pressure levels. The yellow hose in
Beginners Guide on How to Change Furnace Filters

Pet dander, mildew, pollen, dust, among other pollutants, can significantly reduce indoor air quality. Also, if debris continually builds up in the HVAC system, it can decrease its efficiency or even lead to mechanical failure. Cleaning indoor air and keeping the HVAC system free of contaminants is the work of furnace filters. Having the furnace filter in great shape is thus crucial. It’s vital to change your furnace filters often if you desire to always have good indoor air quality and a smooth-running HVAC system. But do you know how to change a furnace filter? Unfortunately, not many homeowners know how to replace furnace filters. Luckily, this piece explores how to change filters in a furnace for beginners. But first, how does a furnace filter work? How Furnace Filter Works Furnace filter achieves its purpose by cycling the air traveling through the HVAC system and your rooms. In essence, this occurs when the cold air in the house is drawn to the furnace through return ducts. Inside the furnace, the heat exchanger heats the air, which is then sent back to the rooms. This is a continuous process that takes place over and over again. Now, with all this air traveling from the rooms to the furnace through the ducts and vice versa, dirt, debris, and other pollutants are collected on the way. The furnace filter works to clean the air of debris, ensuring that it doesn’t get to other parts of the HVAC system. Also, it makes sure that the air traveling back to your house is clean and safe. For this reason, furnace filters are pretty essential components that need to always be in perfect shape. So, here is how to change your furnace filter? How to Change Furnace Filter Changing a furnace filter is a pretty easy and quick task that you can do yourself. However, if you are not able to do it, you may seek professional help from local experts. Here are the basic steps to follow when changing a furnace filter: Step 1: Determine the Kind of Filter You Have Furnace filters differ, and identifying the kind of filter you have or need to replace is the first and the most crucial step. So, how can you tell what kind of filter you have? Well, to understand that, let’s explore the different types of furnace filters available in furnace filtration. There are five common types of furnace filters including: These filters can either be disposable or permanent. Here are the main differences between permanent and disposable filters. Difference Between Permanent and Disposable Filters Disposable filters are replaced after every month, quarterly, semi-annually, or annually. Though they require replacement every so often, they offer you the convenience of not having to deal with a single filter over an extended period. This is a good thing because you don’t have to keep up with a single permanent filter’s repair and maintenance task. However, disposable filters can be pretty inconvenient as well, especially when your filter size is challenging to find. This can become more of a hassle when purchasing it every other month. Therefore, some people prefer permanent filters over disposable ones as they are long-lasting, between 5-10 years, and most come with a lifetime warranty. Made with aluminum or stainless steel, permanent filters are also sturdier than disposable ones. While the initial cost of permanent filters is higher than that of disposable ones, it can bring you significant long-term savings. For those who don’t have to worry about the high-cost issue, permanent filters are better. Permanent air filters only need washing once a month and not replacement like disposable ones. Also, they carry a high-rated MERV filter, which means better performance. So, what is the MERV rating? MERV Rating Different types of furnace filters have different MERV values. The MERV rating was launched by the “American Society of Heating, Refrigeration, and Air Conditioning Engineers” in 1987 as the first system that allows standard performance rating other than HEPA filtration. The MERV value measures the size of elements that your filter can trap, with a higher number indicating that it captures even the minutest of particles. Step 2: Remove the Service Panel and the Existing Filter The next step is locating and removing the service panel. Then slide out the existing filter inside your furnace. To do that, you need to turn off your furnace completely, reach for the filter inside the air return vent or furnace and pull it out. It is located near the outtake/intake blower fan. After removing it, carefully note the cardboard frame size so you’ll know the exact filter size to purchase. Step 3: Find the Right Replacement After noting the furnace filter size, you need to visit the nearest local home store or hardware store and buy a replacement. Also, you may browse and order it online. Step 4: Install Your New Filter The last step is installing your newly acquired furnace filter. Most furnace filters exteriors have an arrow indicating the direction in which the air flows. This arrow can offer you the correct way to install your filter. Also, the markings tell you the side of the filter that should face your furnace. Slide the new filter into place and then place the cover back over it. Remember to mark the date you change the filter so that you know the date to replace it again. When is the Right Time Interval to Change the Furnace Filters? The time interval you take to change your filter differs from one home to the next. It can occur once a month, quarterly, annually, or longer (for permanent filters). An excellent place to start in order to know the exact timing is to check the product information on the packaging you were given during your filter purchase. Most manufacturers indicate how frequently to change your filter. While the timing for changing furnace filters differs, here is a standard schedule: The thicker the filter, the longer they last. Filter efficiency, measured
Learn What Is Ductless Mini Split in Ten Minutes

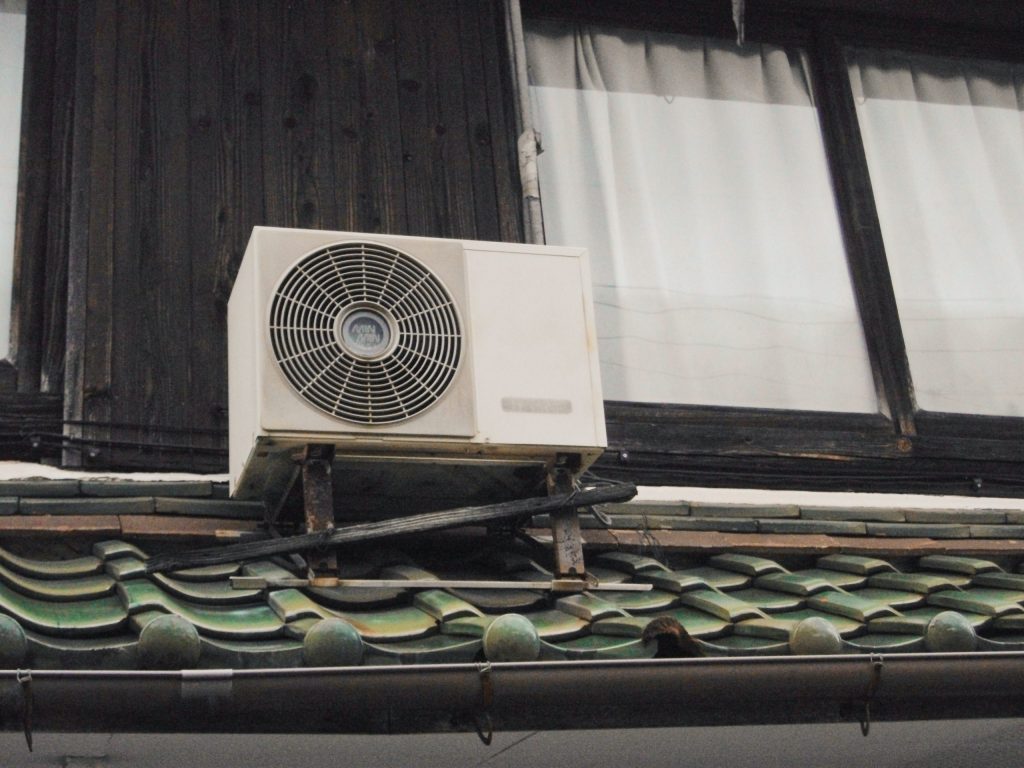
The use of ductless air conditioning systems has seen a steady increase in recent years. And all this is for a good reason. Home users have realized just how effective these AC systems are, both in terms of providing optimal temperatures where needed and saving on energy bills. Popularly known as mini-splits, ductless heating and cooling systems offers you the ability to control your home’s temperatures without having to deal with numerous issues seen in the ducted setups. You can easily regulate your home’s temperature, room to room, without using too much energy. But how do these systems work? Will installing one in your home be the best idea? And, where can you get the best ductless mini-split? This 10-minute guide offers you all these answers and more. What is Ductless Mini Split? Typically, these are air conditioning and heating systems that need “no” air ducts to function. Also, unlike the traditional ducted HVAC units, which regulate your home’s temperatures from a single unit, mini-splits are different. With mini-splits, there is a unit servicing every room/zone, and each of these units has its separate evaporator coil and fan. Generally, a split AC system has two parts—the indoor and the outdoor unit. The system works almost in the same way as the traditional ducted system, except that the indoor unit is divided into several units, each unit serving a specific room or zone. Having different units in various rooms allows you to set different temperature levels in other rooms. This is quite convenient, especially where you have several family members favoring varying temperatures. To help us understand the mini-split system better, let’s see what exactly it’s made of: Ductless Mini Split AC’s Components How Do Mini-Splits Work? The ductless mini-split AC consists of individual indoor units, which link to the outdoor unit. This outdoor unit functions as the condenser/compressor, which pressurizes and pushes the indoor unit’s refrigerant. When warm air in the room blows over the indoor units, it is absorbed by the unit’s evaporator coils. With the refrigerant’s help in the evaporator coil, this helps transfer the heat from the air to your system’s outdoor unit. This, in turn, helps to cool the room temperatures. Mini-split systems consist of several small units, installed in different rooms as desired. Each unit controls the temperatures of a single zone. These units help remove warm air from the room, depositing it into the outdoor unit as condensate. The condensate is then drained from the outdoor unit through a suction line and deposited in the desired location. The conduits connecting the outdoor and indoor units only need a small hole on your wall. Difference between Ducted System and Ductless Mini-Split AC System As we mentioned earlier, the main difference lies in the use of ducts. A ducted system contains a central air heating and cooling unit from where the connected ducts transport the air to various rooms of the house. The single AC unit in this system will mainly be installed in the house’s attic or the basement. One significant advantage of a ducted AC system is that it’s reliable and quieter than the multiple window AC systems. It gives you a better chance to efficiently control your home’s temperatures across different rooms simultaneously. As for the mini-split system, the same benefits also apply, with several additional ones. While a central air conditioner is prone to air loss, thus, more energy use in cooling and heating the rooms, a mini-split system has that covered. Since it doesn’t use air ducts to control the temperatures, there is no chance of losing cool or warm air during the process. Unlike the ducted air conditioning system, a ductless system has a heating and cooling unit from each room. This means that you’ll not be using a blanket temperature for your house. Different rooms have their AC units, allowing you to have different temperatures in other rooms as desired. Best Area of Application for Mini-Splits What are the most likely places to see mini-splits? ● Garage Because of the potential risks involved in these places, ductwork is not encouraged. And since you might still need to use that garage for considerable amounts of time, using a ductless mini-split becomes a perfect solution. This way, you can spend all the time you want in your garage without worrying about freezing temperature or temperature that is too hot. ● Basement Most of the time, basements tend to be pretty cold. Additionally, if the place is crowded with people during a party, the home can become too hot and stuffy. For this reason, a ductless mini-split is your ultimate solution in maintaining just the correct temperatures down there. ● Master Bedroom Sometimes you want customized temperatures for the room you spend most hours of your day in. After a long day at work in the scorching sun or freezing winter, your bedroom is your haven. So, it’s only fair to have the best conditions around the room. A mini-split heating and cooling system can help you to achieve your desired environment. ● Slab Homes Without ample space to hold an oversized furnace or air conditioner, such homes need an alternative heating or cooling source. A ductless mini-split seems like an excellent option for that. With it, you can have the ideal temperature in your house without requiring too much space. Benefits of a Ductless Mini Split AC System What makes this system a preferred option over the ducted air conditioning system? What is the Best Ductless Mini Split System? When searching for the best ductless split system, your choice is influenced by several factors. For instance, do you need a single zone system, a multiple zones one, or a cold climate ductless mini-split system? Your budget, plus the system’s efficiency, size (capacity), and lifespan are also factors you should consider. With this in mind, you can now quickly identify who makes the best ductless mini-split system. The fact is that different brands have their strengths and drawbacks. You just need
HVAC Zoning System 101: What It Is and How It Works
Ever walk into one room of your home and feel like it’s a sauna, while the next feels like an icebox? If so, you’re not alone — and an HVAC zoning system could be the solution you’ve been looking for. Whether you have a multi-level house, rooms with big windows, or simply a household with different temperature preferences, zoning can help create customized home comfort. In this guide, we’ll explain exactly how HVAC zoning systems work, what types are available, how much they cost, and why so many Arizona homeowners are choosing this smart upgrade. What Is an HVAC Zoning System? At its core, an HVAC zoning system divides your home into separate areas (or “zones”) that can be heated or cooled independently. Rather than relying on a single thermostat to control the entire house, zoning systems use multiple thermostats, along with smart dampers inside your ductwork, to direct air where it’s needed most. This means your upstairs bedroom can stay cool for sleeping while the downstairs living area stays cozy for movie night — all at the same time. Why Homeowners Need HVAC Zoning Most homes were built with a “one-size-fits-all” HVAC setup. But real life doesn’t work that way. Here are a few everyday situations where zoning can make a big difference: Zoning lets you customize comfort room by room — and often leads to better energy efficiency. How Does an HVAC Zoning System Work? Let’s break it down simply: This trio works together to balance airflow and automatically maintain ideal temperatures throughout the house. What Types of Homes Benefit Most from Zoning? If your home fits any of the following descriptions, an HVAC zoning system is likely a worthwhile investment: That said, even a single-story home can benefit from zoning, especially if it suffers from hot or cold spots in different areas of your home. Homes that aren’t ideal for traditional ductwork setups may benefit more from solutions like ductless air conditioners, which offer efficient, room-specific temperature control. Can You Retrofit Zoning into an Existing System? Yes — many homeowners think zoning is only possible in new construction, but that’s not true. Depending on the layout and condition of your existing ductwork, zoning can often be added to your current system. In some cases, adding ductless mini-splits for independent control in specific rooms may be a smarter choice. An HVAC professional can evaluate your setup and recommend the best solution. How Much Does an HVAC Zoning System Cost? The cost of an HVAC zoning system in Arizona can vary depending on: Here’s a rough estimate: System Type Estimated Cost (AZ) Retrofit (2–3 zones) $4,500 – $7,000 New install (3–4 zones) $5,500 – $8,500 Ductless mini-split (1 zone) $3,700 – $6,000 Keep in mind — the real cost depends heavily on labor and ductwork conditions, so it’s best to get a professional in-home quote. Tip: Don’t forget about efficiency ratings when comparing systems. Investing in one with a good SEER rating for ductless mini-splits can significantly reduce long-term energy costs and improve comfort. Advantages of Installing an HVAC Zoning System Here’s why more Arizona homeowners are choosing zoning for their heating and cooling needs: 1. Customized Comfort, Room by Room Are you tired of battling over the thermostat? Zoning lets each space in your home maintain its own perfect room temperature. Whether it’s a warm nursery or a cooler home office, you’re in control—and so is everyone else in your household. 2. Improved Energy Efficiency Zoning reduces wasted energy by sending heated or cooled air only where it’s needed. That means no more pumping AC into an empty guest room — and less strain on your HVAC system. 3. Lower Utility Bills With better control and less waste, many homeowners report energy savings of 20–30% after installing a zoning system—a change that can significantly lower their monthly energy bills. 4. Longer HVAC System Lifespan Because the system isn’t working overtime to condition your entire home at once, wear and tear is reduced. That means less maintenance and longer life for your HVAC equipment. 5. Smart Home Compatibility Many modern HVAC zoning systems come with smart thermostats and app-based controls. Adjust temps from your smartphone, set schedules, or make changes on the go — no more thermostat wars. 6. Improved Air Quality Zoning systems can help reduce the spread of allergens and pollutants by limiting airflow between spaces and promoting cleaner, healthier air in each zone. Things to Consider Before Installing a Zoning System While HVAC zoning has clear benefits, it’s not a one-size-fits-all solution. Here’s what to keep in mind: 1. Upfront Investment Installing a zoning system involves additional components like zone control panels, dampers, and extra thermostats — plus the labor to install them. While the long-term savings can be real, the initial cost can be higher than a standard system. 2. Home Compatibility Some homes—especially those with outdated or poorly designed ductwork—may need extensive retrofitting to support zoning, which could mean added cost or complexity. 3. System Maintenance More components mean more potential for system maintenance and repairs. Dampers and thermostats may eventually need servicing or replacement. Keeping your system maintained is key to keeping it efficient. 4. Not Ideal for Very Small Homes Zoning may offer limited benefits in smaller or open-concept layouts. A traditional HVAC setup may be more cost-effective if your home has fewer rooms or consistent temperature needs throughout. Alternatives: Manual Dampers or Ductless Systems If a full zoning system isn’t in the budget right now, you might consider: Both offer partial zoning benefits without the full investment of an advanced automated system. Is an HVAC Zoning System Worth It? If you constantly adjust your thermostat, argue with your spouse about temperatures, or are just tired of dealing with uneven comfort levels in your home, then yes, an HVAC zoning system is absolutely worth exploring. Not only can it help you save on energy, but it also improves your day-to-day quality of life. And that balance can make a difference in