
HVAC Tips for the Summer
With the arrival of summer, everyone is looking forward to spending lots of time in the great outdoors. Summertime outings to go hiking, camping, fishing or whatever else you enjoy are always something to look forward to, and chores like lawn mowing, gardening or other yard work can really work you into a sweat. As the temperatures climb, you’ll also be looking forward to stepping back into the cool comfort of your home when the day is done. Arizona temperatures during the summer months can be real scorchers. You’ll use your HVAC system more as the humidity and temperatures rise. You will want to do all you can to keep it running smoothly, providing cool air and sparing you from unnecessary repairs that can impact your finances and your free time. No one wants to sit in a house that is hotter than their front yard in the middle of a summer day. To take the best care of your HVAC system, you’ll need to understand how it works. We’ll explain some of the different components you’ll need to become familiar with to maintain your system in the following HVAC tips. Here are some of our best HVAC tips for summer and for dealing with Arizona heat. The first of our summer HVAC tips is perhaps the simplest. The air filter in your HVAC system keeps particles out of the air, leaving the air flowing into your home clean and odor-free. Proper air filter maintenance reduces allergens and dust that affect the air quality in your home. It is recommended that you change your air filters at least every few months, but in the summer, when you are using your system considerably more, you may need to replace it as often as monthly. At the start of the season, put in a fresh filter and change it as often as necessary to keep your system working at optimum levels. The type of air filter you choose can also make a difference in the air quality of your home and the energy efficiency of your HVAC system. Choose the one that best suits your needs and budget. Did you know there are batteries in your HVAC system? Consult your system manual or search your system online to see what kind of batteries you need, how to change them and how often to do so. Typically, batteries only need to be replaced every couple of years as part of routine maintenance. You can handle this yourself or consult your HVAC technician to see if it was included in your yearly maintenance. If it wasn’t, or if you haven’t had professional maintenance done, you can purchase batteries at most hardware outlets or from your HVAC service provider. If you change them yourself, it’s a relatively simple, straightforward task. You’ll only need a screwdriver to remove the screws on the battery compartment and the replacement batteries. If you haven’t checked your batteries but notice the display on your digital thermostat has dimmed or is flickering, you’ll want to change the batteries immediately. Failure to do so could mean you are not getting a different temperature than what you have set your thermostat to regulate. One of the best HVAC tips we can give you is to do preventative maintenance. Having the ducts cleaned and inspected before the summer can keep your system working at the most energy-efficient level possible. A professional can remove built-up dust, debris and dirt from the air ducts that you may not realize are there. Not only will this keep your system running well, but it will also keep the air quality of your home at optimal levels. Your technician will also ensure your system is correctly balanced if you have a forced-air heating system that runs during the colder months once the summer has passed. An energy audit will ensure that the ducts are all in good condition, with no cracks or disconnections. Certain components of your HVAC system need to be inspected regularly. One of these parts is the blower motor. This motor is a primary part of your heating and cooling system. It pulls air from the return ducts and forces it back through the system. A fan turns on the motor inside the HVAC unit, which is connected to it with a belt. This belt is vital to the system’s operation and should be inspected yearly when the rest of the system is checked. A defective blower motor or a damaged belt could cause the system to run poorly, providing you with poor cooling and increasing your utility bills dramatically. Additionally, early detection of problems that need to be repaired or components that need to be replaced can avoid more extensive repairs down the road. Perhaps one of the most critical HVAC summer tips we can give you is to do proper maintenance on your system. The best time to schedule maintenance is in the spring months, before the summer season takes its toll on those long hot Arizona days. A good inspection and tune-up will get you ready for the season ahead and prepare you for the cold months to follow. A properly serviced system will keep you cool all summer and reduce the cost of running your HVAC system by making sure it is clean and running as the manufacturer intended it avoiding some common AC issues such as blown AC fuses. In the long run, regular professional maintenance will ensure that you stay cool during the hottest days of the year without interruption. Maintenance costs may vary depending on the age of your system and what must be done to get it operating properly. No one wants to find themselves without a cooling system in the summer. Our HVAC tips can help make sure that doesn’t happen. Unexpected failures can be costly and create discomfort in your home. Investing in preventative maintenance can save you on unexpected repairs later. You can call the HVAC experts at American Home Water and Air to
8 Common AC Problems and Solutions
At some point, many of us will find that we need to look into common AC problems and solutions. If your air conditioner isn’t working correctly on a hot Arizona summer day, it’s usually quickly apparent. It is helpful to understand the most common AC problems. Once you understand common AC issues, you can take quick action to prevent them from escalating to complete system failure. Let’s take a look at the ten most common AC problems and solutions: In the heat of summer, your air conditioner will run more than usual. Still, it should not run without stopping. If your AC isn’t taking a breather from time to time, it risks damage to crucial elements and increases energy costs, causing your utility bill to rise steeply. Problem: A constantly running AC is one of the most common air conditioning problems noted by homeowners. If your air conditioner keeps running when turned off, it could be one of several issues. Solution: You may have a clogged air filter. Check to be sure your air filter is clean and placed correctly and see if that corrects the problem. If not, you may have issues with your thermostat, compressor or other electrical elements. You can contact a professional at American Home Water and Air for assistance. Nothing is worse than realizing the temperature in your home is rapidly rising because the air conditioner isn’t kicking on when it should. If you’ve adjusted the thermostat in hopes of it coming back to life and it hasn’t, you’ll have to find a fix. Problem: It could be a tripped circuit breaker. Investigate to see if the AC or something else is causing the breaker to trip. You may need to unplug something on the same circuit to reduce how much power is being pulled. If the breaker hasn’t shut off or you can’t get it to stay on, you may have a faulty thermostat or loose wiring. Solution: You should always consult a licensed HVAC technician to make repairs involving wiring. A professional can diagnose the problem with specialized equipment and safely make repairs. If you can hear your HVAC unit running, but either no air is flowing, or the air flowing is not cool, you are wasting electricity without the desired result of a cool home. Problem: A lack of cool air could be due to a tripped circuit breaker shutting down part of the unit but not all, a worn blower belt or low refrigerant. If air is flowing, but it is hot, you might have a dirty filter, obstructed ducts or debris in your compressor. Solution: Preventative maintenance can thwart this by addressing wear and tear before it becomes an issue. Replace your filters monthly and schedule a yearly tune-up and cleaning before the hot months of summer. However, if you do experience such a failure, you can contact a professional for repairs. Here are more possible reasons and solutions for why AC is blowing warm air. While most refrigerant leaks occur in coolant lines where they aren’t visible, you may notice colored stains near the AC unit where they have seeped out. Limited amounts of condensation are normal, but pools of liquids are not. Problem: The coolant lines or connections may have deteriorated over time, allowing leaks to form. Blockages in drainage pipes or defective condensate pumps can also cause leaks. Solution: Once you’ve noted a leak, turn the unit off immediately and contact an HVAC professional immediately. Leaks can run your refrigerant level low and damage the compressor, which can be costly to replace. An AC unit cutting on and off repeatedly is commonly known as short cycling. It happens when the HVAC kicks off before completing a full cooling cycle and then kicks back on to finish the process. Problem: You may have an obstructed air filter, or your thermostat may be miscalibrated. You might also have an HVAC unit that is too powerful for the space you have to cool. Solution: First, check your air filter and change it if necessary. If this doesn’t correct the problem, contact a professional to address the problem by recalibrating your thermostat or suggesting changes to your system to better accommodate your cooling needs. If you are finding ice around the coil or copper lines of your AC, it means your system is working too hard to keep you cool. Problem: It’s not unusual for your AC to work hard in the heat of an Arizona summer, but it shouldn’t freeze up. You may have a dirty air filter or a faulty condenser unit. These will make your system work twice as hard to cool, causing it to freeze and costing you added energy costs. Solution: You can change your air filter, but if that doesn’t correct the problem, you’ll want to contact a licensed HVAC technician to check the blower, air ducts and condenser for any blockages. If you note a burning smell or a musty scent coming from your vents or your main AC unit, it can be unpleasant and a sign of trouble. Problem: A burning or hot smell can signify bad wiring or overheating due to a clogged air filter. If you’re smelling something musty or like mildew, this is usually a sign of dirty ductwork or poor drainage. Solution: If you are experiencing a burning smell, turn the AC off and check your filter. If it’s clogged, replace it and see if that corrects the problem but keep a close eye on the system until you’ve determined that was the problem. If it wasn’t, turn the system back off and contact a professional to check your system and repair the issue. Everyone’s HVAC system has some normal operating sounds familiar to them. If you hear noises different from what you’re used to, pay attention to them. Problem: A squealing sound is usually caused by a worn or out-of-place belt. Grinding noises usually are a sign of bearing problems. Solution: Routine maintenance performed by a professional
Reverse Osmosis vs. Filtration: Which is Better?
Sediments, taste, odor, hardness and bacteria can all result in less than tasty and unhealthy water. Water filters remove or reduce unwanted impurities from our drinking water to create better quality water. Many households clean their water using refrigerator, faucet, or pitcher filters. For those who prefer more serious filtration, a reverse osmosis (RO) system may be in place. So, what is the difference between reverse osmosis vs. filtration? Reverse Osmosis vs. Filtered Water: What is the difference? The answer lies in the number of contaminants filtered from tap water. Refrigerator filters reduce only three pollutants. Pitcher filters reduce four contaminants. A good faucet filter will reduce 11 of the contaminants usually found in tap water. However, a quality reverse osmosis system can remove up to 26 contaminants in most household water. Reverse Osmosis vs. Water Filter: How do they work? Typical household water filters use an activated carbon filter that attracts contaminants and absorbs them, pulling them out of your water. Reverse osmosis uses a more complex process. Water passes through a filter that removes sediment from the water. This will remove particles like sand and salt from the water. Next, it will pass through a carbon filter that eliminates bad-tasting elements and any odors found in the water. Any remaining contaminants and impurities are caught in a semipermeable membrane before the water is pushed through a final activated carbon filter that improves the taste and quality of the water. Finally, the contaminants pulled from the water are flushed away instead of remaining caught up in the filters. RO vs. Filtered Water: What contaminants are removed? There are around 100 possible contaminations that can affect the quality of your drinking water. A Reverse osmosis system will filter out many of the most concerning ones, including the following: While these are some of the most concerning contaminants caught by reverse osmosis, they are not the only ones. There are nearly 100 contaminants that can be removed or reduced by reverse osmosis. Among other common contaminants filtered out are chlorine, chloramines, barium, cadmium, calcium, copper, cryptosporidium, fluoride, giardia, iron, magnesium, nitrate, nitrite, arsenic, radium, sodium, dissolved solids, trihalomethanes, trivalent chromium. In contrast, water pitcher filters remove very few of these. While a pitcher full of crisp, cold water might provide the illusion of clean drinking water, it doesn’t remove many contaminants that can still be present. Of the more than two dozen water contaminants that can be present in our tap water, water pitchers will only remove four of them: chlorine, odors, cadmium and copper. In-line water filters on your refrigerator typically only remove chlorine, bad tastes and odors. So, the water and ice produced by your appliance may appear clean and taste clean, but it could still contain dissolved solids that are invisible to the naked eye. Plus, even the best care and cleaning can leave behind things like mold, E. coli and yeasts that form in foods present in the refrigerator and seep into the water dispenser. Faucet water filters do a better job of removing impurities, pulling nearly a dozen from your water as it exits the tap. However, it still doesn’t come close to removing all of the unhealthy contaminants that can be found in your water system. Reverse Osmosis vs. Filtration: What is the bottom line? While simpler water filters might be relatively inexpensive and convenient, they can often only give the illusion of clean drinking water while leaving behind a host of pollutants you’d rather not be ingesting. Obviously, they are an improvement over drinking water directly from the tap without additional filtration. Still, if you are looking for more powerful water filtering that leaves you with truly cleaner water, you might want to opt for the reverse osmosis system instead. Still not sure when it comes to reverse osmosis vs. filtration? No problem. Contact the professionals at American Home Water and Air. We will be happy to discuss your options with you or visit you to assess your water filtration needs.
Where is My Water Pressure Regulator?
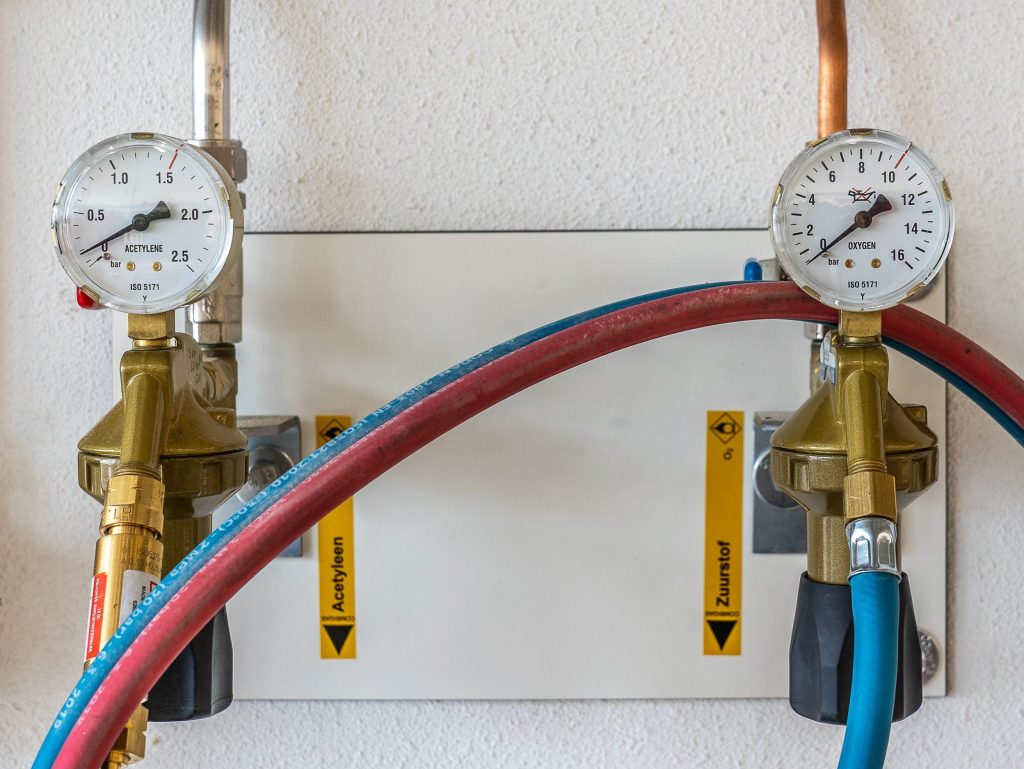
Water entering your home at high pressure can damage your pipes and fixtures. Over time, this added pressure on your system can result in leaks or burst pipes. For this reason, knowing the water pressure regulator’s location is crucial. Being able to answer the question of “where is my water pressure regulator” can be the difference in whether additional damage is sustained in the event of a pressure problem. This guide is intended to help you understand what your water pressure regulator does, how to find it and what it can mean for the well-being of your plumbing system. Where is the Water Pressure Regulator Located? The standard residential water pressure regulator location is usually outside your home, just past the main shut-off valve for your water supply. If you are familiar with your shut-off valve, you should have no problem resolving the question, “where is my water pressure regulator?” We can help you with that if you are unsure where to look. Let’s first discuss a bit more about what your water pressure regulator does. What is the Purpose of a Water Pressure Regulator? The water pressure regulator is a part of your plumbing system. The water pressure regulator or pressure reducing valve is installed on your incoming water supply line to regulate the water pressure flowing through your home’s pipes. You can recognize it as a bell-shaped component attached to your exterior pipes. This device is necessary because many water supplies leave the city’s pipes at a higher pressure than you want to flood through the incoming water lines of your home. With a water pressure regulator installed, you can adjust this pressure if you find it is higher than you would like. Doing so can increase the lifespan of the incoming pipes that make up a part of your home plumbing system. So, we must first answer the question: Where is my water pressure regulator? Where Is My Water Pressure Regulator? Have you ever had a leak or a burst pipe and had to turn off your water supply while you sought repairs? If so, then you should already have an idea of where to locate your water pressure regulator. Wherever you went to turn off the water is also where you will find the answer to where you can locate your water pressure regulator. The valve you turned to shut off your water is your main shut-off valve. Once you know where that is located, you should be able to see the water pressure regulator near it on the same pipe. Though this is usually located outdoors, in some instances, you might find it located in a basement, garage or other indoor water pressure regulator location due to unusual construction. Otherwise, you should see it outdoors, near the front side of your home. Another option is that it may be inside the underground area where your water cut-off valve is located. Look for the small plate resembling a maintenance hole cover. You should find it between where the city or county supply lines run alongside the street and the pipes leading into your home. If all else fails, consult any home inspection reports you may have from the purchase of your house. This item would have been included in your home inspector’s evaluation of your plumbing system. If you’ve tried all of these things and still aren’t sure where to find your residential water pressure regulator, it might be time to call a licensed plumber like American Home Water and Air to help locate it. Why Do I Need a Water Pressure Regulator? Preventative care is one of the most important things you can do to maintain the good order of your home operating systems. A water pressure regulator will keep water from entering your home with too much pressure, creating extra wear and tear that can cause damage and reduce its longevity, but there are other benefits to be found: Do All Homes Have a Water Pressure Regulator? No, and in some cases, you may not need one. Certain municipal supplies regulate their water pressure safely, but if that pressure runs above 80 psi, you’ll want to protect your plumbing system by installing one. Phoenix considers anything between 40 and 100 psi acceptable, so you may be best served by having one installed for when the pressure reaches the high end of the range. If you are unsure about the pressure of the water entering your home, it is easy to determine this by using a water pressure gauge. Checking it at different times of the day will give you a range, as most municipal water supplies vary based on peak usage times in your area. How Long Will a Water Pressure Regulator Last? A properly installed water pressure regulator should last ten to fifteen years. No maintenance is required during its lifespan, so there isn’t much you can do to extend how long it lasts. There’s not much active maintenance that can go into one of these, so it is difficult to extend its lifespan. However, it is vital to have one as it can help save your plumbing system from preventable damage caused by high water pressure. Hopefully, this guide has given the information you need about where to find your water pressure regulator and why having one is necessary. If you need more information, you can always contact American Home Water and Air experts to discuss your concerns or get answers to any remaining questions.
Does Your Shower Drain Smell? Here Is What to Do
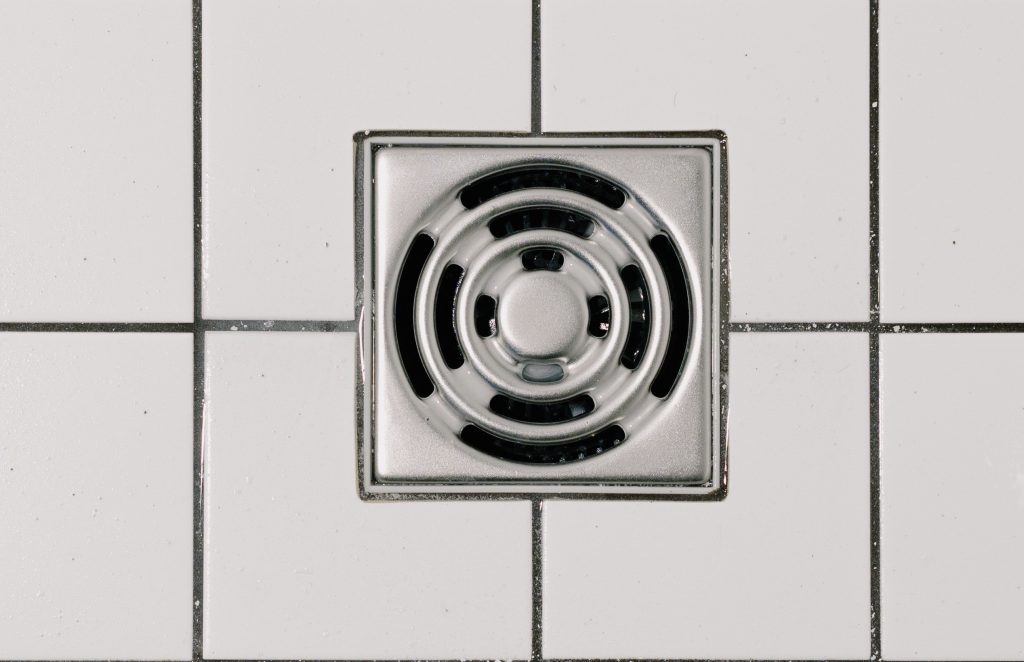
There can be many reasons for smelly drains. It could be bacteria or a clog. It might even be a sewer gas leak. If you’re experiencing a stinky shower drain, finding the root of the problem is the first step toward figuring out how to stop drains from smelling. Though your shower may be the area affected, many factors can affect multiple drains in your home, including those in the shower or showers present. The causes of shower drain smells we’ve listed below may help you quickly determine where your problem lies and put you on the path to clearing up those smelly drains. Some measures you can take on your own, and others may require the assistance of a professional plumber like American Home Water and Air. Whatever situation you find yourself in, we’re here to help. Let’s go over some potential reasons for why your shower drain might smell, and how you can solve the issue. Possible Causes for Shower Drain Smell Bacteria The hair and dirt going down your shower drain can build up in the pipes over time, leading to smells and blockages. Even if this is just a partial blockage, it can allow bacteria to build up and emit odors that rise from the drain and permeate the air in your home. You may be able to cure the problem with an enzymatic drain cleaner, a DIY solution or by snaking the drain, but if the problem is severe, it’s best to contact drain cleaning services. Here is one simple solution you can try with ingredients you likely already have on hand: Pour a half cup of baking soda and a quarter cup of salt onto the drain. Begin flooding the mixture with white vinegar until it bubbles up and goes down the drain. Let it sit for 15 minutes, and then pour hot water (not quite boiling) down the drain to rinse it away. Hopefully, this will rinse away the debris caught up in your drain and remove the smell. Repeating this every few weeks can keep your drains clean and prevent the odor from returning. If that fails, you can try a drain cleaner to break up blockages and send the clog remnants flushing out of the system to clear the pipes and remove the smell. There are many kinds of drain cleaners on the market for you to choose from, but it’s best to stay away from chemical-based brands that can damage your pipes. Instead, opt for some of the natural enzymatic or bio-clean formulas. Clogs that aren’t too far down the pipe may be accessible enough for you to reach with a snake auger. This handy device can help you push through the clog and clear it away if it’s not too serious. Push the snake into the drain until you hit the clog and push through it, pushing and pulling it free until it is clear. Vent Pipe Issues The pipes that make up your drainage system are connected to a network of vent pipes that bring in the fresh air and allow gas and odors to escape. If this system gets clogged, smells can back up into the house drains, creating shower drain smells. The only solution to this problem is to contact a professional plumber to assess your vent pipe system and clean out any obstructions. You might also not have enough vent pipes. A professional can help you install additional vent pipes to handle your plumbing system needs with a full inspection of your plumbing system. Sump Pump Stench If you have too much wastewater directed toward your sump pump instead of the main sewer drain, you might experience a smell backing up into the drains. Have a plumber check the number of pipes draining into the sump pump and redirect some of them to the more significant sewer exits to keep the debris from appliances like washers and dishwashers from leaving smells behind. A bit of re-routing can correct the problem before it creates those pesky smells you want to avoid. Drain Trap You can prevent smells from the sewer lines from coming up through your bathtub and shower drain by having a licensed plumber install a drain trap. A quality drain trap is relatively inexpensive to install and can block those nasty smells from coming up from the sewer in the first place. Water Woes Sulfates occur naturally in the soil and rocks. In some instances, they can leech into the water supply and create a rotten egg smell. The professionals at AHWA can examine your water system and determine the best course of action in preventing this type of water contamination and the smells that come with it. One way to prevent this from happening is to invest in a whole house filtration system to remove contaminants before they enter your home. Sewer Smells If those shower drain smells in your home smell like sewage, you might have an issue with your main sewer line. If this is the case, the shower drain smells likely won’t be the only ones you notice. Because the sewer line carries away wastewater and dumps it into a septic tank or municipal sewer system. Any blockages or damage to the sewer lines from corrosion, tree roots, shifting or construction can cause sewage to back up into multiple drains in your home. If you don’t take steps to prevent the problem from worsening, the problem can get worse. Sewage can continue to back up until it seeps into the basement or foundation. Tackle sewage smells immediately by contacting a plumber to correct the problem. A plumbing expert will have the proper equipment to locate and remove the blockage or make necessary repairs. Seek Help From Professionals With Your Shower Drain Smell When dealing with shower drain smells, you can’t always tell where the problem lies. If there is a blockage, a licensed plumber may use water jets, snake augers or special cameras to locate and put an end
Plumbing Inspection: How Often Do You Need to Have One?
Before we talk about how often you need to have your plumbing inspected by a professional, let’s talk a bit about why it’s a good idea. AHWA can take care of all of your plumbing needs, but routine inspection will pay for itself by preventing costly repairs down the road. Let’s discuss it a bit further. Why Should You Have a Plumbing Inspection Done? There are a variety of situations that might dictate a need to have your plumbing inspected. If you live in a home that you have built and are familiar with the plumbing, you might expect the systems to be in good order for years to come. Still, after a set amount of time, you’ll eventually want to have your plumbing inspected to fix and prevent any issues. Unattended plumbing issues can lead to further damage; leaks can do damage to floors, walls, or ceilings, clogs can get worse, backing up pipes and sometimes, tree roots can grow into plumbing lines to cause issues. The earlier you know about these or other potentially costly problems, the better. What may be a small repair today could be significantly more involved if allowed to fester. How Often Should You Have Your Plumbing Inspected? One of the most common questions we get asked by homeowners is how often they should contact us to have a plumbing inspection. Unfortunately, many put off this simple checkup, not requesting regular inspections of plumbing at all. The answer to how often a plumbing inspection should be done will vary from one person to the next. While there is no way to know when some plumbing problems might occur, most can be prevented by having a plumbing inspection at least every two years. If you prefer a more extensive inspection performed by a professional, you should have it done by a reputable plumbing company with qualified plumbing experts. In certain situations, you might even want to schedule inspections even more often. Homes that have settled a great deal, experienced damage from other sources, or are showing signs of plumbing damage like low water pressure, sluggish drains, discoloration or particles in the water, or unfamiliar noises like the sound of running water or loud creaks may need to be inspected sooner. If you have moved into a home and are not familiar with the plumbing system or issues that have been present in the past, it is always a good idea to have a plumbing inspection fairly often for the first few years. This should be the case until you are comfortable that you won’t run into any unexpected plumbing nightmares left discovered during pre-purchase inspections. There could very well be conditions present that you were not made aware of and that weren’t immediately visible to an inspector doing a rough plumbing inspection for sale purposes. If homeowners aren’t available to provide a proper history or simply don’t provide a full history beyond what is required of them, waiting two years to get another plumbing inspection from a company you can trust can lead to disaster. In a case such as new home ownership, it is recommended that you have your plumbing inspection done at your earliest convenience and then have another one within the year. If no signs of trouble are noted, perhaps you can drop the frequency to every two years. Other Reasons to Get Your Plumbing Inspected Right Away There are many reasons for getting your plumbing inspected, since any of these potential scenarios might need quick attention to stop them from growing into a bigger problem. There goes the neighborhood – If you find that sewer lines or drains are backing up in other areas of your neighborhood but you haven’t had an issue, it doesn’t mean you won’t. It is far better to call for a pre-emptive plumbing inspection to address the problem before it wrecks your home. The roots of all plumbing evil – If you spot roots pushing up through your walkway, home foundation, or trees expanding into areas where you have water lines, this is a potential issue for your pipes. Roots are notorious for growing into the water supply and sewer lines outside the home or beneath homes. They might even push them out of place, causing connections to break and leak. It is best to get a handle on the situation before it does the damage. Nip it in the bud – One obvious case when a plumbing inspection might be in order is when you are having an issue and must have a plumber come out anyway. It’s always a good idea to have him look for signs of other potential trouble rather than just addressing the problem at hand. Ask him about getting a full plumbing inspection while he is there or schedule one for another time when he is available, as he may not be prepared to do a full inspection if he has just come out for a simple service call. Here’s your sign – If you’ve had problems and foregone a complete plumbing inspection, it might be a good idea to reconsider and get one done to stay ahead of any future problems. Signs that might appear before you notice the actual plumbing issue are yellowed or peeled plaster or paint on the walls. Abnormally high water bills. Water spots on the ceilings or around the molding. Leaks beneath your sinks or around your toilet. Hissing sounds could be water escaping from a pipe or other such anomalies. Catastrophe avoidance – You should address any problems such as these immediately or they will only grow worse and a full inspection can let you know in advance what needs to be mended before it grows worse, allowing you to prioritize any necessary repairs if you can’t have them all done at once. It is always better to see what is coming rather than finding yourself run down by it. Don’t let plumbing inspection costs deter you from preventative maintenance, as it
Do You Need a Hot Water Heater Expansion Tank?
As water is heated, it expands and causes pressure to build up. In earlier water heater systems, this pressure forced the water in the tank to drain into its original water supply source. Modern plumbing systems don’t allow this kind of backflow. A check valve keeps this kind of wastewater from within your household from backing up into the water supply and potentially fouling the incoming water supply. Read on to learn more, or contact an American Home Water and Air expert to discuss your needs further. What Does a Hot Water Heater Expansion Tank Do? An expansion tank is a smaller tank that attaches to the water supply pipe that feeds water to your water heater. This additional tank provides a place for the thermal expansion of water to take place so that the pressure doesn’t become excessive, damaging fixture valves, supply line joints, or even the water heater. How Do I Know if I Need a Hot Water Heater Expansion Tank? The majority of households have a check valve on their main water supply line, but building requirements didn’t previously require expansion tanks. If your plumbing is designed in such a way that pressure build-up is not an issue for you, you may not need an expansion tank. However, if you are having issues with the washers in your plumbing fixtures requiring increasingly frequent replacement due to damage or if your water heater is leaking around the relief valve, an expansion tank might well be something that will save you money and headaches in the long run. It is far better to take preventative measures now than to incur the cost of expensive repairs once the damage is done. What If I Don’t Install a Hot Water Heater Expansion Tank? Choosing not to install an expansion tank for a hot water heater is certainly up to each homeowner to decide. Before you make your decision, you should fully understand what is happening in your water heater. Think of it as a pressure cooker. Most of us these days have never used one, but plenty of us are familiar with them or have seen our parents or grandparents use one. As the contents of the cooker heat up, the pressure builds. The small gauge on top of the cooker lets it escape so that it does its job inside the cooking but not so much that the cooker explodes. If your water heater has this kind of pressure building up inside and there is a valve preventing the excess pressure from pushing some water out of the way to make space, then it is trapped there. A water heater doesn’t expand, so where will it go? Let’s take a 50-gallon water heater as an example. If you heat this amount of water to 120 degrees Fahrenheit, it will expand to about 52 gallons. With nowhere to go, it puts more pressure on the surrounding hardware, causing more wear and tear and possible failures. Now, like the pressure cooker, your water heater has a pressure-relief valve. If the pressure gets so high that it is in danger of causing a water heater explosion, this relief valve will kick in to offset some of the pressure. However, there can still be plenty of damage done by this assault from the water pressure against the unyielding tank within your water heater. Over time, it will get worse, causing issues that you will eventually have to address with repairs or replacements. How Much Space is Needed For a Water Heater Expansion Tank? Because this addition to your water heater is nothing more than an empty chamber that gives expanding water a place to go, it doesn’t take up much space at all. As the expanded water flows toward the top of the water heater, it will flow into an insulated pipe leading to the expansion tank which needs to be only large enough to accommodate the excess. It is unlikely that your expansion tank will be any larger than a propane canister like the ones you hook to your outdoor barbecue grill. It is insulated to keep the water that enters hot. Any water that collects there during the pressure build-up will drop back into the water heater once the pressure subsides. Most expansion tanks are installed on top of the existing water heater, so they will take up no additional floor space. Is a Hot Water Heater Expansion Tank Legally Required? No, not currently. However, if you live in a home with a closed water system where a check valve prevents backflow, then you should definitely install an expansion tank to prevent damage. For those living in older homes with open plumbing systems where no such valve exists, the pressure is relieved by flowing back to the supply lines. So, you are at a much greater risk for damage and failures if you are living in a home with a closed system. Your first step toward deciding what’s best for you (and your plumbing) is to know which system you have. If you aren’t sure, it is wise to contact a professional for assistance. How Do I Get a Hot Water Heater Expansion Tank? If you think you need a hot water heater expansion tank, the best thing to do is contact a professional plumber for an evaluation and estimate. A licensed plumbing expert can check your home’s water pressure levels and examine your water heater to determine if you could benefit from adding an expansion tank based on your unique circumstances. How Much Will a Hot Water Heater Expansion Tank Cost? The cost of an expansion tank, including installation, will run you somewhere between $100 and $400 depending on what kind of water heater you have and what must be done to accommodate the added tank. If you are living in a home with high water pressure, this cost may well be nominal compared to what it may cost overall to address repeated repairs or a complete failure. If you’d
Water Heater Inspection Checklist: What to Look Out For
Many homeowners don’t give their water heater a second thought unless it stops working, but you can make sure this never happens in the first place with a hot water heater inspection and ongoing water heater maintenance. Unless your water heater is brand new, the water heater inspection cost you incur will likely pay for itself in the form of money saved on costly future repairs. AHWA is always ready to perform a water heater inspection for you at your convenience. Of course, you can also do a simple water heater inspection yourself. Let’s talk about the things you should check to make sure your water heater works at peak efficiency and enjoys a long life cycle. We’ll also provide you with a water heater inspection checklist to follow so you can ensure you’re checking the right things. How Often Does a Water Heater Inspection Need to Be Done? You can do a spot check on your water heater each time you frequent the room or utility closet it is in. Even a glance can reveal any problems that may be easily visible. You might hear unfamiliar noises or spot leaks this way. However, it is far better to schedule a more dedicated water inspection once every few months, whether you choose to do this yourself or have it done by a professional as part of a larger inspection periodically. What Should You Look for During a Water Heater Inspection? Many things can go wrong with your water heater. Look for the following when you perform your inspection. Aside from the physical condition of your water heater, you may note some other things that are an indication that all is not well. Any of these things might be an indication of trouble and should be addressed immediately. If you are concerned that there are problems with your water heater, a plumbing expert from AHWA can help you resolve your issue before it gets out of hand. No Idea Where to Start? Try This Handy Maintenance Checklist. Before starting your water heater inspection, you should review your appliance’s manual to familiarize yourself with the operations. Secondly, be aware that this appliance contains very hot water and electrical components. Do not attempt to repair any issues you find without killing the power to it completely by closing the circuit at the breaker box. Professional Maintenance Requirements While there are many things you can note during DIY water heater inspections, you’ll want to turn to the professionals if you are finding problems. While there are some repairs you can make yourself, it is not recommended unless you are completely comfortable with your ability to handle the inner components of your water heater. A professional plumber can do the following: With routine water heater inspections and maintenance, your water heater can provide you with headache-free hot water for years to come. Without them, you might well find yourself facing unexpected repairs or a complete failure that requires a full replacement. Whether you choose to do a simple review yourself or call in a professional for more intense maintenance is up to you, but if you find any signs of trouble, you can contact American Home Water and Air to clear up the problem right away or provide any other services such as installing tankless water heaters in Phoenix.
Types of Plumbing Noises: Causes and Solutions
If you’re having issues with your plumbing making different types of noises, such as hisses, thumps, clangs, or thuds, it’s important to consider that you might have some functional issues taking place. If you can’t decipher what the noises might indicate, don’t worry: the professionals at AHWA can help! We understand that noisy plumbing can indicate everything from minor issues to signs of major problems. When in doubt, give us a call to come take a look and make sure everything’s working okay. In the meantime, here’s a quick overview of the types of plumbing noises you might encounter and what they mean. Usual Plumbing Noises in Your Home Plumbing usually prefers to be the strong silent type, but it sometimes kicks up a bit anyway—especially in older homes where the plumbing has aged a bit. Not every noise is bad, so it’s important to know what you should be concerned about and what is normal. Let’s look at some common plumbing noises you might hear in your home. Harmless Plumbing Noises These noises are nothing to worry about. If you understand them, you won’t be so worried about them being potential problems. Banging – A single or multiple loud bangs when you close a water tap is a perfectly normal sound. Swishing – The sound of water flowing through the pipes can sometimes be audible, especially if the house is otherwise quiet. Splashing – A toilet tank refilling can create small splashing sounds. Pressurized water leaving a valve can also make a splash when hitting still water on the other side. Gurgling – You may hear a gurgling noise coming from your pipes or waste traps. This is common with new plumbing systems and ones that had been drained or refilled, perhaps after recent work has been done. Rattling – If you have a shower pump, it may make a bit of noise as it vibrates against a surface. Make sure you’ve moved it away from this type of contact and the problem will be resolved. Creaking – No, that creaking board in your house when no one is walking is probably not a ghost. It’s more likely being caused by hot-water pipes under your floorboards as they expand and then contract again. Noises That Require Attention These noises are an indication that there may be a more serious problem down the line. Consult a professional plumber like AHWA to help you determine their origin and make any necessary repairs. Gurgling – If the gurgling is coming from a drain, you might have a clog in your drain or even in a sewer line. Hammering – Do you hear a loud clunk or clang when your dishwasher or washing machine stops filling or you turn off a faucet? You might be experiencing overly high water pressure that has blown out the air usually present near valves. If left unchecked, you could develop a leak over time due to the “water hammer” this creates. You may be able to fix this yourself by simply replacing the missing air pockets. Follow the steps below: This should correct the problem. If you continue to experience the hammering noise, then you’ll want to consult a professional for more assistance. Clanging – If your home has old copper piping, you may experience clanging noises created by the contracting and expanding of the metal when you use hot water. The heat results in the pipes expanding and rubbing against brackets, connecting joints, or supports. This is normal and nothing to worry about, but if the noise bothers you, there are some things you can do to minimize it. Ticking – First comes the ticking and then comes the BOOM! A ticking noise might mean you have a faulty water meter, but it can also signal loose or unstable pipes that can cause bigger problems if not repaired. Squealing – Air in the water lines can create a high-pitched squeal that can sound very odd and out-of-place. It could also be that your pressure-reducing valve needs to be replaced. Thumping – Plumbing noises in the wall, such as thumping, can indicate a host of problems, such as pressure build-up in specific sections or something being stuck in the piping. Call a professional before the problem escalates. Running water – The sound of running water can usually be traced back to a broken flush valve in the toilet that needs to be replaced. Swishing – High water pressure or high pump pressure can create a swishing noise as water runs through the pipes. A plumbing professional can reduce the water flow or pump pressure for you and eliminate the noise and reduce wear and tear on your plumbing. Whistling – If your showerhead or faucet whistles at you, it’s not just being flirtatious. It’s usually telling you that there is a clog somewhere that needs to be cleared or replaced. Knocking – Your water heater might get a bit wild if sediment builds up. This is not only annoying, but it causes extra wear and tear on the appliance, reducing its efficiency and reducing its lifespan. You can flush it yourself following maintenance instructions or call a professional to check it out. Rattling – Water moving around your home creates pressure and friction against the pipes. If those pipes aren’t fitted together properly because they’ve come loose or were improperly installed, then you may get an annoying rattling sound as the pipes vibrate. You can fix this yourself if you can get to the fittings and tighten them, it may solve the problem. If not, it’s time to call a professional. At the end of the day, you’ll find that many plumbing noises in the pipes are normal and not a cause for concern. That being said, if you hear one outside of what you’ve found to be normal in your home, then you need to call a professional like AHWA to assess the situation and make any necessary repairs.
7 Types of Energy Efficient AC Units of 2022
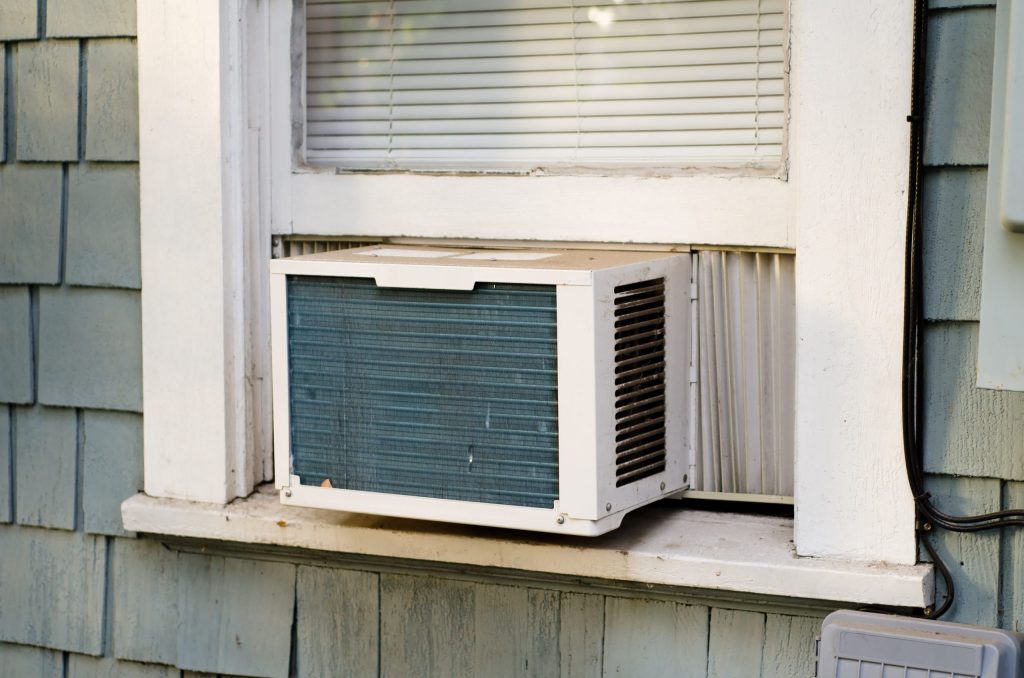
With rising energy costs and environmental concerns related to fossil fuel usage, many homeowners are looking to find the most energy efficient AC unit on the market. If you are among those seeking an energy efficient AC, you’ll first want to familiarize yourself with some standard terminology: You can visit American Home Water and Air online or give us a call if you’d like assistance with your search or are looking for a professionally installed system. We’ll be happy to guide you through your options. Continue reading to learn more. What Types of Energy Efficient AC Units are Available? If you are ready to shop for an air conditioner to suit your needs, let’s talk about the types of AC units available to keep you cool on a hot Arizona summer day. 1. Split ACs A split ac system is better known to most as a central cooling unit. It utilizes a compressor and condenser unit outside the home that works with the evaporator, air handler, and filter system inside the home. A series of ducts distribute cool air throughout the home. 2. Packaged AC Systems This kind of AC system packages the compressor, coils, and air handling mechanisms in a metal cabinet outside the home, saving room indoors. Like the split AC system, the packaged AC system requires ductwork to take cool air throughout the home. 3. Window AC Units Window AC units are housed in a metal box that holds the compressor, coils, and air handler. Mounted in an open window, it circulates air in a room through its system, cools it, and sends it back out to the room. The warm air and moisture created in this process are discarded outside the window. Check out our guide to windows AC insulation if you’re interested in this type of ACs. 4. Portable ACs Portable air conditioners, like window units, are stand-alone units containing the compressor, coils, and fan needed to create cool air. They operate much like a window unit; except they include a hose that must be placed through a window opening to expel the warm air and the moisture it creates. Check out our article on “How to vent a portable air conditioner without a window” for more information about venting portable ACs 5. Ductless Mini-Split Systems Ductless mini-splits include a compressor condenser located outside the home that feeds a small air handler inside each zone set up within the home to cool designated areas. These are also recommended as energy efficient means of cooling older homes. 6. Through-the-Wall ACs Through the wall air conditioners work the same as window AC units, but they are mounted through a hole in the wall rather than taking up window space. Check out our article to learn how to install through the wall air conditioner. 7. Inverter ACs Inverter air conditioners might be ductless, through-the-wall, window-mounted, or split air conditioners, but they include an inverter that gauges and regulates the electrical current received by the unit. Thus, the unit will only be given energy in small doses, providing only what it needs to cool a room. This energy efficient AC unit can be up to 40 percent more energy efficient than a standard unit. Best Energy Efficient AC Units on the Market in 2022 Don’t have time to look at everything that’s out there in the market? Let us help you narrow down some of your choices. These are some of the best energy efficient smaller AC units on the market according to a comparison of their Energy Star ratings and features. Keystone Energy Star 5,000 BTU – This window AC unit has a 12.1 EER rating and multiple operating modes, including an on/off timer and an energy saver mode. It can cool up to 150 square feet. The remote control included with it allows for easy operation. Amana AVXC20 – With a 24.5 SEER rating, the Amana AVXC20 ranks very highly as an energy efficient AC unit. Its inverter varied-speed compressor and Comfortnet thermostat create the perfect combination of built-in energy savings and user control to keep costs low. LG 18,000 BTU Smart Window – This window AC from LG embraces inverter technology to deliver an EER of 14.4. Its ability to quietly cool up to 1,000 square feet makes it an ideal choice. Smart controls allow users to turn it off by remote and Wi-Fi integration allows for setting schedules by smartphone. Whynter ARC-14S 14,000 BTU Portable – Sporting an 11.2 EER rating, this portable air conditioner is highly efficient. The auto-drain system it uses recycles moisture via two exhaust hoses, greatly increasing its ability to create chilled air. It’s designed for smaller rooms of about 500 square feet and its portability allows it to be easily moved from one room to another as needed. Frigidaire 8,000 BTU Through-the-Wall – This through-the-wall AC comes with a remote control to adjust the thermostat and turn the unit off and on. There is also an energy-saving option and a timer that will automatically turn the unit off or on as scheduled. Midea U Inverter Window – The inverter technology that varies the flow of energy to this unit achieves a 13.3 energy-efficiency rating, providing up to 35 percent more energy savings than many of its competitors. Its U-shape allows standard windows to be closed down in the center of the unit, reducing the amount of space around it that must be sealed off. Wi-Fi capabilities allow remote control of the unit through an app. If you’re looking for a quick solution to cool down an area of your home, you can’t go wrong with one of the choices above. For more substantial systems such as a central unit or a ductless mini-split, get in touch with AHWA. One of our professionals will be happy to assess your situation and recommend the best solution for your space and budget.