What is Static Pressure in an HVAC System?
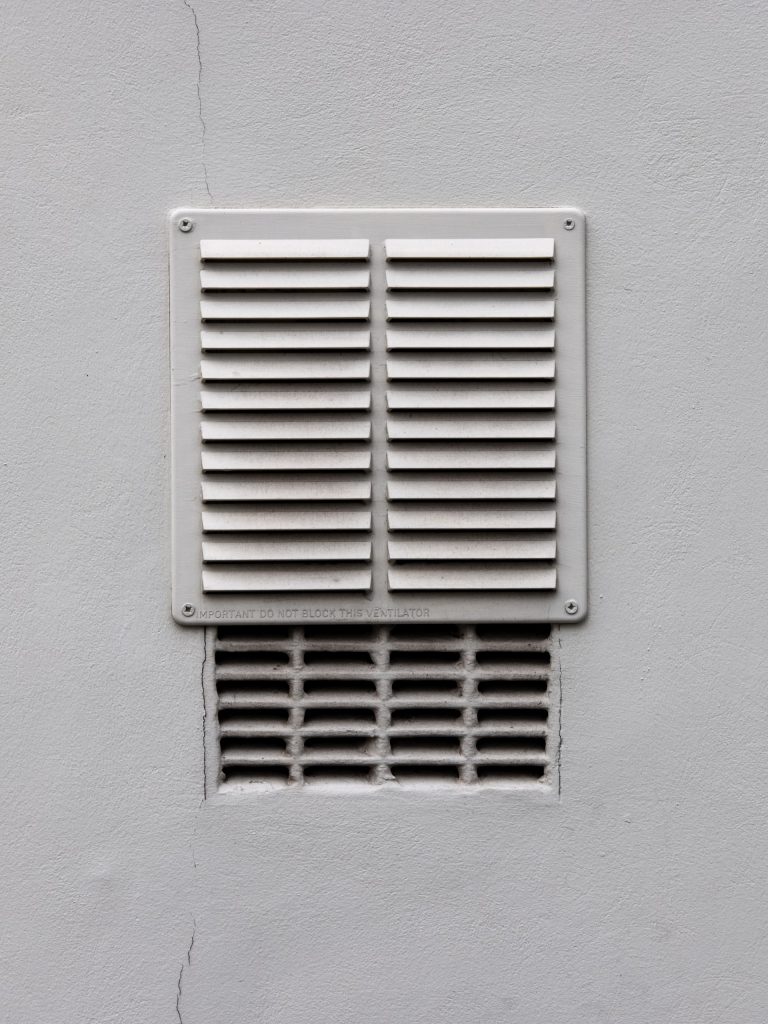
The static pressure of HVAC systems isn’t something that most people ever give a second thought to, but it affects everything about your HVAC system—energy efficiency, system health, and even your comfort in your own home. So, what is static pressure, and what part does it play in your HVAC maintenance? How does it work, and what is the ideal static pressure for HVAC? We will look at some of the factors that affect the static pressure in your system, what they mean and how to correct them. What Is Static Pressure in your HVAC System? The simplest way to describe static pressure is to say that it is your HVAC system’s air resistance. Traditional HVAC systems use forced air to circulate warm or chilled air through ducts to heat and cool your home. Along the way, different factors can hinder this airflow. Therefore, there must be a considerable force to push the air through whatever resistance it encounters. If you are having problems with your airflow, the HVAC experts at American Home Water and Air can measure any pressure drops throughout your system. This will allow them to pinpoint where the air resistance is occurring and help them to take measures to resolve the issue. There are signs that you might have issues with the static pressure in your HVAC system if you are noticing any of the following, but especially if you are encountering all of them. Heating and Cooling Disproportionately Many people commonly refer to this as having “hot and cold spots” in their homes. It’s when some areas in your house aren’t at the temperature you’ve selected. In some cases, this may be due to weak air circulation within your system. If air isn’t traveling completely through the ducts, then it’s not reaching each room as it should. Increased Utility Bills An unexpected rise in your energy costs could be attributed to your heating and cooling system. HVAC systems are designed to overcome flaws to continue to function. They will continue to operate as best they can, but their efforts may pull more power than normal, increasing power consumption when it has to overcome resistance. Whether the issue lies within the static pressure in ducts or somewhere else, you’ll want to check the problem out as soon as possible. A continually overworked system will break down sooner or later. It might even result in a cracked heat exchanger, which means you’re looking at replacement instead of repairs. Excessive Operating Noise Loud rushes of air or mechanical clangs can be signs of trouble within your system. These could indicate that your system must work harder to achieve its goal. A struggling blower motor will be noisier than one working at a more normal capacity. The increased draw of the air getting pushed and pulled through the vents will also add to the noise. The Cause of High Static Pressure in Ducts There are several causes of this problem. A professional HVAC technician can take measurements and determine the problem, which is usually one of the following: Clogged Air Filter Typically, the air filter in your system prevents allergens, dust, dirt, and other debris from being recirculated throughout your house. However, a build-up of these can create a clogged filter that impedes airflow and creates excess resistance, especially if you use a filter with a high MERV rating to trap the smallest particles possible. Undersized Ducts and Returns Undersized or poorly designed ductwork and air returns increase static pressure. Return ducts pull air from rooms and send it through the heating and cooling system. If your air returns are too small, you will encounter problems. Think of it like trying to breathe through a tube. You have to pull harder to get enough air through the small opening into your mouth or nostrils. Your heating system operates in much the same way. It’s like breathing through a straw: you have to pull more to get enough air through a much smaller opening than your mouth or nostrils. Your HVAC system is the same way; it has to work much harder to pull enough air into the system, and if enough air isn’t circulating through the refrigerant loop in your unit, it can’t work properly. This will lead to failures and expensive repairs. Dirty or Overly Small Indoor Coil If your indoor coil is dirty or too small for the job, it can cause high static pressure. This coil facilitates the heat transfer process. When using the heat in winter, it provides warmth circulated throughout your house. In the summer, it carries the liquid refrigerant that evaporates into thermal energy as it passes through the coil. The coil transfers heat, and the refrigerant returns to its liquid state to return through the system and begin the heating cycle once again. If this coil has a problem, the whole system will be affected. During this process, the coil creates air resistance. Usually, this is minimal, but if the component is dirty, it keeps the air from flowing freely. A coil that is too small will have the same effect. Because it is too small for the job it must do, enough air will not be able to pass through it. Preventing Static Pressure Problems If any part of your HVAC system is allowed to get dirty or is not a suitable size for the work to be done, you will run into problems with your system’s operation. Issues such as these will make your home temperature less comfortable and add to your costs of operating the system in repairs and replacements. You can prevent this with proper yearly or twice-yearly maintenance and cleaning. If you run into problems, you can always reach out to the professionals at AHWA to inspect, clean, and repair your system so that it continues to work for you for many years.
What Should You Know About Furnace Inspection?
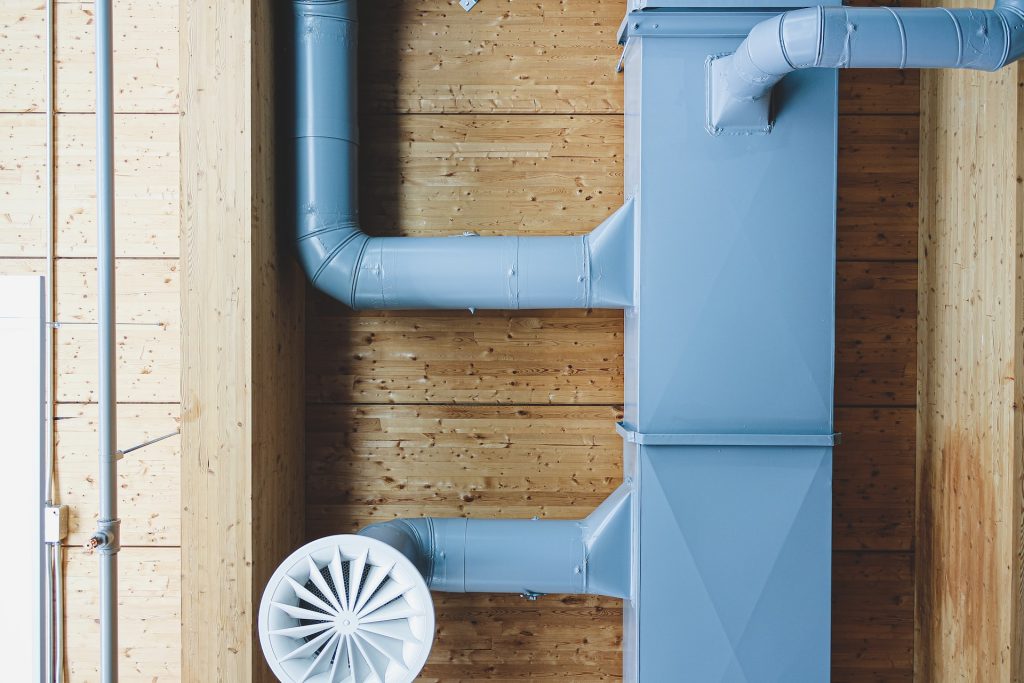
Most homeowners don’t give their furnaces a second thought until something goes wrong. However, you can save yourself a lot of hassle and expense by keeping your system properly maintained, preventing downtime when you need it, and saving yourself the expense of increased utility bills and repairs. HVAC experts recommend that you have an annual furnace inspection done on your furnace once every year. What Does a Furnace Inspection Include? HVAC technicians perform a lot of preventative maintenance during an annual furnace cleaning and inspection. In addition to cleaning and lubricating the furnace’s parts, they will inspect for safety issues, tighten any loose components, make minor repairs, and advise if there are larger repairs needed. Proper maintenance can extend the life of your heating system by as much as 40% and increase its energy efficiency greatly. Some of the areas that will be inspected by your HVAC technician during a furnace check include: Not all problems can be corrected during a maintenance visit, but a technician will advise anything that needs to be addressed and order any parts for work you need to be done so that it can be corrected as soon as possible. Do I Really Need a Furnace Inspection? Some homeowners view an annual furnace inspection as an unnecessary expense. Nothing could be further from the truth. Having a heater inspection every year is critical to the continued operation and lifespan of your heating system. A home furnace inspection is the best way to prevent a loss of energy efficiency and avoid costly future repairs. In some cases, it is a requirement to receive coverage from your manufacturer’s warranty. The last thing anyone wants is for their furnace to fail when the temperatures outside have dropped. It’s going to be hard to keep your family warm if your heating system fails in the dead of winter. While you might be lucky enough to only need some batteries in your thermostat or to reignite your pilot light, you can be in a real jam if you’re without heat in the middle of a cold night and require emergency service. Not only can this be expensive, but it can also be challenging to get help on short notice if callouts are heavy. Emergency Repairs Attempting to repair your own furnace can also be a recipe for disaster. Without proper qualification, you can void your warranty or even set your family up for potential harm. If you find yourself in an emergency like the following, professional intervention is a must. Non-Emergency Repairs While any of these items will require emergency assistance, other furnace issues can be checked at a more convenient hour if you can manage to stay warm in the interim. Non-emergency repairs may include the following: Other Benefits of Annual Furnace Inspections You can take comfort in knowing that your furnace is ready for winter if you have had a recent cleaning and inspection done. However, other reasons should inspire you to schedule furnace maintenance soon. Here are some of them. DIY HVAC Inspections and Repairs While you should never skip out on a yearly inspection performed by a certified professional, there are some items you can do yourself to help your furnace operate at its best. Actions you can take to keep your furnace going strong include: Beyond these measures, you should leave more involved furnace inspections to the professionals. The HVAC technicians at American Home Water and Air are trained and experienced in the proper service and maintenance you require. They are knowledgeable enough to spot cracks or worn parts that might escape a less familiar eye. When you’ve had your furnace inspected, cleaned, and lubricated by a top service provider, you can rest easy knowing that you will be able to count on your system to run smoothly when you need it most.
What Should be the Ideal Humidity Level in the House?

A comfortable humidity level may be fairly obvious from the standpoint of what feels comfortable for you and your family but there are other considerations of which you should be aware. If you are looking for the ideal indoor humidity, there are many factors to consider. Let’s get started by learning a bit more about humidity and its effects on your environment. To achieve the best humidity level for your household, you must first understand what humidity is, how it affects you and your home and what you can do to control it. Armed with a bit of knowledge, you can achieve the appropriate humidity level and air quality for your household and maintain it without too much effort. What is Humidity? With the rise and fall of temperatures, the air’s capacity to hold water shifts and changes. Warmer air can hold more water, while cooler air holds less water. The relative humidity is a measure of the water vapor that is present in the air in relation to what is required for full saturation at the same temperature. This is reflected as a percentage. Thus, a 50% humidity level means the air is holding half of what it is capable of holding at the same temperature. Ideal Indoor Humidity The question for most homeowners is how humid should your house be. The ideal indoor humidity ranges between 30-45%, though it may sometimes reach as high as 50%. The level of humidity you experience in your home can depend largely on the seasons. Summer humidity should be in the normal range of 30-45%, but winter humidity may hover around the 40% mark. Anything greater than this can lead to condensation issues within your home. Your inside house humidity can also depend on your home layout, your routine, and your personal preferences. The American Society of Heating, Refrigerating and Air-Conditioning Engineers (ASHRAE) lists the following levels for most homes: So, a comfortable range for the humidity in your home can fall anywhere from 30% to 60%. Anything below 30% is too dry and anything greater than 60% is too humid. However, you should be aware that humidity levels that are persistently above 50% can enable the growth of bacteria. Comfortable humidity indoors, just as the temperature you prefer, is largely a personal preference. The weather, season, location and even the materials you prefer in your clothing can all factor into what humidity you find comfortable. Humidity and Personal Well-Being Humidity is what keeps you cool during the warmer months and warm during the cooler months. High humidity on hot summer days is what causes you to perspire even when inactive. Excessive humidity can not only cause discomfort but can also lead to illness and disease. Maintaining acceptable home humidity levels will keep you healthy, even if you are periodically exposed to higher levels outside. The benefits of proper humidity levels in your home include: Effects of High Humidity on Your Home Acceptable humidity levels will also protect the interior of your home. Paintings and photos won’t risk damage. You won’t risk arcing and short circuits due to damaged electrical wires and cables. Wooden furniture and fixtures won’t be subject to warping or damage. Perhaps the most noticeable effect of high humidity in your home is the condensation you will see on walls, furniture, and windows. The excessive moisture brought on by high humidity fosters the growth of mold, mildew, and fungi which can spread rapidly, bringing with them contamination that can cause illness to everyone in the household, especially those with allergies, asthma, or other respiratory problems. The increased moisture that comes along with high humidity can have greatly increased adverse effects on these ailments. Effects of Low Humidity on Your Home Just as high humidity can be a breeding ground for virus-producing bacteria, low humidity can also be a catalyst for airborne viruses. In addition to the potential for illness, low humidity results in dry air that causes chapped lips, flaky skin, and rashes. You might also feel considerably cooler than you should because dry air takes away moisture from your skin. This will result in you adjusting the temperature unnecessarily and increasing your utility bills. The effects of low humidity on your wooden furniture, crown molding, door frames, and window frames are also unfortunate. Persistent low humidity and dry air in your home can cause furniture and fixtures to splinter and crack. Controlling Home Humidity You may not need to take active measures. In some households, your HVAC system will do all the work for you and you’ll never have to think about your home humidity level. However, if your air conditioner is cooling your home, but not removing humidity, and you don’t have the natural balance you need, you can employ additional measures such as these: Conclusion Hopefully understanding the principles of relative humidity, its effects on you and your home, and how to make the adjustments you need to in order to keep it at optimal levels, will help keep you more comfortable and give you the tools you need to stay healthy and happy. In addition to these considerations, a comfortable humidity level will result in lower utility bills and allow you to run your air conditioning and heating at more energy-efficient levels.
What Should You Do When Your Heat Pump’s Aux Heat Keeps Coming On?
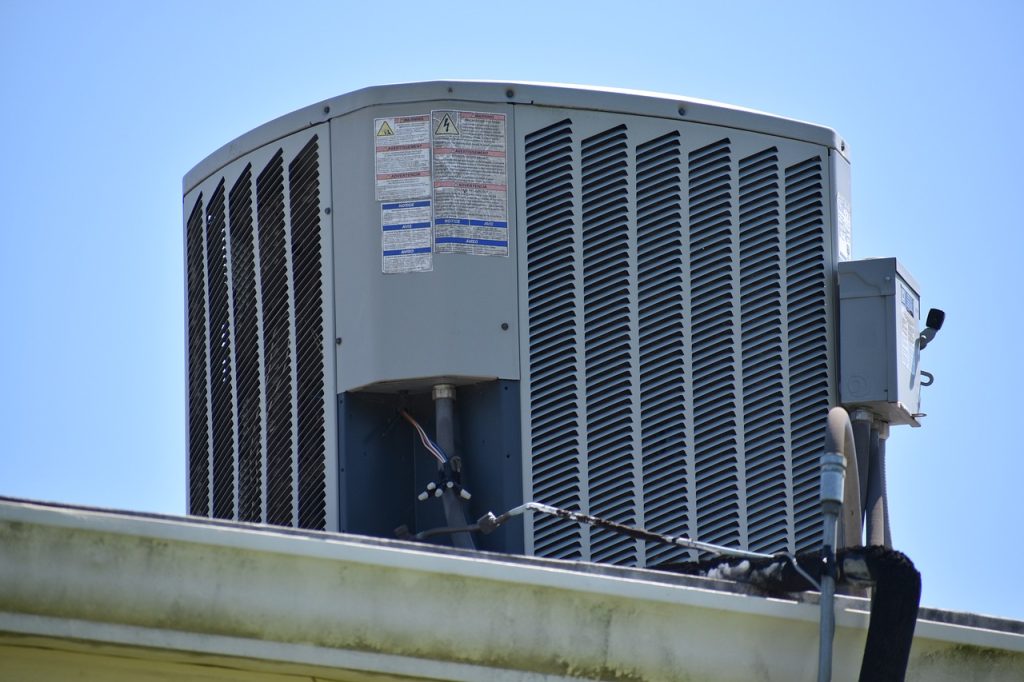
Homeowners often find themselves wondering “why does the aux heat keep coming on?” The fact is that your auxiliary heat exists to provide a burst of heat when it is needed. In Arizona, this isn’t something that happens often, but is it bad if the auxiliary heat comes on? If you find that your auxiliary heat is running constantly or you think it is running much more often than it should, you will want to find out what is causing the problem. Here’s what you need to know. What is Auxiliary Heat? Auxiliary heat is a feature that is most useful to homes found in milder climates than what you will find in Phoenix. Still, even here, temperatures can get low enough that your heat pump’s auxiliary heat function will kick on to warm up your house quickly to combat a rapidly dropping temperature outside. This, understandably, leads people to ask the question “is it bad if auxiliary heat comes on?” Typically, heat pumps employ a reverse cycle to maintain the preferred temperature you’ve set on your thermostat. This is the most efficient way to heat homes in warmer climates where the winter temperatures aren’t as persistently low as other areas of the country. However, this process can be slow to do its job, so your auxiliary heat steps into the gap and uses your electric system to give it a kickstart, rapidly turning up the temperature. Auxiliary Heat Comes On And Stays On If you are experiencing your auxiliary heat coming on more often than you think it should, you may be wondering how do I stop my auxiliary heat from coming on. There are specific circumstances that can cause your auxiliary heat to kick in and run, some are listed below: Temperature Increases Any adjustment to your thermostat of more than a few degrees can send our auxiliary heat into action. This gets things going while your heat pump catches up. The auxiliary heat will jump in and start bringing the temperature up right away instead of you having to wait. It comes in handy for situations where you’ve set your temperature a little lower, such as while you are at work, and then want to quickly warm it back up once you arrive home. Sudden Drop in Temperature If there has been a sudden drop in the outdoor temperature, it may be hard for your heat pump to do its job alone. The auxiliary heat will provide a much-needed assist, providing some extra power to get quick warmth into your home. This isn’t often necessary in weather above freezing, but in instances where the temperature dips toward 35°F or less, you may see the auxiliary heat kick in to help. Frozen Heat Pump The majority of heat pumps contain sensors to detect frozen coils. If there is a problem of this nature, the unit will go into defrost mode. The hot air inside your home will be redirected to frozen components to thaw them. In this event, the auxiliary heat can engage to help keep your home warm while part of its resources is being used to heat the part of the system in need. Some heat pumps will have an indicator that lets you know if this is occurring. This isn’t something you are likely to see much in the Phoenix area, but it’s possible if the weather becomes particularly frigid with snow and ice. Heat Pump Emergency Mode There is an emergency setting on most heat pumps. If this is engaged, the auxiliary heat will come on. Sometimes, this happens by accident and you can just turn it back off. If you turn it on for a good reason, let it run for as long as you need it, but you should try to limit it. If you are having to run it too often, you likely have other issues that need to be addressed. Auxiliary Heat Malfunctions If your auxiliary heat hasn’t come on for one of the reasons listed above or you can’t figure out why your auxiliary heat has come on, there is a problem that you need to have addressed by a licensed professional. When deciding is it bad if the auxiliary heat comes on, you need to consider why it has come on and if it should be. The signs that you need to request a service call are as follows: Auxiliary Heat is On but There is No Heat If your auxiliary heat has turned on but no heat is coming through, there is a problem with your system. There is likely something wrong with the auxiliary system itself because it is not operating as intended. Turn your system off and call for an HVAC technician to come out and make repairs. Auxiliary Heat Comes On And Stays On Your auxiliary heat is a backup function. It should rarely run. If the heat pump auxiliary heat is always on there is a problem. If you find that it is running constantly, it may be stuck or not receiving proper signals. You will need to request an inspection and repairs. Excessive Electricity Bills You may have many appliances within your home space that waste electricity, but your HVAC unit is one of the biggest consumers of power. If your auxiliary heat is running constantly, it is pulling even more power than is necessary and driving up your energy costs. This can add up over the winter months if you don’t have it addressed. Auxiliary Heat on Instead of AC If your auxiliary heat is kicking on in the middle of the summer when your air conditioning is running, this is a serious problem. There is no reason why this should happen, so if it does, you’ll want to turn off the system and request service. Thermostat Changes Don’t Engage Auxiliary Heat If you change your thermostat by more than a few degrees and your auxiliary heat doesn’t kick in, there is a problem that will require service. Takeaway If
Can the Air Conditioner Cause Carbon Monoxide in Your House?
Can you get carbon monoxide poisoning from an air conditioner? Carbon monoxide is well known for its deadly effects. There are few who haven’t heard the tales of households who have succumbed to this colorless, odorless killer. The best way to prevent being affected by this dangerous gas is to be informed and take precautions to prevent it from occurring in your home. If you are among those who are wondering, can you get carbon monoxide poisoning from an air conditioner, you are in the right place. Let’s talk about some of the things you need to know when it comes to answering “can an AC produce carbon monoxide?” Can Air Conditioners Cause Carbon Monoxide? So, does your air conditioner produce carbon monoxide? No, there is no carbon monoxide in an AC unit. However, the performance of your furnace is another matter. Understanding how carbon monoxide forms and preventing it from doing so are the keys to protecting your household and we have plenty of tips to help you do just that. Carbon Monoxide Sensors While carbon monoxide (CO) sensors are a good idea, they don’t provide complete protection from this deadly gas. Low levels of carbon monoxide will not set off many sensors. They are programmed to respond only to significant levels of CO. This is the reason that those with these types of hard-wired detection devices are told to leave their home immediately if the alarm sounds. However, even low levels of CO can be harmful, especially if there is prolonged exposure to them. Breathing carbon monoxide, even at low levels, can create symptoms such as excess fatigue, recurring headaches, and nausea. It can also cause heart pain in those who have heart conditions. If members of your household begin experiencing these symptoms, don’t hesitate to seek medical attention. What To Do If You Suspect a Carbon Monoxide Leak Because carbon monoxide is colorless, odorless, and tasteless, you will need to rely on other ways to detect its presence. Once you have learned how to check for CO leaks, you will need to know how to go about remaining safe and getting help for the problem. Here are some signs you can look for before feeling any symptoms of carbon monoxide poisoning: Ignoring these signs can result in you and your family being exposed to carbon monoxide for a dangerous amount of time. Carbon monoxide poisoning can feel a lot like a hangover and should be treated immediately. If you feel you may have been exposed to carbon monoxide from an AC unit, you should act quickly. Open all doors and windows and get the members of your household outdoors into the fresh air. Quickly open all windows and doors to let any buildup of the gas dissipate. Visit the doctor to address your symptoms. Do not return home until you’ve had the CO levels in your home checked, especially if you are diagnosed with carbon monoxide poisoning. Once you’ve handled the immediate problem and it is safe to return to your home, do not use your furnace until it has been inspected. How to Prevent Carbon Monoxide Leaks Because so many carbon monoxide leaks originate from heating systems and problems with ventilation, proper HVAC service can help prevent CO leaks from ever occurring. Here are some tips for preventing carbon monoxide leaks in your home: Furnace Maintenance Before the start of each heating season, you should have your furnace and any other fuel-burning appliances inspected by a certified HVAC technician. If you have a fireplace, you should have it and the chimney inspected, as well. Regular inspections and maintenance will prevent carbon monoxide leaks from ever becoming a problem. It also allows your HVAC technician to become familiar with your equipment, so they can note any changes between visits quickly. Inspect Heat Exchangers When scheduling your furnace maintenance, be sure to request that the heat exchanger also be inspected. The heat exchanger in a gas or oil furnace is one of the most common sources of carbon monoxide leaks. What does the heat exchanger do? During the heat combustion process, the heat exchanger is responsible for venting any poisonous gases out of your home, away from the heating ducts that would bring them into your living space. A heat exchanger that has become corroded, cracked, or developed holes will not stop your furnace from working, but it will allow carbon monoxide to escape into the breathable air within your home. Clean the Flues and Vents Blockages in your chimney flue or vents can be another source of carbon monoxide leaking into your home. Dust, debris, and grime in your ventilation systems can combine to form a blockage, clogging the path deadly gases would normally take to exit your home. In some instances, you may even have small animals, birds or even insects build nests inside these areas, blocking the vents. Regular inspections allow your HVAC service provider to find and eliminate these issues before they result in a hazardous situation for your family. Takeaway To recap the answer to the question “Can you get carbon monoxide poisoning from an air conditioner?” The answer is a resounding “no.” However, you can get it from an ill-maintained furnace. There is no greater asset to preventing potentially deadly carbon monoxide from getting into your home than having it inspected, cleaned, and serviced regularly. The fall months before you turn on the furnace for those cold winter months is an ideal time to have maintenance performed. Any creatures that have taken up residence during the warm spring and summer months, any buildup and any damage can be located and corrected before the first use of the season. You can always contact the professionals at American Home Water and Air to inspect your furnace and repair the cause of the leak.
Dry Air Issues: Keeping Humidity in Your Home Under Control in Arizona
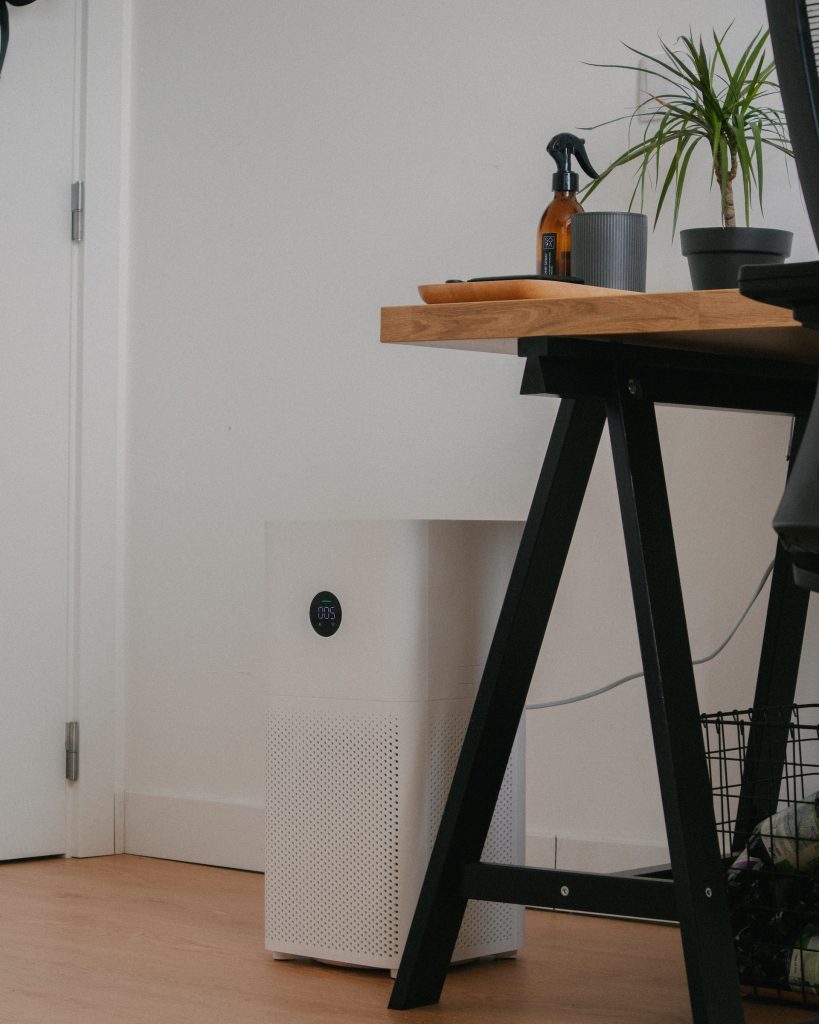
Lower temperatures, heating systems, and closed-up houses can all contribute to creating dry air in your house. Fortunately, there are many actions you can take to create more moisture in dry house air, improving the quality of your home environment and promoting better health. Signs Your Home is Too Dry Static Electricity – Have you ever walked across the carpet in your home and touched someone only to get a little zap? That’s static electricity and it happens when your home is too dry. Breathing Difficulties – If you are waking up or regularly experiencing a dry throat, nose, or other cold-like symptoms, it’s a sign that the air is too dry. You might even be having difficulty with your breathing throughout the day. Continual exposure to dry air can cause damage to your mucous membrane. This membrane prevents inflammation of your respiratory system by acting as a natural barrier. When it is worn down by dry air, you are subject to getting more infections, colds, and flu. You may even begin to experience nose bleeds due to dryness and irritation. Dry Skin – Without moisture in the air around you, your skin and lips may begin to feel like the Sahara. It is common to develop what is called the “winter itch” from dry, itchy skin that results from depleted moisture. Dry skin also leaves you more open to infections that may enter more easily through cracked skin. Floor or Wall Damage – If your home is consistently dry, it can affect the wood and paint of the interior. Wooden floors may buckle or warp. Paint may crack and flake. Many homeowners don’t realize that a certain level of moisture is necessary to home health. What Causes Dry Air in a House? Dry air is most often a result of central heating that evaporates much of the natural moisture found in your home. Poor insulation can also be responsible for allowing heat to escape and take the moisture with it or allowing it to leach into the walls where it gets trapped and creates mold and mildew. However, the cool air from air conditioning also tends to be lower in humidity, so if you are periodically running your AC during the warmer part of the day and your home already leans toward the dryer side, it may be lending to the problem. Don’t discount air conditioning dry air when considering adjustments in your home. If you are experiencing signs of dry air in your home, you can test to find out the severity of the problem. Simply purchase an inexpensive hygrometer from your local DIY, hardware store, or online to measure moisture levels. This device is similar to a thermometer, but it measures moisture instead of temperature. You can even buy small digital ones in packs to place in different areas of your home. Ideally, the moisture level of your home should fall between 30 and 50 percent humidity. If you are registering a moisture level below 30 percent, you’ll want to invest in a humidifier to correct the problem. If you’re just below this range, you might get by with making some of the simpler changes given for increasing moisture levels. Anything over 50 percent means you have the opposite problem and need a dehumidifier. It is common for some homes to possess both as homes tend to be drier in winter and moister in summer. Dry Air Solutions If you are dealing with dry air in your house, there are some actions you can take to correct the problem. Reduce Oven Use – Many don’t realize that the heat from your oven serves to further dry out the air in your home. Cooking on the stovetop doesn’t have the same drying effect. Stovetop cooking can help put moisture back in the air from steam escaping from the food. While everyone likes to bake from time to time, do your best to limit it if you are experiencing a dry indoor climate. Air-Dry Dishes – If you use a dishwasher, open the door once the rinse cycle ends and pull the rack out. Letting the dishes air-dry allows moisture to make its way back into the air. Your dishes will still get dry, but they’ll serve a useful purpose while doing so and you’ll save money by skipping the automatic drying function. Line Dry Laundry – Like the dishes, your clothes will give off moisture if you allow them to dry naturally on an indoor line or rack. Line drying is also cheaper than using an electric or gas dryer and eliminates the additional wear and tear to your clothes from dryer friction. Bathroom Steam – If you live alone or shower at a time that allows you to leave the door open while you do so, the steam of the hot water you use escaping into your home outside the bathroom can help put moisture back in the air. Likewise, you will reap the same benefits from a hot bath if you allow the steam to escape into the house. Commercial Humidifiers – As the colder months begin to creep in, your heating system will be put to greater use, creating dry air. When this happens, many homeowners will mistake the dry air for coolness and adjust their thermostats to a higher setting, creating even drier air in the process. A single-room or whole-house humidifier will eliminate your dry air troubles and help your home feel warmer without turning up the heat unnecessarily. DIY Hydration – If your home isn’t excessively dry, you can create moisture in the air by simply setting out small containers of water to evaporate into the air. This is especially effective if you place them on floor vents where heat rises but be careful when placing them in areas where they might be subject to being overturned. Radiator Humidifiers – If you have radiators in your home, you can make use of them by hanging small containers of water from them.
Eliminating Water Leakage from a Mini-Split Air Conditioner
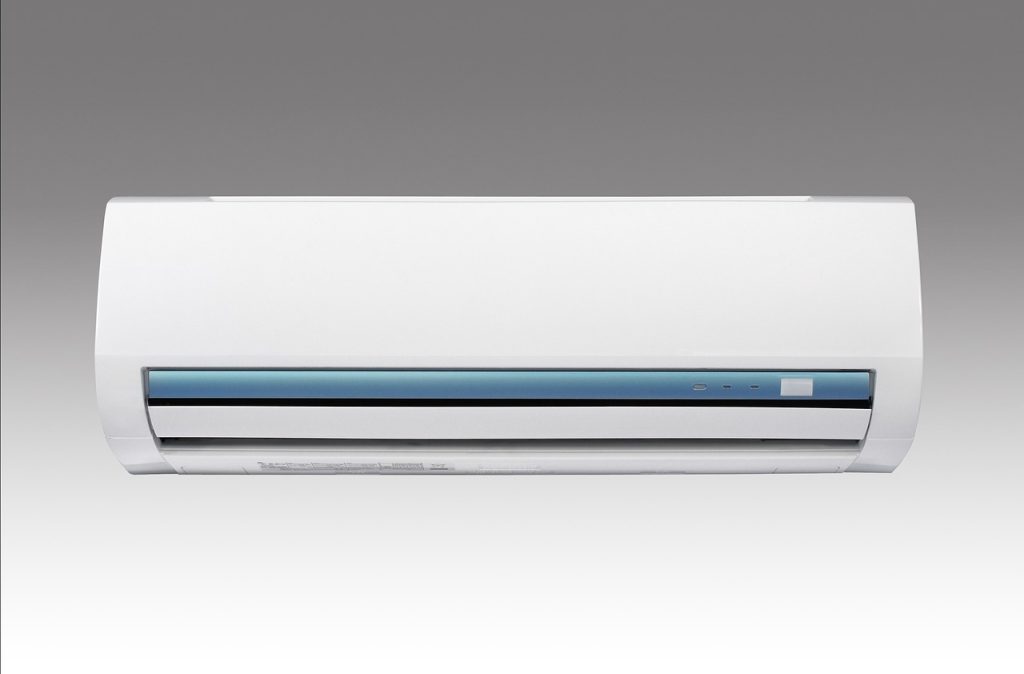
Ductless mini splits are one of the most effective and energy-efficient solutions to your heating and cooling needs on the market today. Mini split systems are versatile, compact, and operate without the need for the ductwork required by traditional HVAC systems. However, like any system, they can experience problems from time to time. One of those problems is encountering a situation where your mini split is leaking water. While there are some problems that you can easily repair, others will require a service call from a qualified HVAC technician. Dirty Filter A filter that is full of dirt and debris will be too clogged for air to move through it properly. When the airflow becomes obstructed like this, the coil will freeze. After the coil thaws, the ice that builds up on it will melt and leak from the unit. You can keep your mini split from leaking water by keeping your filter clean. Your owner’s manual should provide you with maintenance guidelines but most filters need to be cleaned twice per month. How to Clean Your Mini Split Filter In addition to leading to leaks, a dirty filter causes your system to work harder than it should. This means higher utility costs, poor air quality, and a reduced life span of the unit. To keep your filter clean and avoid your mini split dripping water, follow this guide on how to clean your mini-split filter: 1. Turn the system off Though it is not likely you will encounter a shock just by removing the filter, there is always the possibility that you might encounter a fault of which you were unaware. Turning off the system is merely a standard safety measure to prevent any chance of electrocution. 2. Locate the front panel The filter’s location may vary depending on the brand of mini split you have installed. Most are located beneath the front panel of the indoor unit. 3. Remove the filter Open the front panel, being careful not to touch the metal parts. Use a soft, dry cloth to wipe down the inside area. Pull the filter out of the unit. 4. Clean the filter Use mild detergent and water to flush out the dust and debris from the filter. Be sure to rinse it thoroughly once you are done. Place the filter in an area out of the sunlight to dry. 5. Reinstall the filter Return your clean and dry filter to the mini split unit, making sure it snaps into place. Some models may have clips that keep it locked in. With the filter back in position, close the front panel and turn your unit back on. This should stop your mini split AC from dripping water. Blocked Drainage Pipe The inside unit of your mini split has a coil that pulls moisture from the air during the cooling process. There is a drainage pipe that carries this moisture outside. If this drain gets clogged, the water will not drain properly. Instead of the water dripping outside, it backs up and drips down your wall. If your system seems to be cooling properly, any leak you see is likely because of a clogged drain. Here’s how to stop your mini split AC from leaking water. How to Clean a Blocked Drainage Pipe 1. Gather your tools You will need a screwdriver, duct tape, a vacuum, and a water bucket. 2. Remove the casing With the system powered off, open the control panel and remove the filter. Remove the screws that hold the casing in place. 3. Remove the drainage line The drainage line is usually found at the bottom of the unit. Remove any screws that are holding it in place. Pull the hose downward, unwrapping any tape securing it, and allow any water backed up inside to flow into a bucket. 4. Clean the drainage line Use your vacuum to suck out any dirt and debris that have accumulated in the line. 5. Reassemble the unit and test Once the drainage line is clear, reassemble the unit just as it was before and test it to see if your mini split is still leaking water. Leaks Requiring Professional Service In some cases, you may have more extensive issues that are causing your mini split to leak. If you are knowledgeable, you may be able to address some of these yourself, but most are better left to a professional. Tainted Thermostat A buildup on your mini split’s remote control thermostat can cause the system to fail at regulating its temperature effectively. You should have it professionally cleaned to correct the problem. Clogged Indoor Unit The indoor unit of your mini split includes a fan that can get clogged by dust and debris. If this happens, the system cannot blow out the air it is designed to produce and may begin to leak. If you are comfortable getting into the inner workings of the unit, you might be able to clean it yourself. Otherwise, contact a licensed HVAC technician. Refrigerant Leaks You may have developed a refrigerant leak which has resulted in your unit becoming low on refrigerant. This can cause the inside condenser to leak profusely. What you are mistaking for a water leak might actually be a refrigerant leak. You can tell the difference because a loss of refrigerant will also cause your unit to not cool. If you are losing refrigerant, contact a professional as exposure to refrigerants is a health hazard. Leaking Seals Your ductless mini split may develop leaks around the door seal if it has gotten ripped or worn. If you have opened the access panel to the system, the panel gasket may have been damaged. A professional can quickly repair your seals. Damaged Drain Pan Your mini split’s drain pan holds the condensate that forms from the coil’s contact with humid air. This pan can develop rust or become damaged over time, leaving it to leak fluids rather than storing them until they exit through the drain line. You
Best Thermostat Temperatures & Settings for Fall in Arizona
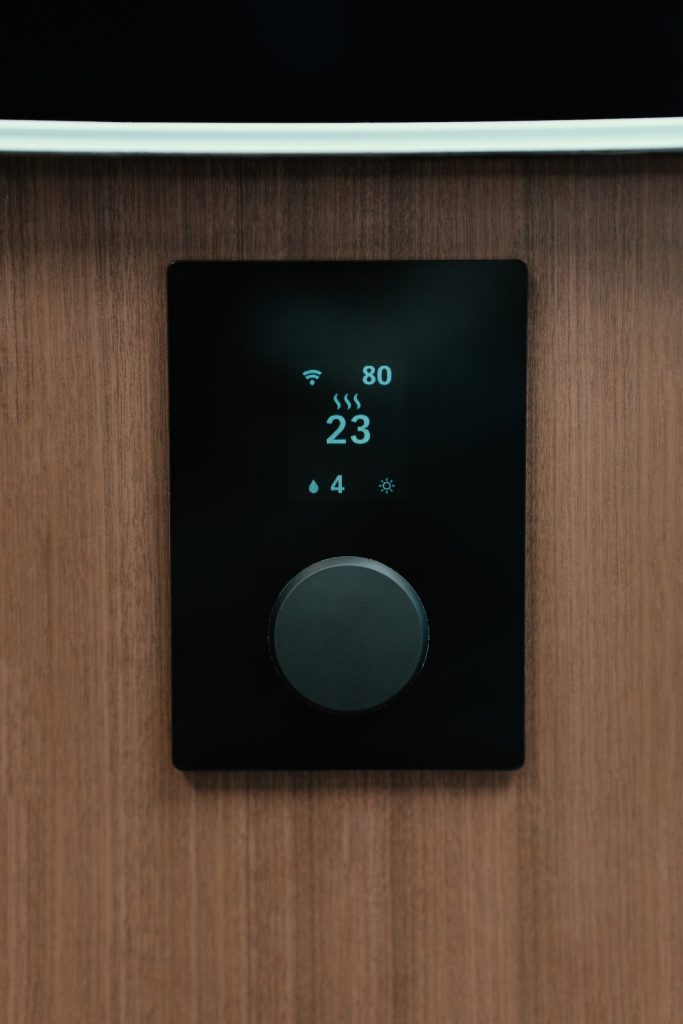
As summer slips away and Arizona inches into fall, the temperature range from day to night can make it more difficult to maintain your home at a temperature that is both comfortable and energy efficient. If you are wondering what to set your thermostat to in the fall, here are some tips to help guide you toward an answer. Energy History The first thing you’ll need to consider when figuring out the best thermostat setting for fall is the energy efficiency of your HVAC system. Your heating and cooling systems make up around half of your home energy usage, according to the Department of Energy. As the biggest source of energy consumption in your home, the efficiency of your HVAC system is vital to keeping down the costs of maintaining a comfortable temperature in your home. If your system is in good working order, then you’ll want to determine the best thermostat setting for your HVAC system. Since we are now into the fall, we’ll focus our discussion on the current season. The question then is what should your thermostat be set at in the fall? The best place to start is with a review of your past energy use. Look at what you’ve paid for electric, gas, or other fuel sources for each month and compare those costs to the average temperature for the matching period. You’ll be able to see the highs of summer when you are using more HVAC and winter when you are using more heating but focus on the in-between months that make up the fall season. Without the spikes before and after fall, it might be difficult to determine the ideal thermostat setting for fall. However, this is one of the best times to save on your energy costs. Aim for the temperature settings you were using on the lowest energy bills. Weathering the Weather It’s no secret that the more you can adjust your temperature so that you are using your HVAC system the least, the more money you will save. A simple adjustment of between seven to ten degrees for at least eight hours a day can result in savings of as much as 10% on your energy bill. The best way to do this is to simply keep your home at a temperature setting that may be a bit warmer or cooler than you would like while you are out of the house. While turning off your system is not recommended, adjusting the temperature while you are away from home and won’t notice the change can lower your energy bill without creating discomfort while you are home. Unlike the highs of summer and the lows of winter, the natural temperature of the fall months makes it an ideal time to make changes that won’t create unnecessary energy consumption. However, keep in mind that it is never a good idea to make drastic temperature adjustments. Make smaller, gradual increases or decreases as needed to achieve the ideal home environment. Programmable Thermostats In discussing adjustments to your home temperature, we’d be remiss not to mention the beauty of programmable thermostats that will do the work for you. Once you’ve determined the ideal temperature and what times of the day are best for adjusting while you are away from home, you can automate your changes with a programmable thermostat. Fall temperatures in Arizona can be quite warm in the daytime and much cooler at night. The ability to set your thermostat to alter the temperature in your home accordingly will help to optimize your energy efficiency. You can create a schedule based on the extended forecast and update it periodically when there are changes significant enough to require it. Ideally, your home temperature is best set around 78 degrees for warmer weather and 68 degrees when it is cooler. While these are good base temperatures to start with if you don’t have an energy history to review, you will want to adjust based on your preferences and the energy efficiency of your home. Smart Thermostats If you want to get ahead of the game, consider investing in a smart thermostat. You can take all the calculations and guesswork out of figuring out the best thermostat setting for fall by letting your thermostat do the work for you. This handy HVAC temperature controller will detect changes in your home and adjust the temperature as needed. If you want the least amount of hassle and peak energy efficiency, this type of smart device is ideal. Not only will it decrease your energy use, but it will also let you monitor your home temperature when you are away. This is especially beneficial if you are away for a long period and want to adjust the temperature to a more comfortable level for your return home. It can also let you know if there has been a problem in your absence so you can plan for repairs. Energy Efficiency In talking about energy efficiency, it is not enough to simply determine what temperature to set your thermostat in the fall and make the adjustment. There are factors outside your HVAC system that will affect your energy costs. Leaks, inadequate insulation, poor circulation, lack of proper maintenance, and other issues can affect efficiency in even the most state-of-the-art HVAC system. There is only so much work an ideal thermostat setting can accomplish. If outside issues that affect how well your HVAC system is working for you aren’t corrected, you will be hard-pressed to achieve the energy efficiency you desire. Periodic walkthroughs of your home to assess problems can help prevent unnecessary costs. Routine HVAC maintenance will keep your system performing at its best. If you are concerned that you aren’t getting optimal use out of your HVAC system at the lowest costs, consider having a home energy audit done. With current incentives offered by recent legislation, this is a great time to have your home evaluated and correct issues that may be affecting your energy efficiency.
Causes Your Furnace Smells and What You Should Do About It

It is likely that you are here reading this because you’ve just discovered that your furnace smells. There is nothing worse than turning on your furnace and finding your home filled with a weird smell coming from the furnace. Many things can cause furnace smells, and not all of them are a problem once the odor has cleared. Let’s look at some of the reasons your furnace smells bad so you can properly identify the problem before calling in a furnace repair. Cracked Heat Exchanger Your furnace is only as good as the sum of its parts; if one of its components fails, the whole system can fail. An early indication of this impending doom is the chemical smell from a cracked heat exchanger. A damaged heat exchanger can produce a scent similar to that of formaldehyde. If you detect this odor in your home, consult a professional immediately. Failure to replace this component will reduce efficiency and lead to fires or deadly carbon monoxide leaking into your home. Dampness Where your furnace sits may have something to do with the odor. If it is located in a damp part of your home, moisture can get into it. Once the furnace is turned on and gets hot, this moisture will burn off and spread the smell of dampness throughout the heating vents. The smell will lessen and disappear as the moisture evaporates. Dust Whether your HVAC has gotten older, been abused, or suffered damages leading to poor operation, repairs to keep it running can add up quickly. While most HVAC systems require some repairs and maintenance, this should not be allowed to become excessive. If you find yourself making constant repairs, especially if some of them are the same ones time after time, you should look at how much those repairs have cost. If they add up to more than half the price of a replacement, it is time to upgrade your system. Gas Leaks If you use natural gas as fuel for your furnace, you may experience a smell similar to that of rotten eggs. This comes from the purposeful treatment of natural gas with sulfur and measures gas companies take to give this usually odorless gas a distinct odor. The horrid odor is intentional. It lets homeowners know that they have a leak almost immediately. If you smell sulfur after turning your furnace on, exit your home immediately. You’ll need to call your gas company and an HVAC expert to correct the problem before re-entering your home. Polluted Intake If your furnace has an intake that brings air in from outside your home, there is the potential for contamination. Smells near the intake system can be sucked into your home, creating furnace smells. This might be okay if you’re pulling in the smell of your rose bushes, but it’s not so nice if you’re pulling in odors from a sewer grate or a deceased animal. You’ll need to locate and eliminate the smell to correct the problem. Mold If your furnace is constantly exposed to moisture, mold can easily develop within it. The smell, if given off through your furnace, is similar to that of the dampness noted earlier, but it can last much longer. If you find yourself experiencing an earthy or musty smell for an extended period, you will need to locate the mold and remove it. It will not burn off like simple moisture. Blockages Different furnace smells can develop based on the nature of the blockage. If your chimney is blocked, smoke will filter back into your home. If an animal or pest has gotten stuck inside the system, it may begin to decompose and smell rotten. You’ll need to turn off the system and call a professional to inspect and remove the obstruction. Dirty Filters Your furnace contains various filters that help clean the air in your home. Like any other filter, these get dirty over time. If your filter becomes clogged, not only will it not operate efficiently, but it will also begin to smell like whatever is clogging it. Additionally, furnace filters can break down and might smell of motor oil. Changing the filter should correct the issue, but if it doesn’t, you may have a more serious problem, such as an oil leak which needs to be attended to by a professional. Overheating Electrical or hot metal smells from your furnace are a sign of trouble. You should never ignore these kinds of smells as they signify your furnace is overheating. The automatic shutoff may be faulty and failing. Turn your unit off and have it checked by a qualified HVAC technician. Contaminated Vents Smells emanating near a vent intake can get sucked into the register and pushed through the system, flowing back out into other areas of the house. Even those present outside a vent where the air is blowing across them can push the smell into the air. One of the most common causes of this comes from pets or babies. Has your dog fouled near a vent? Has a dirty diaper pail or cat litter box been placed too close? Removing any smells near a vent should eliminate these kinds of furnace smells. If you are unable to locate the origin of the smell and it persists, you should contact a professional for assistance. Conclusion You should never have a persistent smell coming from your system. If you are experiencing unpleasant odors that don’t quickly disappear, you should always have a licensed HVAC technician examine your system and provide answers for the problem. While some furnace smells may be more unpleasant than harmful, those persistent smells left unattended can lead to more serious troubles. Sometimes, you may be endangering your health by letting them persist. The moment that you have to ask yourself, “Why does my furnace smell?” is the same moment that you should begin seeking answers. That smell coming from the furnace could be your earliest warning sign that there is a problem that
When and How You Should Upgrade Your HVAC System
Upgrading your HVAC system can be a substantial expense, so most people want to be sure it’s the right time to make HVAC upgrades before they make the investment. No matter how well you maintain your HVAC system, it will eventually require replacement. If you are looking to upgrade your heating system before winter or looking at upgrading that AC unit you had trouble with during the summer, here are some ways to know if it’s time. When to Replace an HVAC System If you are experiencing any of the following situations, it is time to look into investing in HVAC upgrades. 1. Your HVAC System is More Than a Decade Old When was your HVAC system installed? If the answer is more than ten years ago, then you may be due an HVAC upgrade. According to the Department of Energy, homeowners should replace their heating and air conditioning systems every ten to fifteen years due to deterioration. Some older units may also contain outdated refrigerants. 2. Repair Costs Have Exceeded Half the Cost of Replacement Whether your HVAC has gotten older, been abused, or suffered damages leading to poor operation, repairs to keep it running can add up quickly. While most HVAC systems require some repairs and maintenance, this should not be allowed to become excessive. If you find yourself making constant repairs, especially if some of them are the same ones time after time, you should look at how much those repairs have cost. If they add up to more than half the price of a replacement, it is time to upgrade your system. 3. Increased Utility Bills Heating and cooling systems can add up to as much as 40-50 percent of our overall energy costs each year. Compare your energy usage listed on utility invoices for the same months during previous years. If you are using more energy with no explanation, your HVAC system could be the culprit. With age, HVAC systems become less efficient and use more energy. If you have been diligent with repairs and maintenance, a significant increase in utility costs may be your sign that it’s time for an HVAC upgrade rather than just a simple repair. 4. Temperature Fluctuations There are many reasons why your HVAC system might not be able to maintain a consistent temperature. You could have a damaged or failing thermostat, low fluids, dirty filters, cracked ducts, or motor damage. It might also mean that your HVAC system isn’t powerful enough to cool your home or that you have improperly installed ductwork. If you are looking at substantial repairs to tackle a temperature control problem or have made structural changes that may have reduced efficiency, consider upgrading your HVAC. 5. You’ve Noticed Heavier Dust Collection HVAC systems not only produce heat and air, but they also facilitate air circulation and ventilation. When working efficiently, your HVAC system should remove most dust, dander, and debris from your home. An increase in the presence of dust may mean your air conditioning system is no longer doing an adequate job of removing particles from the air. 6. Odd Odors While some smells can arise from dust burning off, others can be a sign of melting wires or mold on the ducts. If you consistently experience unpleasant smells coming from your HVAC unit and have had it inspected and serviced, it might be due to aging components creating odors due to poor operation. 7. Strange Noises Your HVAC system should operate quietly enough that it isn’t a disturbance. If it has begun to grind or squeal, it is not functioning properly. An inspection from a licensed professional can help identify the cause and recommend repairs or suggest replacement. 8. Low Air Quality Summer can be very unhealthy for those who have a poorly operating HVAC system. The reason for this is that the heat of summer can bring with it mold, mildew, dust, and higher humidity than usual. If you have noticed an increase in problems with any of these during the warmer months, it may be because your HVAC system isn’t properly circulating and filtering contaminants that enter the air in your home. If you are having any of these issues despite your best efforts to keep your HVAC system properly maintained and serviced, you may be fighting a battle you can’t win. A qualified HVAC expert from AHWA can inspect your system and help you determine if it’s time to upgrade your HVAC. The cost of replacement will pay for itself in reduced energy and repair costs. You’ll feel healthier with the improved air quality and reduced stress from high energy bills. HVAC Upgrade: Where to Begin If you are reading this, you have already begun the process of considering an HVAC Upgrade. Your next step should be to set up a consultation with a heating and cooling specialist to assess your situation. Together, you can work out what sort of budget you have to work with and what your needs are. Perhaps money is tight and you need to stick with the basics. A qualified HVAC technician can help you find an affordable system that provides the essentials for your home. If you can afford more, you can consider additional conveniences such as floor heating, programmable thermostats, built-in humidifiers, or additional filtration. In some cases, you may find that your system is in better shape than anticipated and explore options for revitalizing or expanding it to better meet your needs or reviving it enough to buy you time to pay for a replacement. It is always better to hold out for a better quality system rather than installing a bargain HVAC system that won’t last. Though you will pay more for higher quality, it will be worth it in the long run. Whether you decide to replace your HVAC right away or buy some time with your existing unit until you can afford a more preferable system, AHWA can help you install your AC and make the best decision