Choosing the Right Size Air Conditioner for Your Room
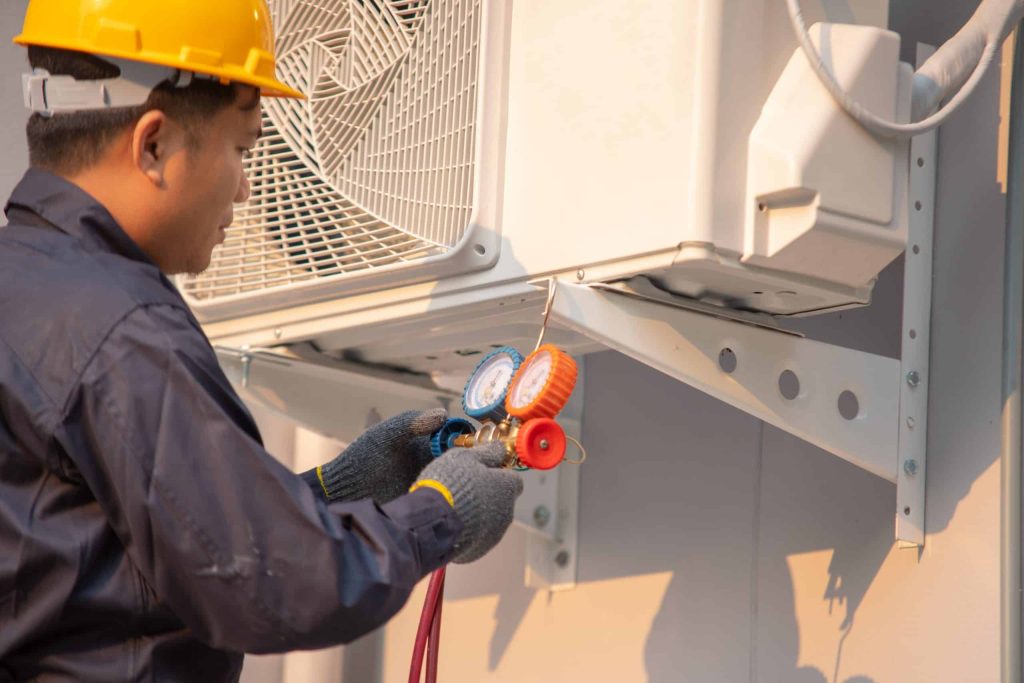
Living in a room that isn’t adequately cooled can be uncomfortable, especially during the hot summer months. The air feels heavy, and even simple tasks become exhausting. This discomfort often stems from using an air conditioner that is not the right size for the room. Choosing the correct size air conditioner is essential for maintaining a comfortable indoor environment and ensuring energy efficiency. When selecting an air conditioner, size matters. A unit that’s too small will struggle to cool the room, while one that’s too large can lead to problems like high humidity and frequent cycling. These issues not only affect comfort but also increase energy bills and reduce the lifespan of the unit. Understanding how to choose the right size can make a significant difference in your home’s comfort and efficiency. This guide will explore the importance of proper air conditioner sizing, how to use a cooling calculator, and tips for considering local climate factors. By understanding these elements, you can make an informed decision that enhances your living space’s comfort and efficiency. For those wondering what size AC do I need, this guide will provide valuable insights. Understanding Air Conditioner Sizing Proper air conditioner sizing is critical for both energy efficiency and comfort. When an AC unit is appropriately sized, it cools the room effectively without wasting energy. This balance helps maintain a comfortable temperature while keeping energy bills in check. On the other hand, an oversized unit can cause issues like high humidity levels and frequent cycling, which can lead to increased wear and tear on the system. Oversized air conditioners often cycle on and off more frequently than necessary. This short cycling prevents the unit from removing enough moisture from the air, leading to a clammy and uncomfortable environment. Additionally, this constant stopping and starting can shorten the lifespan of the air conditioner, leading to more frequent repairs or replacements. Choosing the right size can lead to significant energy savings over time. Studies suggest that correctly sized units can reduce energy consumption by up to 30%. This not only saves money but also reduces your carbon footprint. To better understand what size AC do I need, consulting resources that provide detailed guidelines on AC sizing can be incredibly helpful. Using an Air Conditioner Room Size Calculator An air conditioner room size calculator is a valuable tool for determining the appropriate BTU rating for your space. The primary keyword here is “air conditioner room size calculator,” which helps ensure you select a unit that matches your room’s cooling needs. These calculators consider various factors such as room dimensions, ceiling height, and window size to provide a more accurate estimate. Room dimensions play a crucial role in determining the right AC size. Larger rooms require units with higher BTU ratings to ensure effective cooling. Ceiling height also affects cooling needs; rooms with higher ceilings may require more powerful units due to increased air volume. Additionally, window size and exposure can impact how much heat enters the room, influencing the cooling capacity needed. For example, let’s say you have a room that measures 20 feet by 15 feet with an 8-foot ceiling. A basic calculation might suggest a unit with around 12,000 BTUs. However, if the room has large windows facing direct sunlight, you might need to adjust this estimate upwards. Using tools like an AC size calculator can help fine-tune these estimates, ensuring you choose a unit that meets your specific needs. Interesting Facts about Air Conditioner Sizing Proper air conditioner sizing plays a crucial role in energy efficiency and comfort. An oversized unit can lead to unwanted humidity and frequent cycling, potentially shortening the system’s lifespan. For more information, visit the size guide. Using an air conditioner room size calculator helps determine the right BTU rating for your space, taking into account room dimensions and window size. Climate considerations significantly impact air conditioning needs, especially in regions like Arizona. Additional cooling solutions may be necessary for challenging climates. Learn more about beating the heat in Phoenix. Common mistakes in choosing AC size include ignoring room insulation and solar gain. Practical advice can help avoid these pitfalls, such as understanding the best attic insulation options. Consulting with HVAC professionals offers tailored advice, ensuring you have all the information needed for accurate AC sizing and installation. Explore the benefits of professional consultation here. Energy-efficient AC models offer benefits like cost savings and enhanced comfort. New models may be more efficient, as explained in this efficiency guide. Factors Influencing AC Sizing – Climate Considerations Climate plays a significant role in determining the appropriate air conditioner size for your room. In regions like Arizona, the intense heat demands a more robust cooling system to maintain comfort. The local climate can drastically affect how hard your AC unit needs to work, impacting both its efficiency and lifespan. For instance, in areas with high humidity, an air conditioner might need to be larger to effectively manage both temperature and moisture levels. In particularly challenging climates, additional cooling solutions may be necessary. Options such as ceiling fans or energy-efficient window treatments can complement your air conditioning system, helping to maintain a comfortable indoor environment. To learn more about managing heat effectively in places like Phoenix, consider exploring strategies on how to beat the heat. Understanding your local climate’s impact on air conditioning needs can guide you in selecting the right size unit. This ensures your system operates efficiently and effectively, providing relief from extreme temperatures while minimizing energy consumption. Common Mistakes When Choosing AC Size Choosing the wrong air conditioner size can lead to several common pitfalls. One frequent mistake is neglecting the importance of room insulation. Proper insulation helps maintain the desired temperature, reducing the workload on your AC unit. Without it, even a correctly sized air conditioner may struggle to cool your space efficiently. Another error is underestimating solar gain, which refers to the heat absorbed from sunlight entering through windows. This can lead to an increased cooling demand that might
Hydro Jetting Explained: What It Is, How It Works, and When You Really Need It
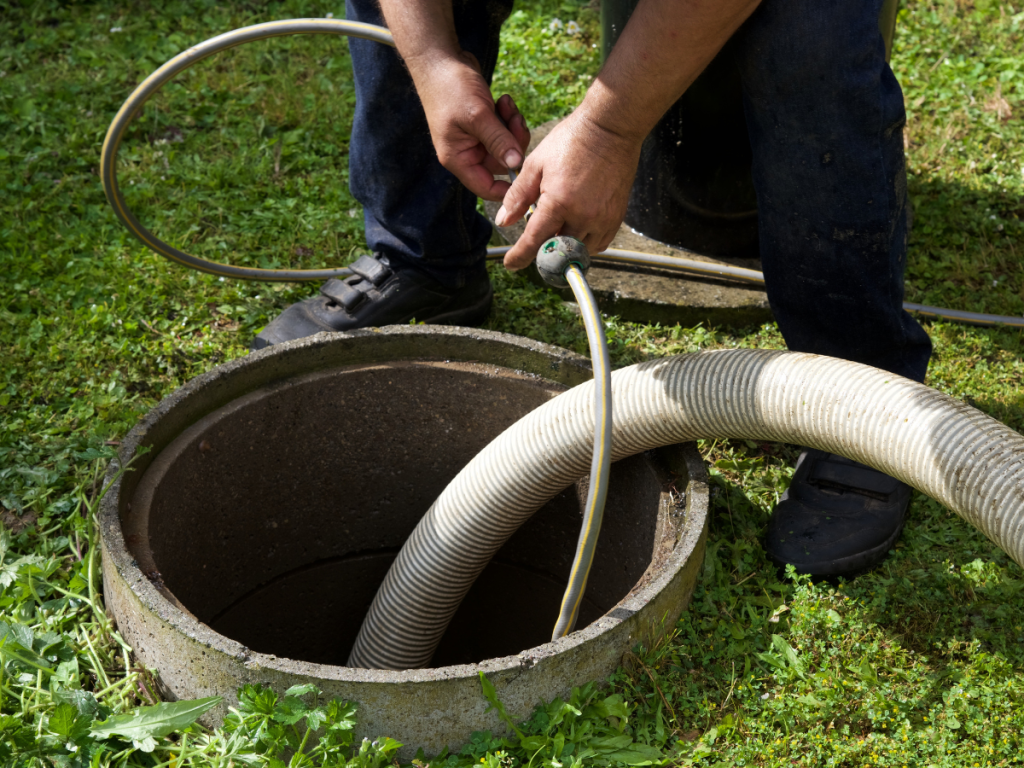
If you’ve ever struggled with a drain that won’t stay clear or a sewer line that keeps backing up, you know how frustrating stubborn plumbing problems can be. In Arizona’s busy households and businesses, these issues are more common than you might think. That’s where understanding what hydro jetting is and how it works can make all the difference. This powerful plumbing solution clears tough blockages that traditional methods can’t handle. Let’s take a closer look at what hydro jetting means, how it works, and when it’s truly the best option for keeping your pipes healthy and clog-free. What Is Hydro Jetting? If you’ve ever dealt with a kitchen sink clog that wouldn’t budge, you’ve probably wondered if there’s a more effective way to unclog it than a plunger or drain snake. That’s where hydro jetting services come in. Hydro jetting is a professional drain cleaning method that uses pressurized water—often up to 4,000 PSI—to thoroughly clean the inside of pipes. It’s a safe, efficient, and eco-friendly solution to eliminate grease, sludge, roots, and debris that are causing clogged drains or slow drainage. So when people ask, “What is hydro jetting?”—the simple answer is: It’s a powerful plumbing solution that blasts away buildup and restores clean pipes to near-new condition. How Does Hydro Jetting Work? Hydro jetting might sound high-tech, but the process is pretty straightforward (when done by a professional plumber). Here’s how it works: Before starting the process, a licensed plumber will use a camera to inspect your pipes. This allows them to locate the blockage, determine its cause, and ensure your plumbing is in good condition to handle high-pressure water jetting. A flexible hose equipped with a nozzle that sprays in multiple directions is then inserted into the pipe. Once the system is powered on, high-pressure water shoots forward to break through clogs and backward to scrub the pipe walls, flushing debris out of the system. Unlike snaking, which cuts a narrow path through a clog, hydro jetting washes the entire interior of the pipe. It clears away years of accumulated grease, hair, soap residue, and even intrusive tree roots. One of the main benefits of hydro jetting is that it thoroughly cleans and removes debris that could lead to future clogs, helping you avoid repeat service calls. It’s also considered a cost-effective drain cleaning option for homeowners dealing with frequent backups or tough blockages. Think of it like pressure-washing the inside of your plumbing system. It’s a safe, eco-friendly process too, since it relies solely on water — no harsh chemicals required. What Types of Blockages Can Hydro Jetting Remove? Hydro jetting is incredibly effective at clearing: It’s commonly used in both residential plumbing and commercial systems—and especially useful for restaurants or older homes with frequent drain issues. This deep, pressurized cleaning is something snaking simply can’t achieve — a snake might punch a hole through a clog, but it often leaves debris behind that soon causes another blockage. Hydro jetting, on the other hand, cleans out the entire pipe system. When Do You Really Need Hydro Jetting? Hydro jetting isn’t for every situation, but when it’s the right fit, it can save you time, money, and serious headaches. Here are some signs it might be time to consider hydro jetting: Important Note: Hydro jetting isn’t recommended for damaged or fragile pipes. That’s why a camera inspection is critical before doing the job. At American Home Water & Air, we always ensure your system is a good candidate before starting any high-pressure cleaning. Hydro Jetting vs. Traditional Drain Snaking Feature Hydro Jetting Drain Snaking Power High-pressure water (4,000 PSI) Mechanical coil Scope of Cleaning Full-pipe diameter Small path through the clog Long-Term Results Removes all buildup May leave residue behind Suitable for Grease/Sludge Yes No Risk of Pipe Damage Low (with inspection) Minimal In short, snaking is a quick fix, while hydro jetting provides deep, longer-lasting results. Why Hydro Jetting Could Be the Smartest Solution for Your Plumbing If you’re dealing with clogged drains, slow water flow, or suspect deeper issues in your sewer system, hydro jetting might be the answer. It’s thorough, effective, and a cost-effective solution to keep your home’s plumbing running smoothly. But remember—this isn’t something to tackle on your own. Reach out to a licensed pro like the team at American Home Water & Air, and we’ll help you decide if hydro jetting is the right fit for your home. Need help now? Let’s clear things up—literally. Call us today or schedule a service to talk with a certified plumber about your hydro jetting needs. Frequently Asked Questions About Hydro Jetting Is Hydro Jetting Safe for My Home? Absolutely—but only when a trained, licensed plumber does it. The high pressure involved in hydro jetting means that it should never be a DIY project. Improper use can cause pipe damage, especially if the plumbing is already compromised. At AHWA, our plumbing pros use careful diagnostics, the right tools, and expert techniques to make sure the job is done safely and effectively. How Often Should I Schedule Hydro Jetting? For most homes, hydro jetting every 1–2 years is a good preventative measure—especially if you’ve had issues with slow drains or grease buildup in the past. Commercial properties like restaurants may benefit from more frequent cleaning methods due to heavier use. If you’re unsure, a professional inspection can help determine the best schedule for your drain cleaning. Can Hydro Jetting Remove Tree Roots? Yes, hydro jetting can break up and flush out small to moderate tree root intrusions. However, if the roots have caused cracks or significant pipe damage, further repair or pipe replacement may be needed. That’s why a camera inspection is always performed first—to assess the condition of your plumbing before using high-pressure water. Is Hydro Jetting Better Than Snaking a Drain? Hydro jetting offers a deeper, more thorough clean compared to traditional drain snaking. While snaking simply punches through a clog, hydro jetting cleans the whole diameter of the pipe, removing
Spray Foam Insulation vs. Blown-In: 5 Key Differences
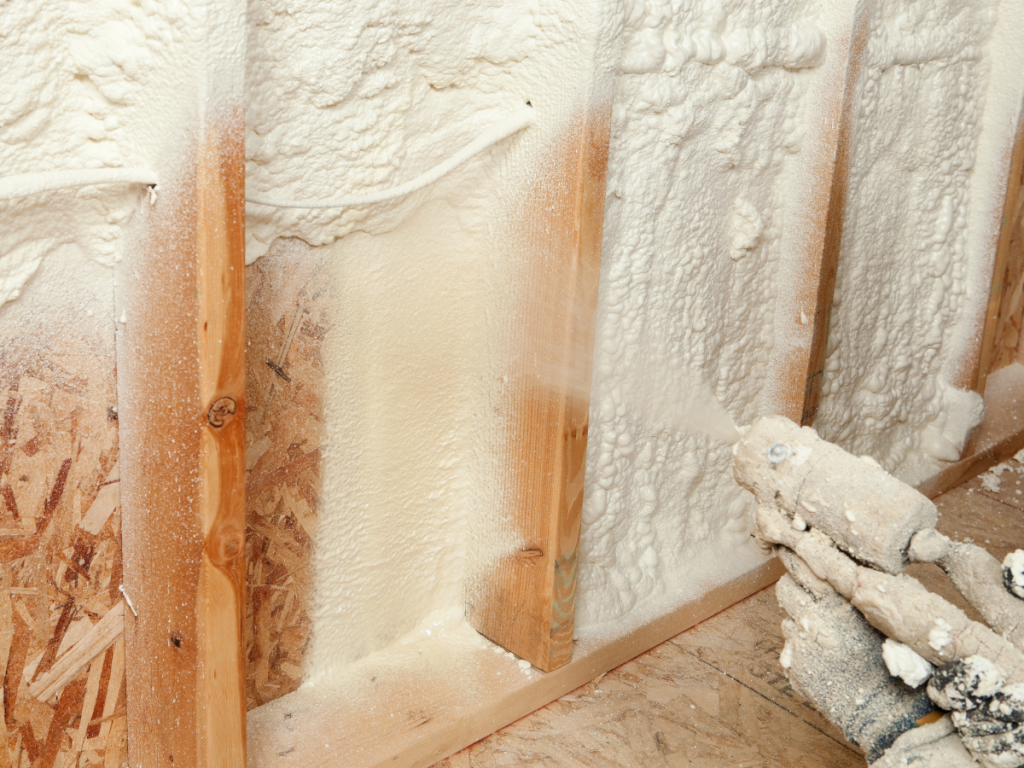
When it comes to insulation options for your home, deciding between spray foam insulation and blown-in insulation is a common dilemma for homeowners. Both effectively enhance energy efficiency and improve comfort, but each has distinct advantages and disadvantages. Understanding these key differences can help you make an informed choice that best fits your home’s needs. In this post, we’ll explore the five key differences between spray foam insulation and blown-in insulation, providing essential insights into choosing the right product for your upcoming new home project. What is Insulation, and Why Does it Matter? Before going over the specifics of spray foam insulation vs. blown-in insulation, it’s essential to understand why insulation is crucial for your home. Insulation helps prevent heat transfer and maintains a comfortable temperature by regulating heat flow. For example, choosing the right attic insulation solutions enhances your home’s energy efficiency. Since the attic is a significant source of heat loss or gain, it directly impacts both comfort and energy expenses. Heat transfer occurs through three primary methods: Insulation acts as a barrier against these heat transfer methods, making it essential for maintaining an energy-efficient home. It helps trap heat in the winter and keeps your home cooler in the summer. This improves comfort and reduces the strain on your HVAC system, which can help you reduce your energy bills. Effective insulation helps maintain proper air flow, reducing the need for constant temperature adjustments. Spray Foam Insulation: The Expanding Solution Spray foam insulation is one of the most advanced insulation options available today. It is typically made from polyurethane foam and expands when applied, filling even the tiniest cracks and gaps in wall cavities, nooks, and joists. Benefits of Spray Foam Insulation Spray foam insulation is known for its high performance in sealing areas where traditional insulation may fall short. The key benefits include: Drawbacks of Spray Foam Insulation Despite its impressive benefits, spray foam insulation does come with some downsides: Blown-In Insulation: The Versatile Choice Blown-in insulation, also known as loose-fill insulation, is made from small particles that are blown into place using specialized equipment. The material options for blown-in insulation include fiberglass, cellulose, and mineral wool, each with unique properties. Benefits of Blown-In Insulation Blown-in insulation is popular for its ability to reach tight and hard-to-access spaces. Its key advantages include: Drawbacks of Blown-In Insulation While blown-in insulation is a popular option, it also has some limitations: Comparing Cost: Spray Foam vs. Blown-In Cost is often a major consideration when deciding between spray foam insulation vs. blown-in insulation. Here’s a general breakdown of the cost factors: Although spray foam insulation provides exceptional energy efficiency and long-term advantages, blown-in insulation remains a cost-effective choice for many homeowners, especially those looking to insulate an attic or other large space. Which Insulation is Right for Your Home? The decision between spray foam insulation vs. blown-in insulation depends on several factors: Conclusion Choosing between spray foam insulation and blown-in insulation depends largely on your home’s specific needs and your budget. While spray foam offers higher R-values, better air sealing, and long-term durability, blown-in insulation is a more affordable and eco-friendly option with good energy efficiency. It’s advisable to consult a professional insulation contractor to ensure you choose the best option for your home. At American Home Water & Air, we understand that insulation is a significant investment. Whether you’re leaning toward spray foam or blown-in insulation, we’re here to help you make an informed decision. Contact us today for more information or to schedule a consultation!
What Is Blown-In Insulation? Everything You Need to Know
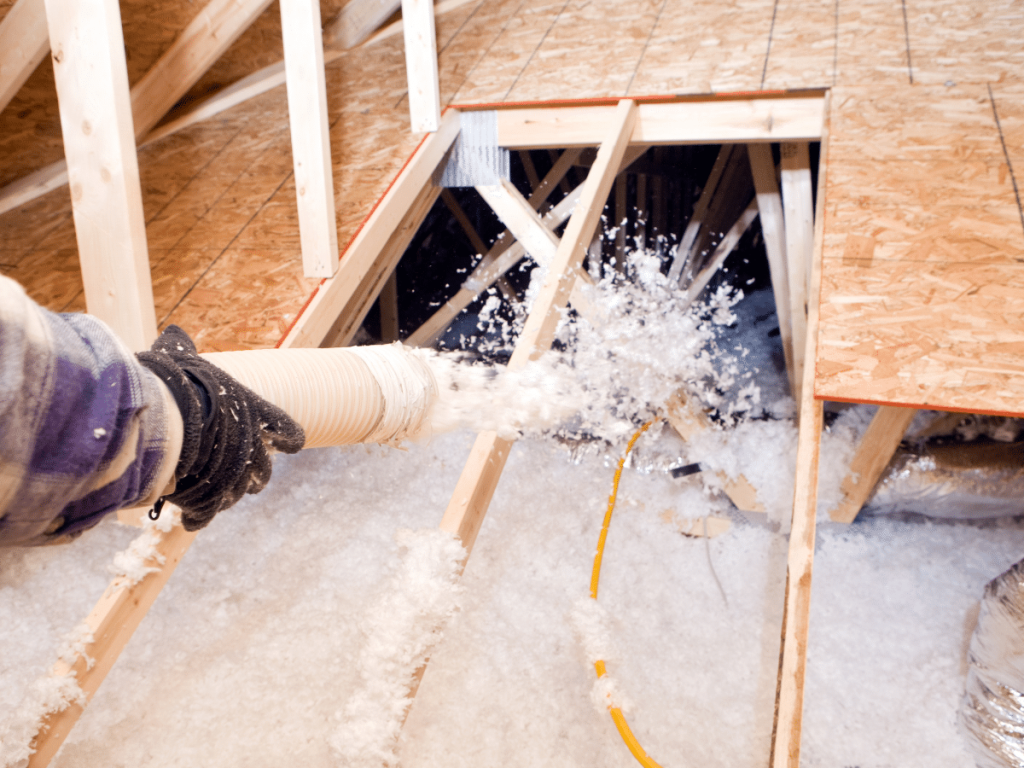
If you’ve been researching ways to boost your home’s energy efficiency or make your indoor space more comfortable year-round, you’ve likely encountered the term blown-in insulation. But what exactly is it, how does it work, and is it the right choice for your home, especially if you live in places with extreme weather swings like Arizona? In this guide, we’ll explain everything you need to know about blown-in insulation, including its materials, installation process, pros and cons, and cost. Whether you’re building new or upgrading your current insulation, this article will help you make an informed decision. What Is Blown-In Insulation? Blown-in insulation—also called loose-fill insulation—is a method of insulating your home using small, loose particles that are literally “blown” into spaces using a special blowing machine. Unlike traditional batts or rolls of insulation, blown-in insulation material conforms to whatever space it fills, making it ideal for attics, wall cavities, and hard-to-reach areas like crawl spaces. This type of insulation can improve your home’s R-value, which measures how well a material resists heat flow. The higher the R-value, the better the insulation performs, keeping your home warmer in winter and cooler in summer. How Does Blown-In Insulation Work? To install blown-in insulation, technicians use a machine called an insulation blower. Here’s how it works: Because of its flexibility, blown-in insulation is particularly effective in existing homes, where opening up walls might not be practical. Types of Blown-In Insulation Materials Not all blown-in insulation is created equal. Depending on your goals—whether it’s maximum energy savings, eco-friendliness, fire resistance, or cost-efficiency—you’ll want to choose the right material for your specific needs. Here’s a breakdown of the most common types of blown-in insulation and what sets them apart: 1. Cellulose Insulation Cellulose is one of the most widely used blown-in insulation materials, for good reason. It’s a smart, eco-friendly choice, made primarily from recycled materials like newspaper and treated with fire retardant and mold-resistant additives. Cellulose insulation is an excellent option for attic insulation, as it provides good coverage and efficiency in hard-to-reach spaces like attics. 2. Blown-In Fiberglass Insulation Composed of ultra-fine glass fibers, blown-in fiberglass is a lightweight and budget-friendly option that performs well in dry climates, such as Arizona. While it’s similar in cost to cellulose, it may settle more over time, which can affect performance in certain applications. Note: Watch for reduced effectiveness over time if not properly installed 3. Mineral Wool Insulation (Rock Wool) Made from industrial slag or molten rock spun into fibers, mineral wool offers excellent thermal insulation, top-tier fire, and sound resistance. It’s heavier and more expensive than cellulose or fiberglass, but its durability and performance often justify the cost. Note: Contains some recycled content, but not biodegradable 4. Eco-Friendly Alternatives If sustainability is a top priority, there are several biodegradable and renewable blown-in options worth considering. These include sheep’s wool, recycled cotton (often denim), cork granules, aerogel, and plant-based spray foams like icynene. Note: Consider some products like aerogel are niche and may not be widely available Now that you’re familiar with the different materials available, let’s weigh the pros and cons to see if blown-in insulation is the right fit for your home. Pros and Cons of Blown-In Insulation: What to Expect Before you decide whether blown-in insulation is right for your home, weigh the benefits against potential drawbacks. Every insulation material and method has trade-offs, and understanding them helps you make a more informed choice. Pros Cons Blown-in insulation offers excellent coverage, but it’s essential to consider how it compares to other insulation types. For example, spray foam insulation is another popular choice, but its cost and installation process differ significantly. Comparing these options—like spray foam vs. blown-in insulation—can help you determine the best fit for your home. Best Applications for Blown-In Insulation: Why It Works So Well in Attics and Walls When it comes to improving your home’s insulation, blown-in insulation shines in specific areas—particularly attics and existing wall cavities. Here’s why: 1. Attic Insulation Blown-in insulation is one of the most effective ways to insulate your attic. It covers the floor like a thick blanket, helping to trap indoor air and reduce heat gain during Arizona’s scorching summers. It can also be layered over existing fiberglass batts to boost your home’s overall thermal performance without removing the old material. Benefits of attic application: 2. Wall Cavity Insulation If your home has older walls without proper insulation, blown-in insulation is often the only practical retrofit solution. Instead of tearing down drywall or exterior siding, small holes are drilled to blow insulation directly into wall cavities. Once filled, the holes are plugged and can be patched or painted. Benefits of wall cavity insulation: Note: In older homes, wall cavities may contain obstructions like wiring or fire blocks. A skilled installer will know how to navigate around these to ensure complete coverage. Cost of Blown-In Insulation One of the most common follow-up questions to “What is blown-in insulation?” is, “How much will it cost me?” Average Costs in Arizona In Arizona, the cost of blown-in insulation ranges from $0.60 to $2.30 per square foot, depending on the material used: Material Average Cost per Sq. Ft. Fiberglass $0.50 – $1.10 Cellulose $0.60 – $2.30 Rock Wool $1.40 – $2.10 Sheep’s Wool $1.50 – $3.10 Attic insulation for a 1,000 sq. ft. home may cost between $600 and $1,200. Wall insulation could add to that, depending on labor and access. The effectiveness of your attic insulation can vary depending on the material you choose. Understanding what constitutes the best attic insulation for your home can help ensure you’re investing in the right solution for long-term energy savings. Though the upfront cost may seem steep, blown-in insulation pays off by lowering your energy bills and helping your HVAC system run more efficiently—especially in Arizona’s scorching heat. Should You Install Blown-In Insulation By Yourself? While renting an insulation blower and installing it yourself is technically possible, especially for attic spaces, professional installation is strongly recommended. A
What’s the Best Attic Insulation? Pros, Cons & Cost Comparison
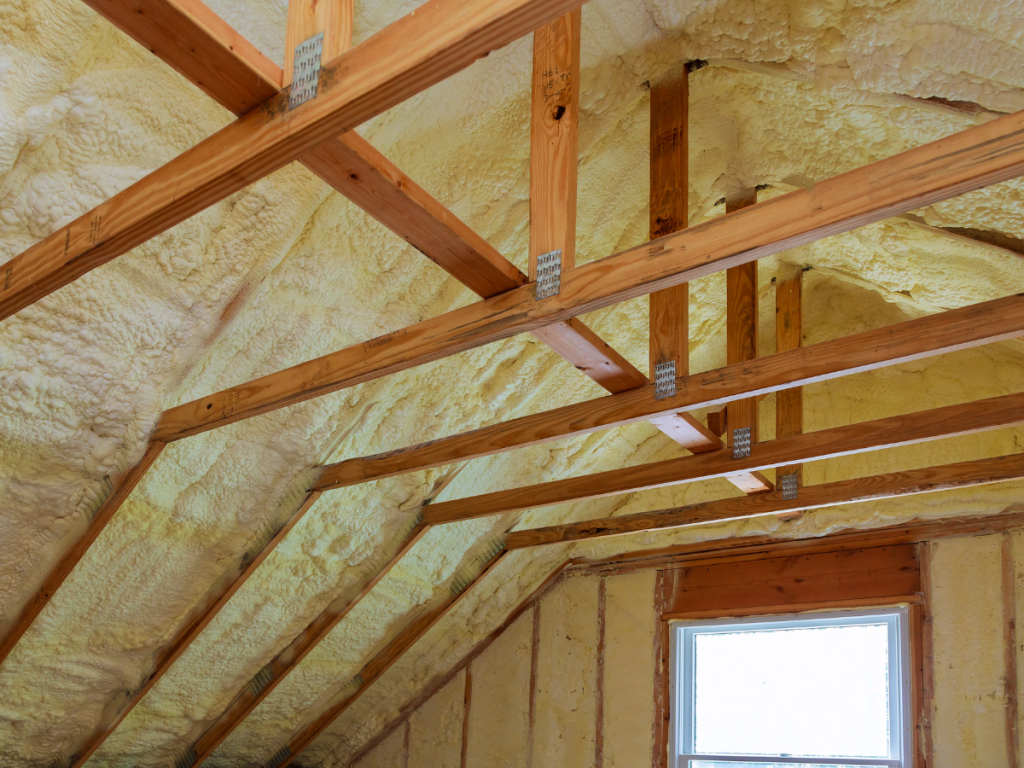
When it comes to keeping your home energy-efficient and comfortable, choosing the best attic insulation is one of your most important decisions. Attic insulation helps regulate indoor temperatures, lowers energy costs, and enhances the comfort of your home, especially during the extremes of summer and winter. But with various options available, how do you know which type of insulation is the best for your attic? In this post, we’ll explore the four most common types of attic insulation—fiberglass batt, blown-in fiberglass, spray foam, and cellulose—and break down the pros, cons, and costs of each. By the end, you’ll better understand which insulation offers the most value and fits your home’s specific needs. Types of Attic Insulation Several factors must be considered when choosing the best attic insulation. The best option will depend on your budget, the thermal performance you’re looking for, and the specific needs of your attic space. Let’s examine the four most common types of attic insulation and their benefits and drawbacks. 1. Fiberglass Batt Insulation: Traditional and Trusted Fiberglass batt insulation is the traditional insulation you most often see in attics. It comes in pre-cut panels or rolls that fit between your attic’s joists, making it relatively easy to install. This type of insulation is made from fine strands of glass spun into fibers, which are then compressed into mats or batts. Pros: Cons: Cost: Fiberglass batt insulation is one of the most affordable options, ranging from $0.60 to $1.00 per square foot. The DIY installation makes this option appealing for those looking to save on professional labor costs. But ensure you measure your attic’s stud spacing and use the correct thickness of fiberglass batt for maximum efficiency. 2. Blown-In Fiberglass Insulation: Comprehensive Coverage Blown-in fiberglass insulation uses the same base material as fiberglass batt, but is applied differently. Instead of being pre-cut into panels, the fiberglass is broken into small particles that are blown into the attic using a machine. This method provides a more even coverage, especially in hard-to-reach spaces. Pros: Cons: Cost: Blown-in fiberglass insulation typically costs between $1.00 and $2.00 per square foot, depending on the size of your attic and the labor costs of installation. This can be more expensive than fiberglass batt insulation, but it offers superior coverage. 3. Spray Foam Insulation: Premium Protection for Maximum Efficiency Spray foam insulation is a newer variety of insulation that comes in liquid form. It’s sprayed into the attic where it expands and hardens into a foam. The foam fills every gap and crack, creating an airtight seal that enhances energy efficiency. Pros: Cons: Cost: Spray foam insulation is the priciest option, ranging from $1.50 to $3.00 per square foot. Although the upfront cost is higher, it can result in substantial long-term savings by cutting energy costs for years to come. 4. Cellulose Insulation: Eco-Friendly and Effective Cellulose insulation is made from recycled paper products like newspapers and cardboard. It is treated with flame-retardant chemicals to make it safe for use in attics and other parts of the home. Cellulose is blown into place like fiberglass insulation, making it a great option for filling gaps and providing comprehensive coverage. Pros: Cons: Cost: Cellulose insulation costs around $1.00 to $1.50 per square foot, making it a cost-effective, eco-friendly option that can help reduce energy bills. Cost Comparison: Which Type of Attic Insulation is Best for Your Budget? When considering attic insulation, cost is always an important factor. Here’s a quick cost breakdown to help you choose the best option for your home: While upfront costs matter, consider the long-term savings each option can offer. Spray foam may cost more initially, but its energy efficiency can save you more money in the long run, especially due to its higher R-value. Choose the Best Attic Insulation for Your Home Choosing the best attic insulation depends on your specific needs and budget. Fiberglass batt insulation is an affordable option for those on a tight budget. If you’re willing to invest a little more for superior thermal performance and coverage, blown-in fiberglass or spray foam insulation might be the right insulation. Cellulose insulation is an excellent option for environmentally conscious homeowners looking for an eco-friendly alternative. No matter what type of insulation you choose, proper installation is key to ensuring long-term performance. Ready to upgrade your attic insulation? Contact AHWA experts today for a free consultation, and let our HVAC Company in Scottsdale, Phoenix & Gilbert help you choose the best solution tailored to your home and budget. Don’t wait—start saving on energy bills today!
How Much Does a New Furnace Cost in 2025?
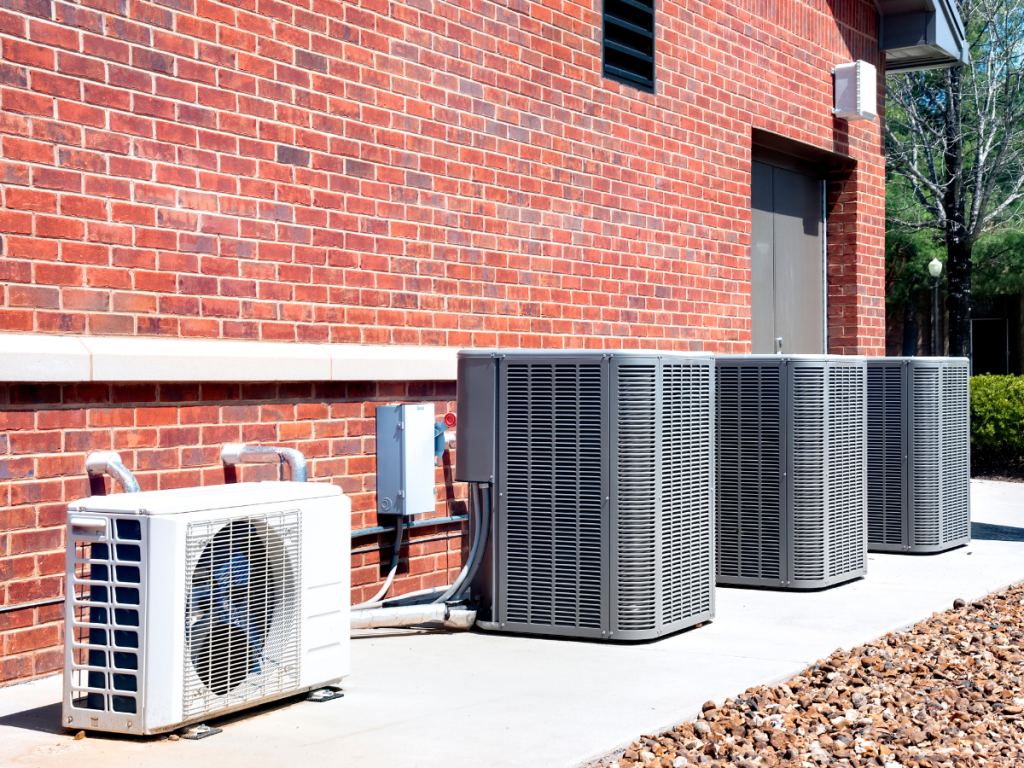
In 2025, furnace replacement remains one of the most significant investments for homeowners. Whether your existing furnace is making noise or showing signs of wear, or you’re considering upgrading to a more energy-efficient model, understanding the average cost of a new furnace is crucial for making an informed decision. In this article, we’ll break down everything you need to know about furnace replacement costs, including the factors that affect the cost, the different types of furnaces, and why professional installation matters. What Affects the Average Cost of a New Furnace? Furnace installation costs are influenced by several key factors. Each element impacts the final price, from the type of furnace to your home’s specific needs. If your current system is still functional, it may be worth considering heating repair to extend its lifespan. However, when it’s time to replace your furnace, understanding the various factors that influence the cost will help you make a well-informed decision. Here are the main factors that affect the cost of a new furnace: 1. Type of Furnace: Gas, Electric, Oil, or Propane? The type of furnace you choose is one of the most significant factors affecting its cost. Gas furnaces are the most common and typically offer a good balance between efficiency and cost. Electric furnaces may have a lower initial cost but could result in higher operating expenses. Oil and propane furnaces may be required in areas without access to natural gas lines, and their fees can vary. 2. Furnace Size The size of your furnace impacts both the upfront cost and long-term efficiency. A larger unit will cost more initially due to the materials and installation labor required. However, a furnace that’s the correct size for your home can save you money over time by heating more efficiently. To ensure you select the right size, an HVAC professional will perform a Manual J load calculation, which takes several factors into account, like your home’s square footage, insulation, and window placement. 3. Efficiency Ratings and Features Furnaces come in different efficiency ratings, commonly known as AFUE (Annual Fuel Utilization Efficiency). A higher AFUE means the furnace uses energy more efficiently, potentially reducing your utility bills over time. High-efficiency models will cost more upfront but can save you money in the long run. Additional costs for advanced features such as smart thermostats or variable-speed blowers may be worth considering based on your long-term goals. 4. Installation Complexity and Labor Costs Beyond the furnace itself, installation is a significant portion of the total cost. Installation complexity varies based on the existing ductwork in your home, any necessary system upgrades, and local labor rates. For example, if the installation requires significant modifications, such as adding vents or upgrading electrical components, the cost will naturally rise. How Much Does a New Furnace Cost in 2025? The average cost to replace heating and air conditioning systems that homeowners expect to pay for a new furnace replacement in 2025 is anywhere from $2,500 to $7,500, depending on the factors mentioned earlier. Here’s a breakdown of what you can expect: 1. Gas Furnaces Gas furnaces remain the most popular choice due to their reliability and cost-efficiency. The average cost of a new gas furnace typically ranges from $3,000 to $6,000, including installation. These systems are known for their efficiency and are suitable for most homes. 2. Electric Furnaces Electric furnace units tend to be less expensive to install, with an average cost ranging from $2,000 to $4,000. However, it’s worth noting that electricity can be more expensive than gas in some areas, leading to higher long-term operating costs. They are a good option for smaller homes or areas where gas is not readily available. 3. Oil Furnaces Oil furnaces are less common but still a viable option for homes without access to natural gas lines. These systems typically cost between $4,000 and $7,000. While oil prices can fluctuate, modern oil furnaces are efficient and provide consistent heating in rural or remote areas. 4. Propane Furnaces Propane furnaces are much like gas furnaces, but they use propane as a source of fuel. The average cost of a new propane furnace typically ranges from $3,000 to $5,000. Propane furnaces are ideal for areas without natural gas lines and are a reliable option for heating homes. Like gas and oil, propane prices can vary, affecting long-term operational costs. 5. High-Efficiency Furnaces High-efficiency furnaces, with an AFUE rating of 90% or higher, are ideal for homeowners looking to save on energy bills in the long run. While the initial price may range from $5,000 to $10,000, these furnaces pay off in energy savings over time. How to Choose the Right Furnace for Your Home Choosing the right furnace goes beyond just considering the price. You also need to think about the size of your home, your heating needs, and your long-term energy savings. Here’s what you should keep in mind: 1. Climate Considerations In Arizona, where summers can be scorching and winters chilly, selecting a furnace with the appropriate capacity and efficiency rating is essential. If you live in a region with colder winters, investing in a high-efficiency or two-stage furnace could save you money over time. 2. Furnace Size and Capacity The furnace you choose should be appropriately sized for your home. A furnace that’s too small will not heat your home effectively, while a unit that’s too large may waste energy. A professional HVAC technician in Scottsdale and surrounding areas can select the right furnace size for your space. 3. Energy Efficiency With rising energy costs, many homeowners are looking for ways to reduce their monthly bills. High-efficiency furnaces, while more expensive upfront, can significantly reduce your energy consumption and lower your long-term heating costs. Why You Should Hire a Professional to Install Your Furnace While replacing a furnace may seem like a DIY project, installing a furnace is highly technical and should only be done by professionals. Here’s why: Investing in professional installation ensures that your furnace works properly from
Are New AC Units More Efficient in Saving Energy?
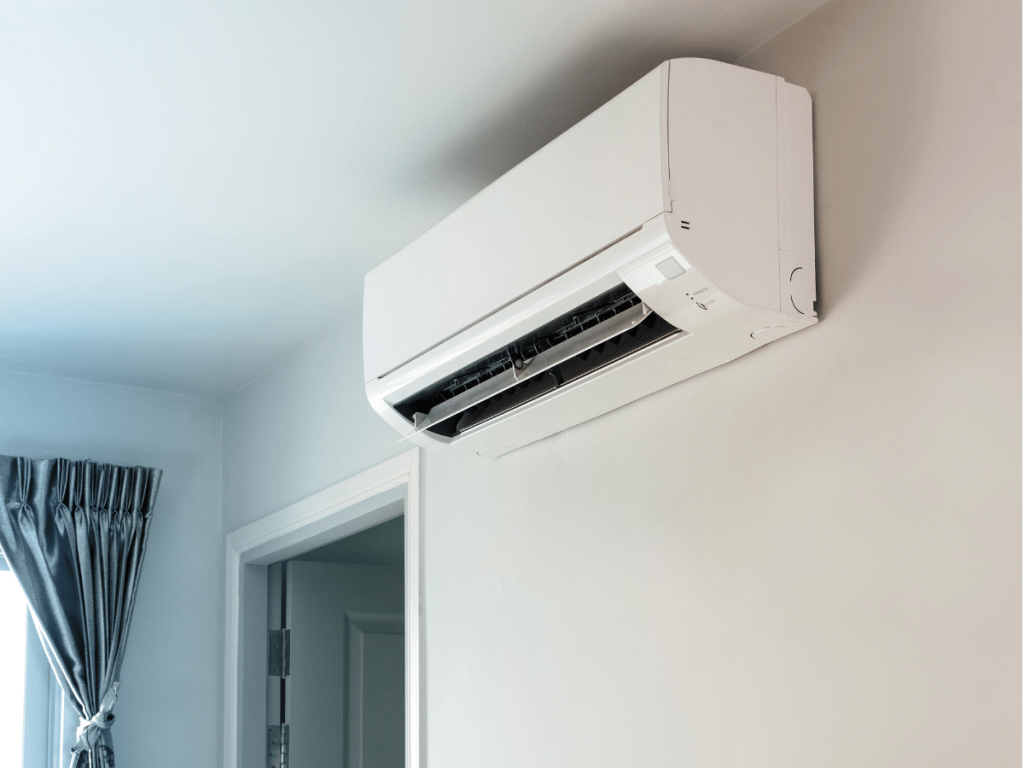
If you’re dealing with rising energy costs or an aging air conditioner that doesn’t cool like it used to, you might be wondering—are new AC units actually more efficient than older ones? And more importantly, how much can you really save by upgrading? We get it. Replacing your AC is a big investment, and you want to ensure it’s worth it. In this post, we’ll explain everything you need to know about new vs. old AC efficiency and why thousands of Phoenix homeowners are choosing to upgrade with American Home Water & Air. What Does “Efficiency” Actually Mean in an Air Conditioner? When we talk about AC efficiency, we’re referring to how much cooling you get per unit of energy used. The less energy your system needs to keep your home comfortable, the more efficient it is. This can significantly reduce energy consumption over time. In technical terms, this is measured using the SEER rating, or Seasonal Energy Efficiency Ratio. The higher the SEER rating, the more efficient the unit. Older units may have SEER ratings as low as 8 or 10, while newer systems can reach SEER ratings of 15 to 26+. Fun Fact: As of 2023, the minimum SEER rating required in Arizona for new systems is 15 SEER. Old vs. New AC Units: Key Efficiency Differences Let’s look at some of the most important ways new air conditioners outperform older models: 1. Smarter Components Modern AC systems often include variable-speed compressors, which adjust output based on your home’s cooling needs. Older systems typically have only one or two settings—on or off—leading to more energy waste. 2. Eco-Friendly Refrigerants Older ACs use R-22 (Freon), which is now phased out due to its environmental impact. Newer systems use R-410A or even more advanced, eco-friendly refrigerants that cool more efficiently and are safer for the environment. 3. Better Design & Insulation Today’s AC units are built with tighter seals and improved airflow design. This reduces the amount of cool air lost through leaks and makes the system run more efficiently overall. 4. More Efficient System Types Some homeowners also switch to ductless mini split systems for more targeted, room-by-room cooling. These systems are incredibly efficient, especially in homes without existing ductwork. How Much Can a New AC Unit Save You? The short answer? A lot. According to the U.S. Department of Energy, homeowners can save between 20% and 40% on cooling costs by replacing an old air conditioner (AC) unit with a high-efficiency model. Here’s an example: System Type Estimated Annual Cooling Cost 10 SEER (Old Unit) $1,200+ 16 SEER (New Unit) $900 20+ SEER (Top-Tier) $700 or less These savings add up year after year—especially in hot Phoenix summers when your AC is running non-stop. If you’re unsure what unit would best suit your home, exploring the different types of air conditioners available today can help you make a smarter, long-term investment. Energy-Saving Features in Newer AC Systems Today’s air conditioners are designed with energy efficiency in mind. Here are a few standout features: More Than Just Energy Savings: Why Homeowners Are Upgrading Replacing an older Air Conditioner unit involves more than lower energy bills. Here’s what else you gain: Lower Repair Costs Older units tend to break down more often. A new system is covered by warranty and is less likely to need expensive repairs. This means fewer surprise service calls and more peace of mind during extreme weather. Improved Home Comfort New systems cool faster, distribute air more evenly, and reduce hot spots in your home. Advanced features, such as variable-speed motors and smart thermostats, also help maintain a consistent and comfortable indoor climate. Higher Home Value Buyers pay attention to HVAC systems. Upgrading to an efficient air conditioner can increase your home’s resale value and make it more attractive to future buyers. A modern, energy-efficient system is a strong selling point in a competitive market. Environmentally Friendly Reduced energy use and refrigerants with a lower global warming potential mean a smaller carbon footprint for your home. Choosing an eco-friendly unit also aligns with today’s green living trends and sustainability goals. When Is It Time to Replace Your Old AC? If you’re unsure whether your current unit is still worth keeping, here are some signs it might be time for a replacement: Even if your unit is still technically running, a newer system can offer better performance, lower monthly costs, and greater peace of mind. And if you’re wondering how much it might cost, take a look at the average cost to replace heating and air conditioning so you can budget confidently. Final Thoughts: Is a New AC Unit More Efficient? Modern units are designed to save energy, improve comfort, and lower your monthly utility bills when it comes to new vs. old AC efficiency. If you’re tired of sweating through repairs and high bills, it might be time to make the switch. At American Home Water & Air, we’ve helped thousands of Phoenix homeowners upgrade to energy-efficient air conditioning systems—and we’d love to help you, too. Ready to get started? Contact AHWA today to schedule your consultation and receive a personalized estimate for your new furnace installation. Our HVAC Company in Scottsdale, Phoenix & Gilbert is here to help you find the most cost-effective solution for your comfort and budget.
How to Fix a Leak Under the Bathroom Sink: Tips for a Quick Repair
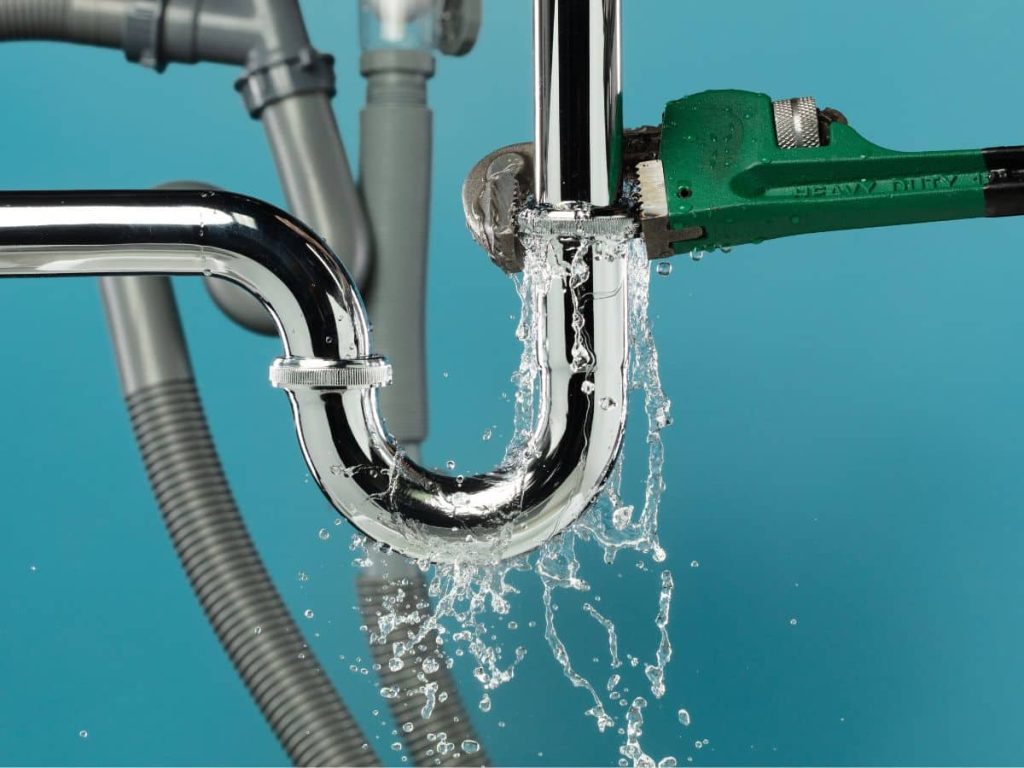
If you’re wondering how to fix a leak under the bathroom sink, you’re not alone. Leaking under the bathroom sink can be frustrating, especially when you notice a pool of water on the floor or a constant drip. These kinds of plumbing issues are common in many homes, and while it might seem daunting at first, you don’t always need to call a plumber immediately. With patience and the right tools, you can often handle the fix yourself before any severe water damage occurs. In this guide, we’ll explain how to identify the source of the leak and provide easy-to-follow steps to repair it. By the end of this post, you’ll know how to handle a leak under your sink and when it’s time to call a professional. Identifying the Source of the Leak The first step in fixing any leak is finding exactly where it originated. A leaky faucet, drain pipe, or P-trap under the sink can all be culprits. Before grabbing any tools, look at the under-sink plumbing and see if you can spot the leak’s origin. It’s essential to scrutinize these areas, as the leak’s source may soon be apparent. Grab some paper towels to dry the area, then check for new leaks after running water. Once you’ve identified the source, you’re ready to learn how to fix the leak under the bathroom sink effectively. Common Causes of Leaks Under Bathroom Sinks Loose or Worn-Out Connections Compression fittings and supply line connections can become loose due to normal wear and tear as the plumbing system ages. These loose connections are often the cause of leaking pipes. If they’re loose, you’ll want to check and tighten all these connections. A simple twist with a pair of pliers can solve the issue. Faulty P-Trap or Drain Pipe The P-trap or drain pipe can also be the source of leaks. Due to frequent exposure to water, the P-trap can crack over time or develop corrosion. In some cases, improper installation or movement can cause the drain pipe to become misaligned, leading to leaks. In this case, you may need to remove and inspect the P-trap to check for a cracked slip nut or damaged PVC. If needed, replace the part or reseal it with a plumber’s putty for a watertight seal. Worn O-Rings or Rubber Gaskets If the O-rings or rubber gaskets in the faucet or compression fittings are worn out, they won’t form a proper seal, leading to drips or leaks. Replacing these small parts is straightforward and can make a big difference in preventing leaks. Step-by-Step Guide to Fixing a Leak 1. Turn Off the Supply Before making any repairs, turning off the sink’s water supply is crucial. Find the shut-off valves under the sink and turn them clockwise. This will prevent any more water from leaking while you work. 2. Disassemble the Components Using a pipe wrench, carefully disassemble the necessary parts of the faucet, P-trap, or drain pipe. Be sure to have a towel or small bucket handy to catch water in the pipes. Inspect each part for signs of wear, cracks, or damage that could be causing the leak. If you’re working on the stopper mechanism, ensure it functions correctly and forms a proper seal. 3. Tighten or Replace the Leaky Part If the issue is a loose pipe or fitting, tighten it securely. If you’ve identified a worn washer, cracked P-trap, or faulty O-ring, replace the part with a new one. Apply the plumber’s tape or sealant if necessary to ensure a tight connection. 4. Test for Leaks After reassembling everything, turn the water back on and run the sink. Check the repaired area for any signs of a continued leak. If everything looks dry, your repair was successful! When to Call a Professional Plumbing Service While many DIY plumbing fixes are manageable for homeowners, there are some cases where you’ll want to call in a professional. If you notice severe water damage or persistent leaks or find that the problem isn’t quickly resolved, it’s time to seek help from a licensed plumber. Issues like clogged pipes, corrosion, or more significant plumbing repair problems can sometimes be too complex to handle alone. It’s always better to be safe than sorry when preventing further damage to your home. Tips to Prevent Future Leaks Regular plumbing maintenance is vital to avoiding future leaks. Here are a few tips: By making use of these proactive steps, you can minimize the chances of leaks and keep your bathroom sink in excellent working order. Trust American Home Water & Air for Expert Help Knowing how to fix a leak under a bathroom sink is essential for homeowners, as this common plumbing issue can often be resolved with a few simple steps. By addressing the source of the leak, tightening loose pipes, or replacing worn-out parts, you’ll stop the leak before it leads to water damage. Remember, if the job seems too big or you’re unsure about any step, don’t hesitate to contact a professional plumbing service for help. Don’t let a small leak become a big problem—contact American Home Water & Air today for expert plumbing services and peace of mind. Whether you’re facing a persistent leak or want reassurance that your plumbing system is in top shape, our team is here to help!
How to Reset a Furnace Blower Motor: A Step-by-Step Guide
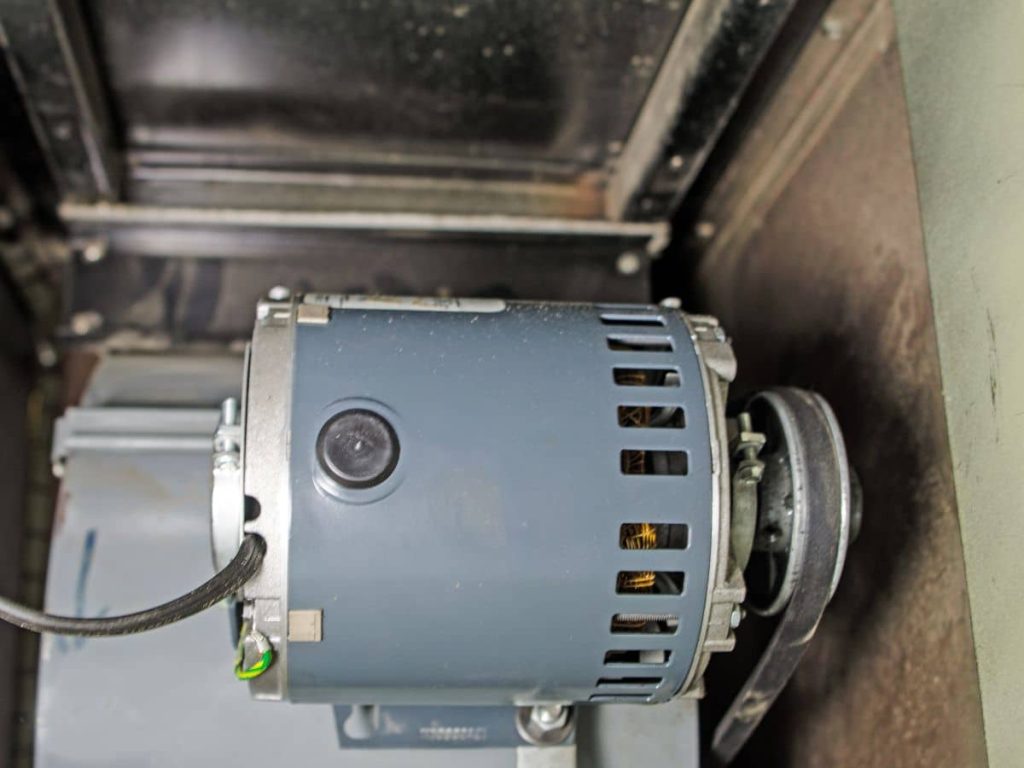
If your furnace isn’t working as it should, the blower motor may be the culprit. The blower motor is essential in distributing warm air throughout your home, so you’ll notice the effects quickly when it malfunctions. In this guide, we’ll walk you through resetting the furnace blower motor in just a few easy steps. Whether your blower motor isn’t turning on, the furnace fan isn’t blowing hot air, or strange noises are coming from the unit, this post will help homeowners troubleshoot and reset the motor to get their furnace back on track. Common Issues Before You Reset Furnace Blower Motor Before starting the reset process, it’s helpful to understand some of the common reasons that can affect your furnace blower motor. This knowledge will allow you to diagnose better what’s going wrong and when a simple reset could fix the problem. Some of the most common signs that your blower motor is malfunctioning include: Various factors, such as blower motor overheating, a tripped circuit breaker, or normal wear and tear, can cause these issues. Sometimes, a simple reset can fix the problem, but it is essential to take the necessary safety precautions before proceeding. Issues like a dirty air filter or malfunctioning gas valve can also contribute to blower motor problems. Preparing to Reset the Furnace Blower Motor Learning how to reset your furnace blower motor is relatively simple, but there are a few steps to follow: Step 1: Turn Off the Power Safety first! Before you attempt any repairs or resets, turn off the power to your furnace. You can do this by switching off the power at the furnace or the breaker box. This will prevent any accidental electrical shocks or damage to the unit. Step 2: Inspect the Blower Motor While the power is off, inspect the blower motor. Look for obvious issues like dust buildup, blockages, or damaged components. If the blower motor is covered in dust or debris, clean it gently to prevent future malfunctions. Also, ensure that the blower fan can spin freely and is not obstructed by any objects. How to Reset Furnace Blower Motor Once you’ve taken these preparatory steps, you’re ready to reset the blower motor. Follow this simple step-by-step guide to restore your furnace blower’s functionality. Step 1: Locate the Furnace Blower Motor Reset Button The first step in the furnace blower reset process is locating the reset button. Most furnaces have a reset button near the blower compartment itself, though the exact location may vary depending on the make and model. It’s usually red or yellow and small in size. Consult your furnace manual for guidance if you’re unsure where it is. Step 2: Press and Hold the Reset Button Once you’ve found the reset button, hold it for about 30 seconds. This allows the furnace to attempt to reset and resume normal operations. After releasing the button, listen to the blower motor restart or check for airflow from the vents to see if the reset worked. If your furnace blower motor starts functioning normally, the reset was successful! Step 3: Check the Circuit Breaker If the blower motor still isn’t working, the issue could be related to your circuit breaker or control board. Furnace motor issues can sometimes trip the breaker, cutting off power to the unit. Inspect your breaker box and reset the breaker if necessary. Then, try the reset process again to see if this resolves the problem. What to Do If Resetting the Furnace Blower Motor Doesn’t Work If you’ve followed the blower motor reset instructions but your furnace still isn’t functioning correctly, you can take some additional steps before calling a furnace repair professional. Step 1: Additional Troubleshooting Tips Step 2: When to Call an HVAC Professional If the reset doesn’t work and the blower motor remains unresponsive, it may be time to seek professional help. A licensed HVAC technician can diagnose more complex issues, such as furnace blower motor diagnosis or electrical problems that require advanced tools and expertise. Attempting to repair major furnace issues yourself can be risky, so don’t hesitate to contact an expert when needed. Professional assistance ensures the job is done right, whether it’s heating installation, heat pump repair, or complex furnace problems. Preventing Future Blower Motor Issues Once your furnace blower motor is back up and running, keeping it in good condition is essential to avoid future problems. Here are a few tips for maintaining your furnace and blower motor: Step 1: Regular Furnace Maintenance Step 2: Schedule Professional HVAC Maintenance Even if you keep up with essential maintenance, scheduling annual HVAC inspections with a professional is a good idea. A professional technician can spot signs of wear and tear and provide solutions before they become more significant problems. Regular heating repair can extend the life of your furnace and ensure it operates efficiently year-round. Get Your Furnace Running Smoothly with American Home Water & Air Knowing how to reset your furnace blower motor is a simple way to fix common furnace issues like poor airflow or a non-responsive blower. By following the step-by-step guide above, you’ll be able to troubleshoot and resolve minor problems. Don’t hesitate to contact a professional if the motor still doesn’t work after a reset. If you’re unsure about resetting your furnace blower motor or the issue persists, contact American Home Water & Air today for expert HVAC assistance. In addition to HVAC services in Phoenix, AZ, we also offer top-notch plumbing solutions to keep your home’s systems running smoothly.Our team can diagnose and fix any furnace problems, ensuring your home stays warm and comfortable throughout the season.
Why Is My Central Air Working But Not Heat?
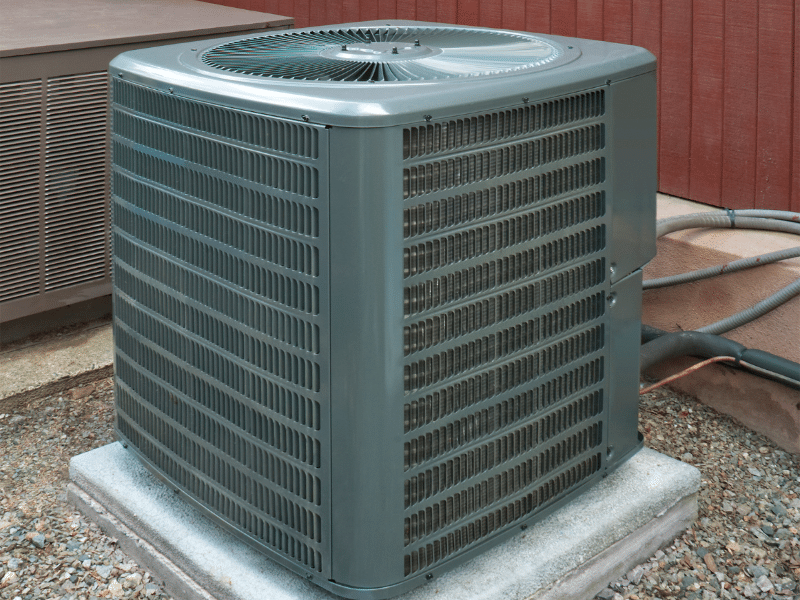
Has your central air system left you shivering in the cold, even though it works perfectly when the weather gets too hot? It’s a common issue that many homeowners face, and it can be quite puzzling. In this blog post, we’ll explore some of the most common reasons your HVAC system might be blowing cold air instead of warming your home. Remember, it’s always best to contact a professional when dealing with HVAC problems in your home for safe and efficient solutions. Stick around to learn more and stay cozy. How central air and heating work We all love stepping into a comfortably warm home on a chilly winter’s day or a refreshingly cool house in the sweltering summer heat, don’t we? The magic behind this comfort is the often-overlooked central air and heating system. Think about your home as a large refrigerator. Sounds strange, right? But it’s a pretty good comparison. When your central air and heating system is in cooling mode, it absorbs the heat from inside your home, just like a refrigerator keeps your food cool by removing the heat from within. It then releases this absorbed heat outside, effectively cooling down your home’s interior. Here’s a real-world example to illustrate this. Imagine you’re sipping on a hot cup of coffee, but it’s too hot, and you want to cool it down. You blow on it, right? As you blow, your breath absorbs some of the heat from the coffee and carries it away, cooling your coffee. Just like you, the central air and heating system breathes in the hot air from inside the house, absorbs the heat, and breathes it out outside your home. During colder months, the process is reversed by the heating system. It pulls in cold air from your home, heats it up, and circulates the warm air throughout your home, giving you a snug and toasty environment. It’s a bit like snuggling up in a warm blanket fresh out of the dryer. The air, much like the blanket, absorbs the heat and wraps your home in warmth. After understanding how central air and heating work, you might be tempted to troubleshoot your furnace and tamper with the system when something goes wrong. However, remember that dealing with these systems requires specific expertise. Just like you wouldn’t attempt to fix your own car’s engine without proper knowledge, don’t try to handle your HVAC system’s problems. Always contact a professional if issues arise to ensure your home’s comfort is restored safely and efficiently. 5 common reasons your central air works but not your heating Here are some common reasons for your central air working, but not your heating. The simplest explanation could be that your thermostat is set to ‘cool’ instead of ‘heat’. It might seem obvious, but it’s an easy mistake to make, especially if you have recently been cooling your home. If your thermostat isn’t set correctly, it can cause your HVAC system to blow cold air even in the winter. If your furnace filter is clogged, it can restrict airflow, causing the furnace to overheat and shut down the heating element. The blower stays on to cool down the furnace, leading to cold air circulating. Regularly changing your filter (recommended every 1-3 months) can prevent this issue. A faulty ignition system can prevent your furnace from producing heat. This could be due to issues with an intermittent pilot light or a hot surface igniter. If you’re not getting a flame when your heating system kicks on, it could be an indication of an ignition problem. If there’s a problem with the gas supply, your furnace can’t produce heat. You should check if the gas valve is turned on and if the gas supply to your home is working. Do not attempt to fix gas problems yourself; instead, contact a licensed HVAC professional. Damaged or leaky ductwork can allow the warm air to escape before it reaches its destination. Moreover, cold air from unheated areas of the house can enter the ductwork, resulting in cold air being blown out. Regular ductwork inspection and maintenance can help prevent this issue. Is your central air working but not heat? Contact American Home Water & Air A range of issues, from thermostat malfunctions to broken ductwork, can result in your HVAC system blowing cold air during winter. Regular upkeep, encompassing filter replacements, inspection of the ignition system, monitoring the gas supply, and maintenance of the ductwork, can help prevent these issues. Nevertheless, due to the complex nature of HVAC systems, professional assistance is highly recommended when problems arise. Stay warm and ensure your comfort by addressing these potential concerns with your heating system. If you live in the Phoenix, Arizona area, consider American Home Water & Air as a reliable provider for all your HVAC needs in Phoenix, and surrounding areas. We’ve been working for over 30 years to provide homeowners with timely and transparent service. If you’re experiencing issues with your system, contact us today!